

Building a Configurable Historian Client Trend Symbol for InTouch HMI
SUMMARY
AVEVA Historian Client makes some of its applications and functionality available as .NET controls that can be imported into your Galaxy or InTouch application to be used as a Client Control. Imported Client Controls can then be embedded into symbols for use in your InTouch application.
The AVEVA Historian Client Trend application can be embedded in an Industrial Graphic by using the Historian Client Trend Control (aaTrendControl). Through the use of custom properties and scripting, you can customize the appearance and behavior of this control, such as whether or not the Tag Picker or Time Selector panels are enabled, the default duration of the displayed trend, and which tags to automatically add to the trend when the symbol is shown.
This tech note will demonstrate how to build a Historian Client Trend symbol that can be customized by modifying the values of custom properties when it is used.
APPLIES TO
- AVEVA InTouch versions 10.0 and later
PROCEDURE
Import the Historian Client Trend Control object
Depending on the software version you are using, it may be necessary to import the Historian Client Trend .NET control into your Galaxy or InTouch application. If your Galaxy already includes the aaTrendControl object in your Graphic Toolbox, you can skip ahead to Create the Trend Symbol.
- In the IDE, select Galaxy > Import > Client Control. If you are using stand alone InTouch, select File > Import > Client Control.
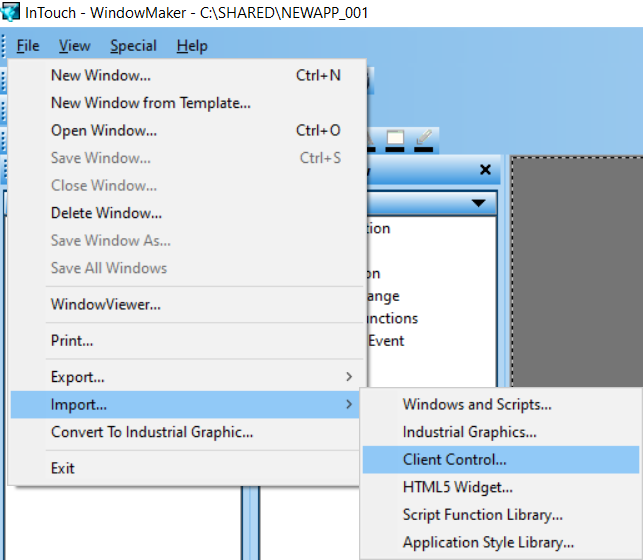
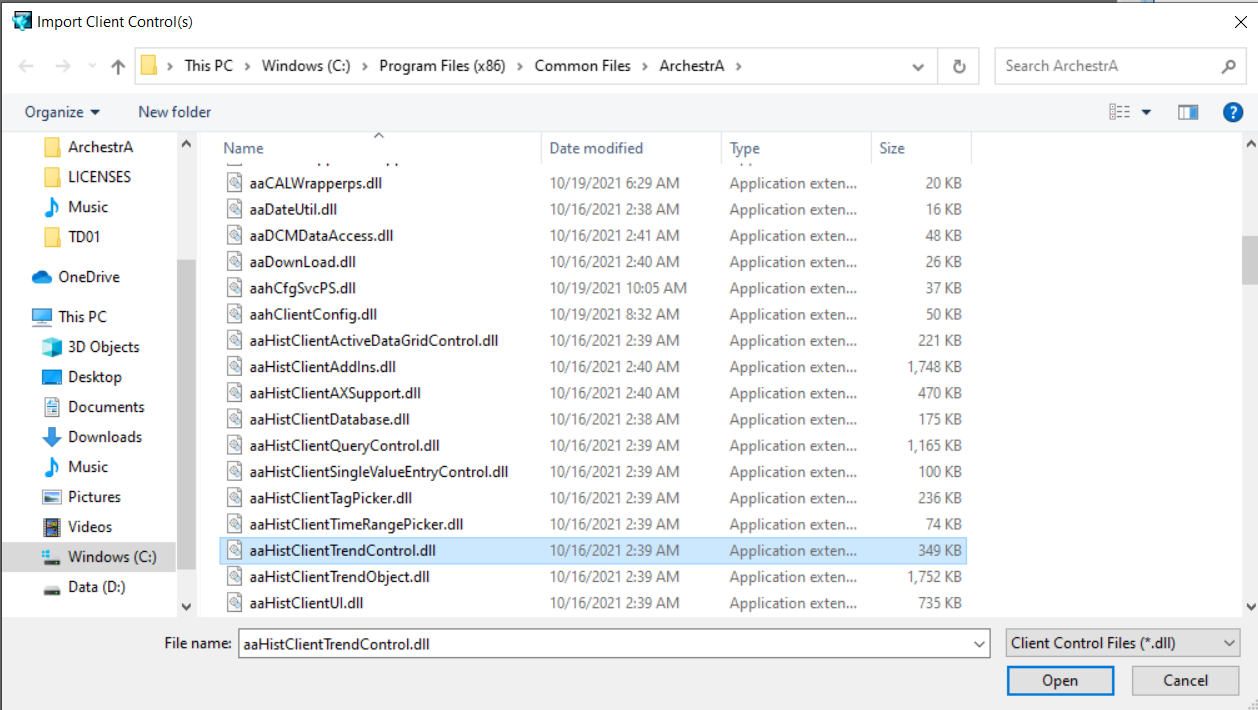
- In the browser window, navigate to C:\Program Files (x86)\Common Files\ArchestrA. Select the aaHistClientTrendControl.dll file and click Open.
- Once imported, the aaTrendControl object will appear in the Graphic Toolbox.

Create the Trend Symbol
- Create a new Industrial Graphic symbol and give it an appropriate name (we have used HistClientTrend). Open the symbol in the symbol editor.
- Select Edit > Embed Industrial Graphic In the browser window, locate and select the aaTrendControl object and click OK. Click on the canvas to embed the object in your symbol.
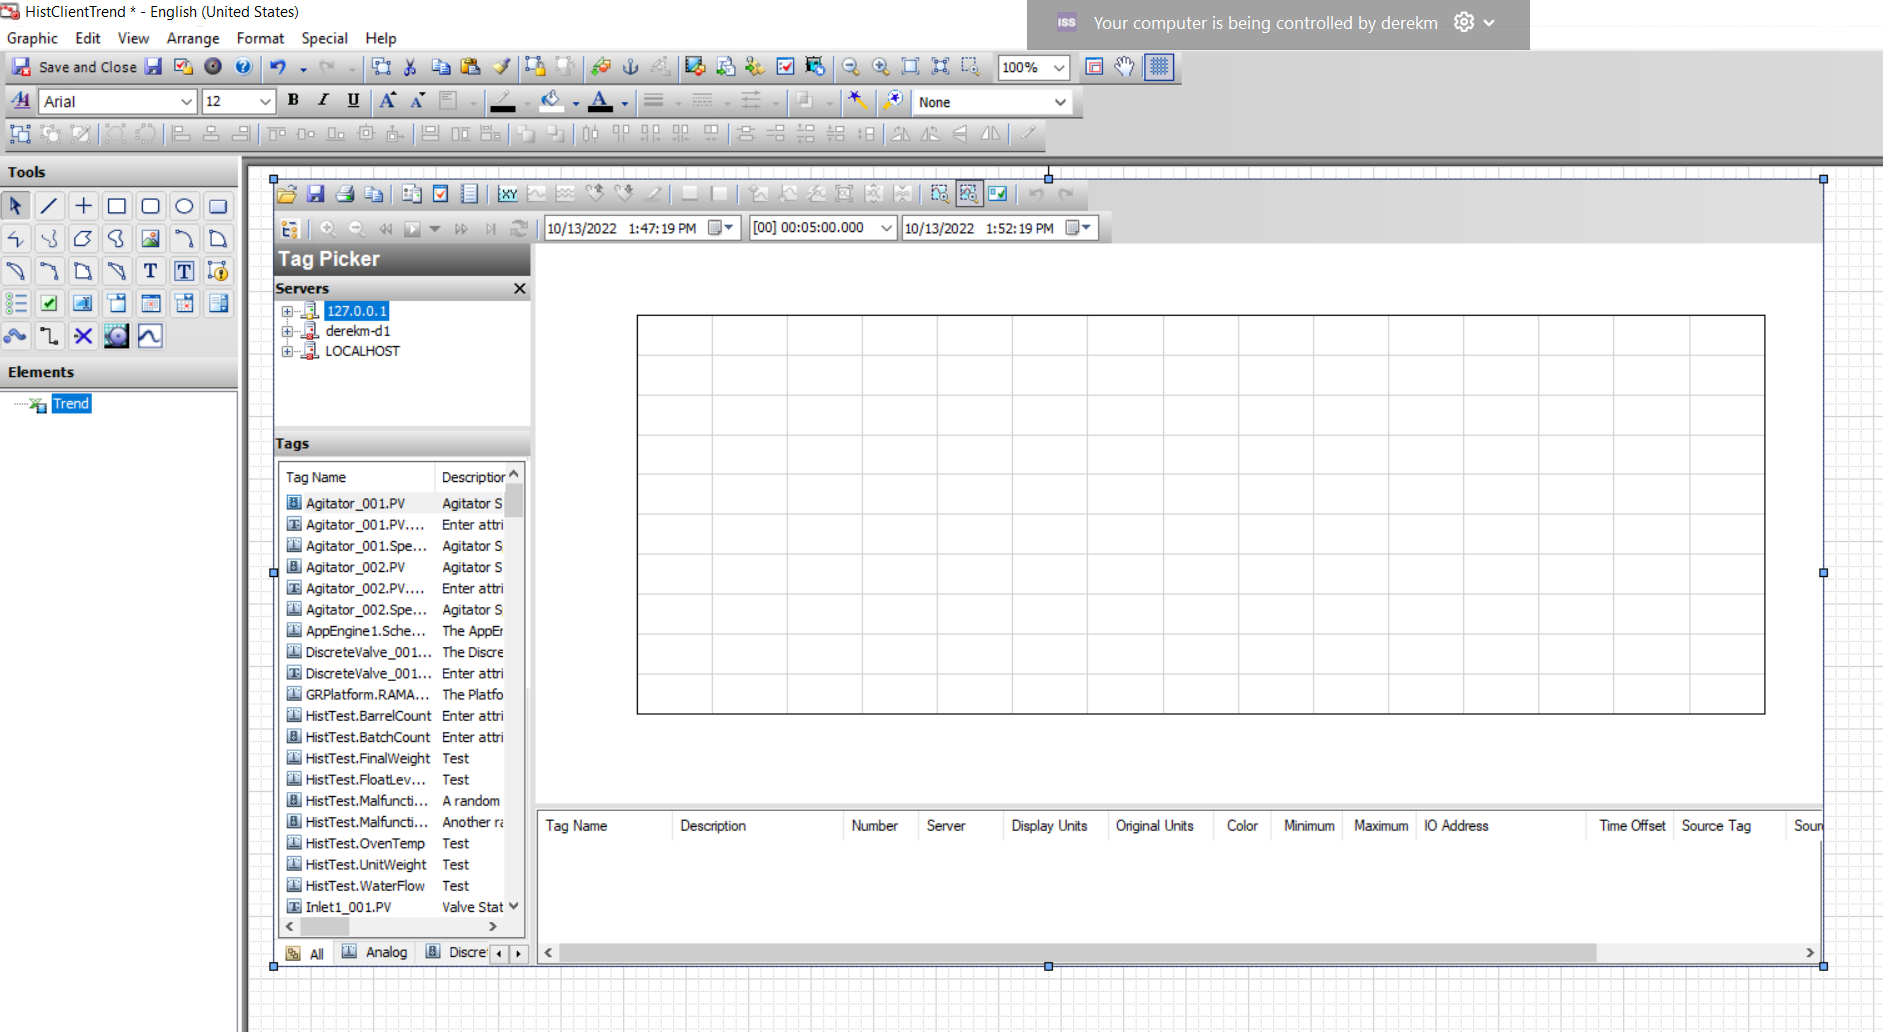
- Rename the embedded element to Trend. This is the name we will use to refer to this control in the scripting.
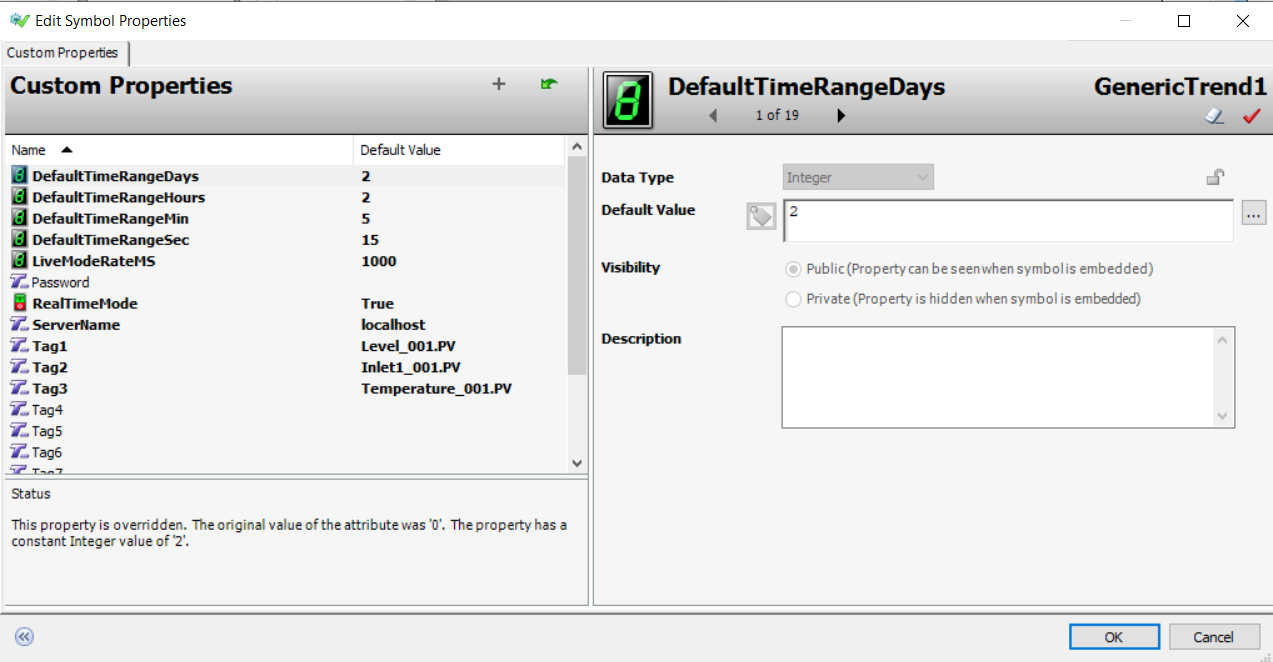
Create the Custom Properties
In this section, you will create a set of Custom Properties that you can use to configure the behavior and appearance of the trend control when you use it.
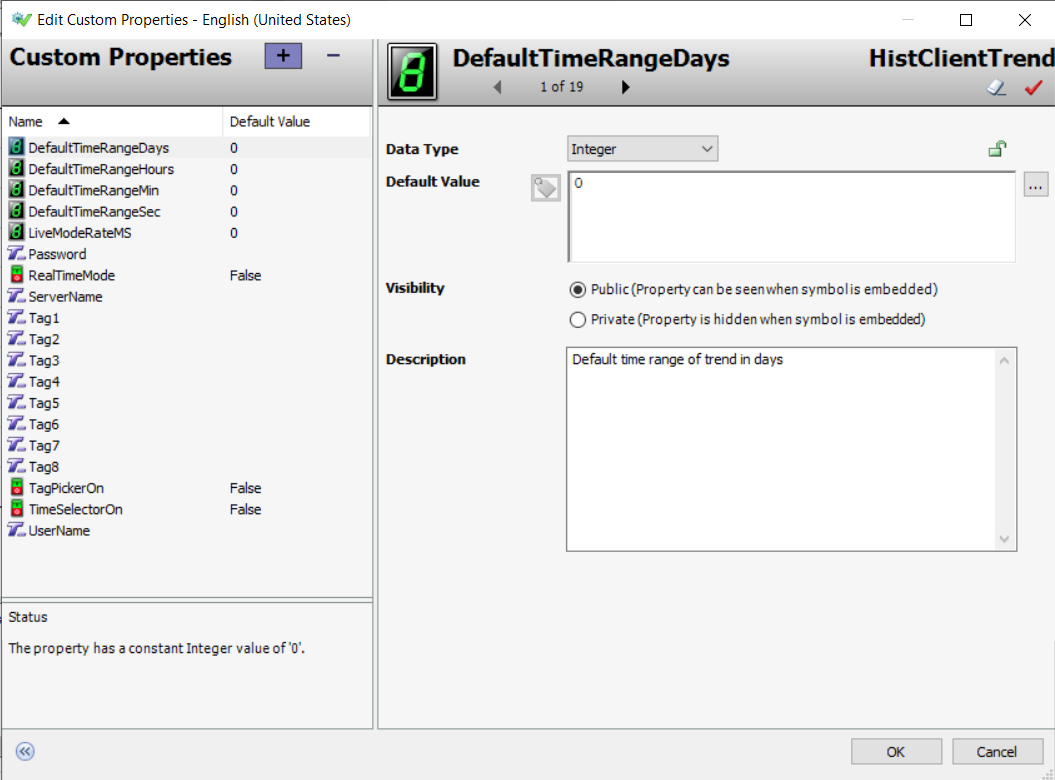
- Right-click the canvas and select Custom Properties. In the Custom Properties window, add the following properties:
| Name | Data Type | Default Value | Visibility | Description |
| DefaultTimeRangeDays | Integer | 0 | Public | Default time range of trend in Days |
| DefaultTimeRangeHours | Integer | 0 | Public | Default time range of trend in Hours (0-24) |
| DefaultTimeRangeMin | Integer | 0 | Public | Default time range of trend in Minutes (0-60) |
| DefaultTimeRangeSec | Integer | 0 | Public | Default time range of trend in Seconds (0-60) |
| LiveModeRateMS | Integer | 0 | Public | Update rate of Live mode in milliseconds |
| Password | String | Public | Password for Historian. Leave blank for Windows Authentication | |
| RealTimeMode | Boolean | False | Public | Enable Real TimeMode |
| ServerName | String | Public | Name of Historian Server node | |
| Tag1 | String | Public | Historian tag name for pen 1 | |
| Tag2 | String | Public | Historian tag name for pen 2 | |
| Tag3 | String | Public | Historian tag name for pen 3 | |
| Tag4 | String | Public | Historian tag name for pen 4 | |
| Tag5 | String | Public | Historian tag name for pen 5 | |
| Tag6 | String | Public | Historian tag name for pen 6 | |
| Tag7 | String | Public | Historian tag name for pen 7 | |
| Tag8 | String | Public | Historian tag name for pen 8 | |
| TagPickerOn | Boolean | False | Public | Enable Tag Picker panel |
| TimeSelectorOn | Boolean | False | Public | Enable Time Selector control |
| UserName | String | Public | User name for Historian. Leave blank for Windows Authentication |
- Click OK to close the Custom Properties window
Apply Bindings to .NET Properties
Next, you will bind certain properties of the Trend control to some of the Custom Properties you just created.
- Double-click the Trend element to open the Edit Animations window.
- Select Data Binding and enter the references for the properties listed below:
| Name | Reference |
| LiveModeRate | LiveModeRateMS |
| RealTimeMode | RealTimeMode |
| TagPicker.Visible | TagPickerOn |
| TimeSelector.Visible | TimeSelectorOn |
- Click OK go close the Edit Animations window.
Add Scripting to Automatically Add Tags to Trend
Finally, you will add an On Show script that will automatically connect the Trend control to your Historian Server and add up to 8 tags to the display.
- Right-click the canvas and select Scripts to open the Edit Scripts window.
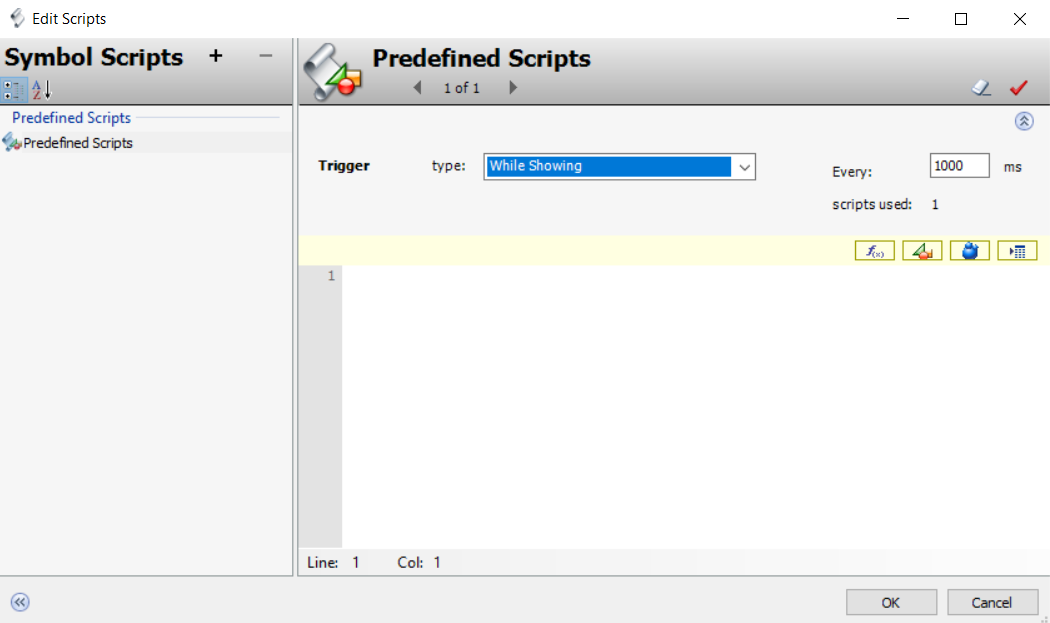
- Select Predefined Scripts. Set the Trigger Type to On Show and enter the following script:
' Connect to Historian Server
Trend.AddServerEx(ServerName,UserName,Password,1);

' Add tags to trend
Trend.AddAnyTag (ServerName, Tag1);
Trend.AddAnyTag (ServerName, Tag2);
Trend.AddAnyTag (ServerName, Tag3);
Trend.AddAnyTag (ServerName, Tag4);
Trend.AddAnyTag (ServerName, Tag5);
Trend.AddAnyTag (ServerName, Tag6);
Trend.AddAnyTag (ServerName, Tag7);
Trend.AddAnyTag (ServerName, Tag8);

' Adjust the default trend time
dim CalcTime as integer;
CalcTime = (DefaultTimeRangeSec*1000) + (DefaultTimeRangeMin*60*1000) + (DefaultTimeRangeHours*60*60*1000) + (DefaultTimeRangeDays*24*60*60*1000);

Trend.TimeSelector.DurationMS = CalcTime;
NOTE: The “Trend” reference in the script is the name of the embedded control (which we set to “Trend” in Step 6). If you gave the control element a different name, substitute “Trend” in the above script with the name of your control.
- Click OK to close the script editor.
- Save and Close the symbol.
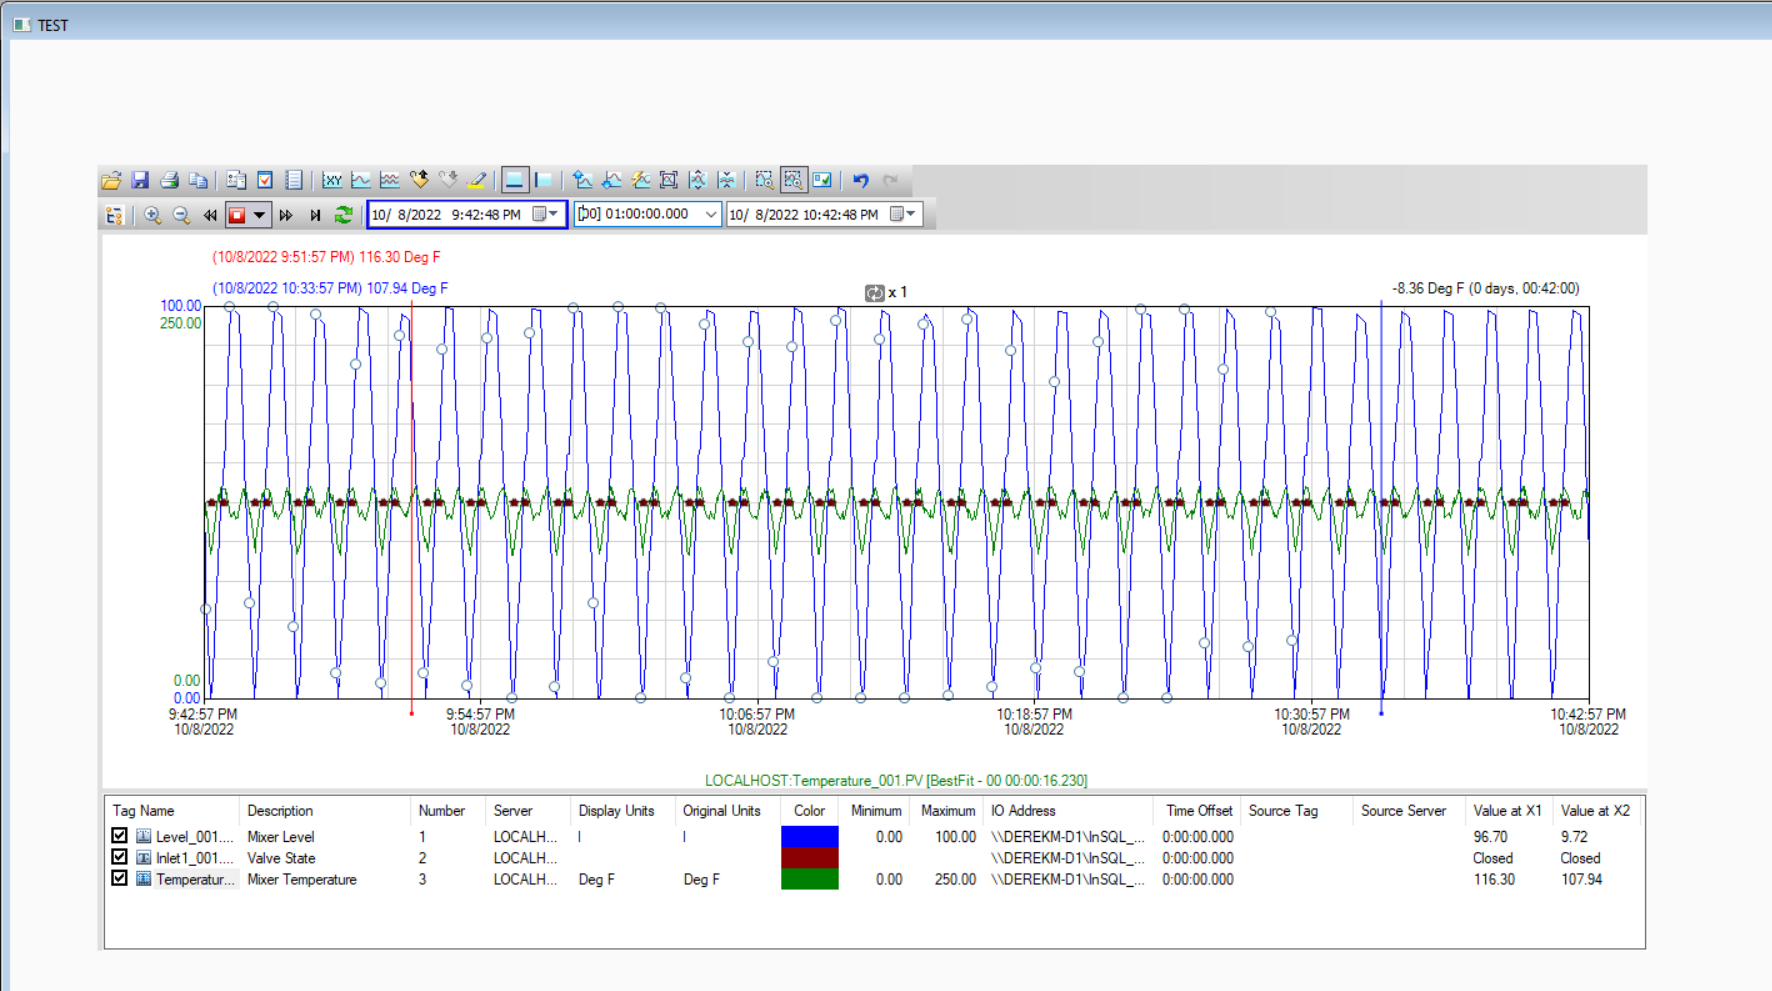
Use in Runtime
Now that your symbol has be built, you can embed it into an InTouch window or another Industrial Graphic and customize it using the custom properties. In our example, we will embed the graphic directly into an InTouch window.
- Open your InTouch application in WindowMaker.
- Create a new window and place your trend symbol (HistClientTrend in our example) into the window.
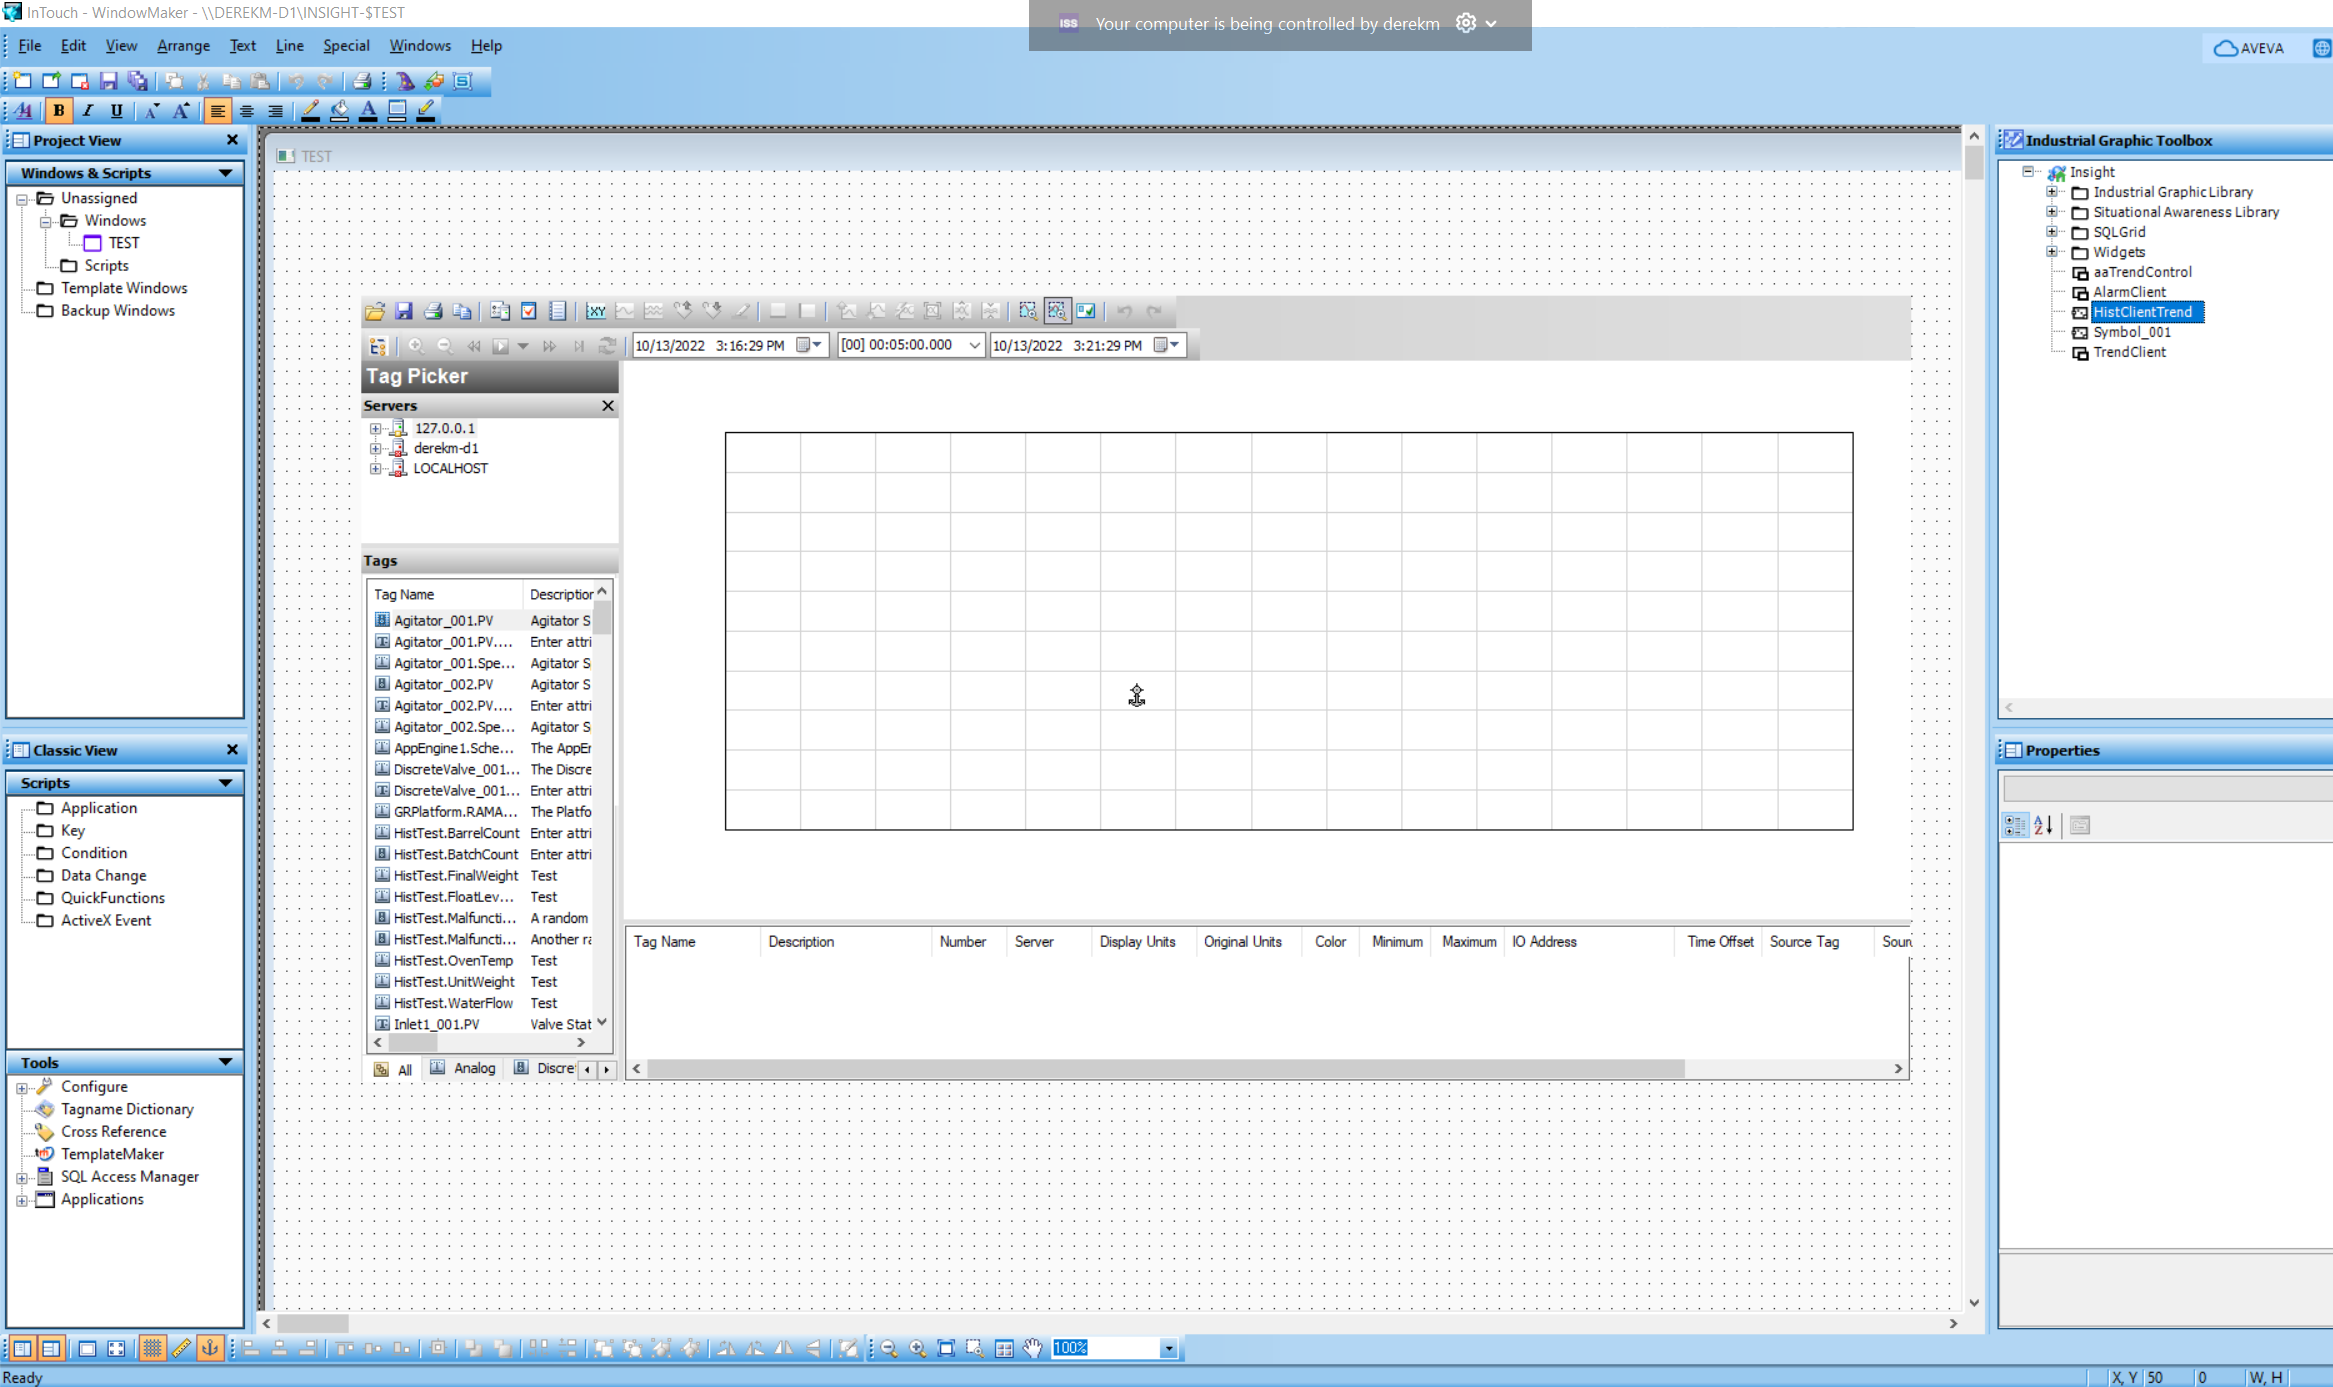
- Right-click the symbol and select Industrial Graphic <Symbol Name> -> Edit Symbol Properties to open the Custom Properties window.
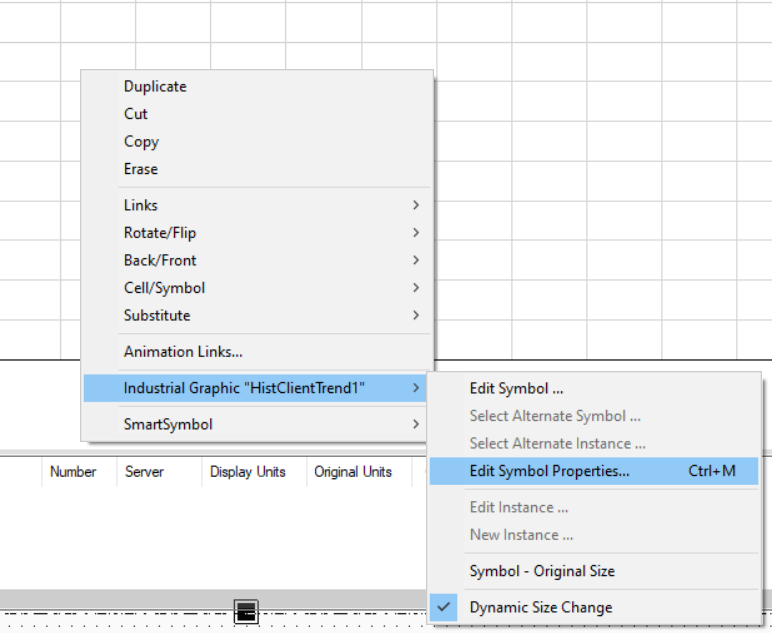
- Set the custom properties as desired.
NOTE: The AddAnyTag function used in the script checks to verify the tag exists before adding it, so and unneeded “Tag” properties can be left blank.
- Switch to runtime to test.
All Industrial Software Solutions Tech Notes are provided "as is" without warranty of any kind.