

Getting Started with the Wonderware Remote Response Objects
SUMMARY
The Wonderware Remote Response Object is an email and text message notification solution for Wonderware Application Server 3.0 or higher. The Remote Response Object is a set of fully functional ArchestrA Objects that integrate with a System Platform Environment, and can be customized by the user to deliver alarm notification via e-mail or text message to cell phones via SMS (Simple Messaging System). Remote users can view alarm information, acknowledge alarms, and enter comments all from a remote device.
APPLIES TO
- Wonderware Application Server 3.0 and higher
- Wonderware Remote Response Objects 1.0
PROCEDURE
Section 1 – Configuring the “Remote Communicator”
The Remote Response Object is installed by importing the “RemoteResponseObjects_X.X.aaPKG” file, where “X.X” will represent the version of the objects. They will appear as two templates by the names of “$RemoteCommunicator” and “$RemoteNotifier“, and they will be located under the “Remote Response” toolset (folder).
The purpose of these objects are as follows:
- RemoteCommunicator – is for the purpose of defining what e-mail account the Remote Response objects will use to notify users, and to also define which users will be contacted in the event of an abnormal condition (i.e. an alarm).
- RemoteNotifier – the purpose of this template is to define whether the user’s will be notified via e-mail, text message, or both. This object is also where you will define what values will trigger a notification. The RemoteNotifier object uses the connection information defined by the RemoteCommunicator object. A single RemoteCommunicator object can define connection information for multiple instances of the RemoteNotifier object.
This section will discuss configuring the “Remote Communicator”.
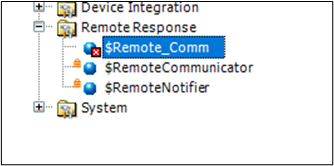
1. The first thing to do is right-click on the “$RemoteCommunicator” object, and select “New->Derived Template”.

2. The new template will already be in rename mode. Rename the object if you choose.
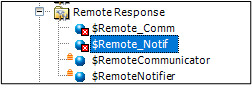
3. Then right-click on the “$RemoteNotifier” template, and select “New->Derived Template”.
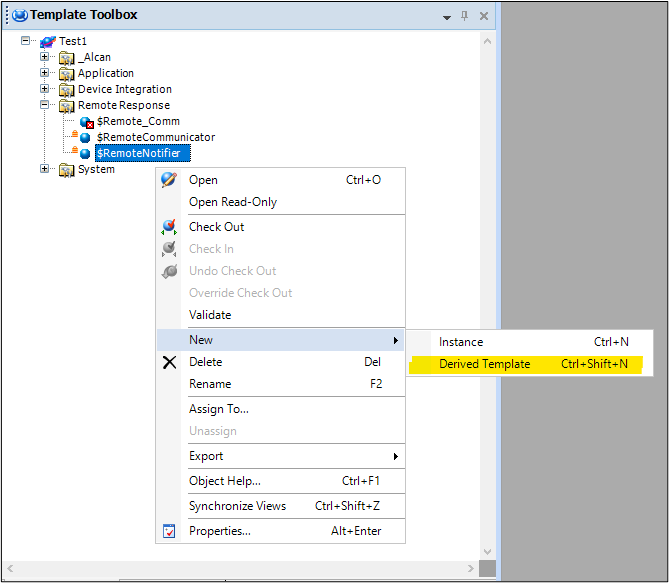
4. Once again the object will automatically go into rename mode. Rename the object if you choose.
5. Double-click on the communicator object to begin configuration. We’ll start by entering the e-mail address, valid credentials, server, and port information that the Remote Response objects will use to notify users. After entering the required information, you can select the “Test Connection” button in the “Outgoing Mail Settings” section to confirm your entries.
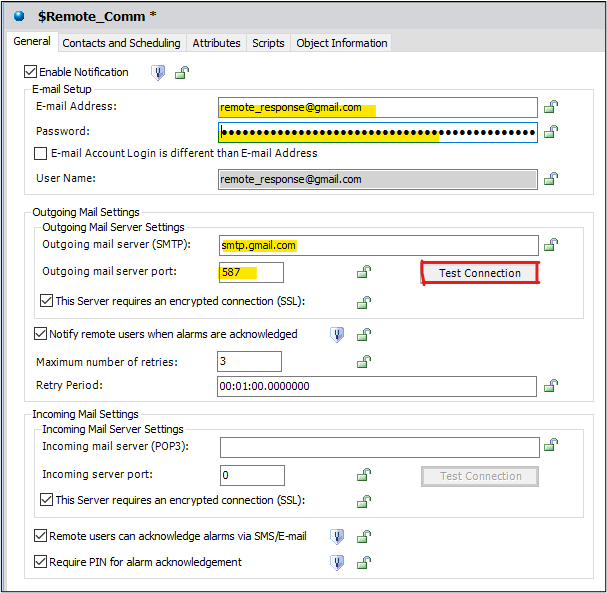
6. If the information had been entered correctly, then you should receive the following message.
7. You can also check the inbox of the account to verify a test message created by the system.

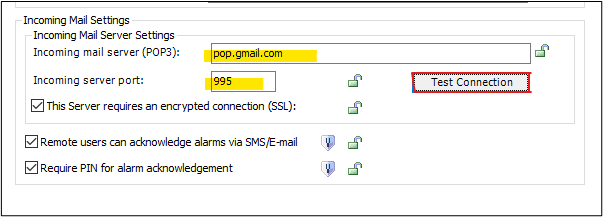
8. You can test the incoming mail configuration as well by selecting the “Test Connection” button in the “Incoming Mail Settings” section. If successful, you will receive a pop-up window similar to the Outgoing Mail “Test Connection”.
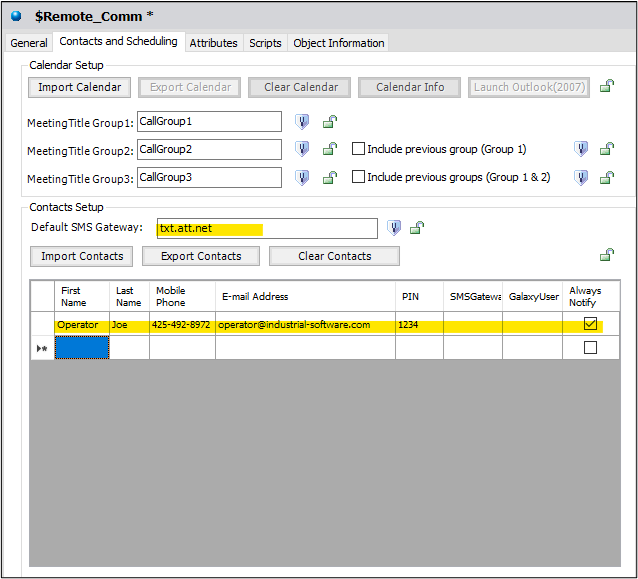
9. To continue select the “Contacts and Scheduling” tab. Here you will enter a default SMS gateway (or “domain”) for SMS messaging, which can be reconfigured on a per-user basis. Then you will add the user information for the personnel that the system will notify in the event of an issue.
Notes:
- In the example below, the SMS gateway information was configured to send an SMS message to a mobile device on the AT&T wireless network.
- If you left the “Require PIN for alarm acknowledgement” checkbox checked from step 5, then a valid PIN must be entered in the user configuration.
- If you do not import a calendar, then you will need to select the “Always Notify” checkbox in order for the user to be contacted.
- For the purpose of this document we will not be importing a calendar.
Section 2 – Configuring the “Remote Notifier”
This section will discuss configuring the “Remote Notifier.” The purpose of this template is to define whether the user’s will be notified via e-mail, text message, or both. This object is also where you will define what values will trigger a notification.
One of the main differences between the two Remote Response objects is that you may have only one Remote Communicator instance, but many Remote Notifier instances.
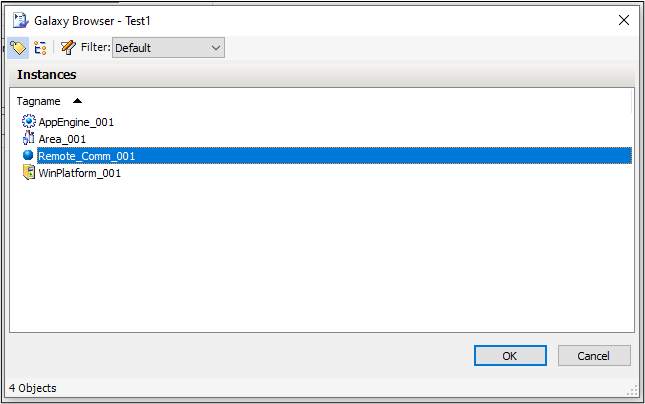
10. Double-click to open the notifier object. With the communicator object deployed you can select the “…” button to open the Galaxy Browser. Alternatively you can manually enter the communicator object instance. If you manually type it, then proceed directly to step 12.
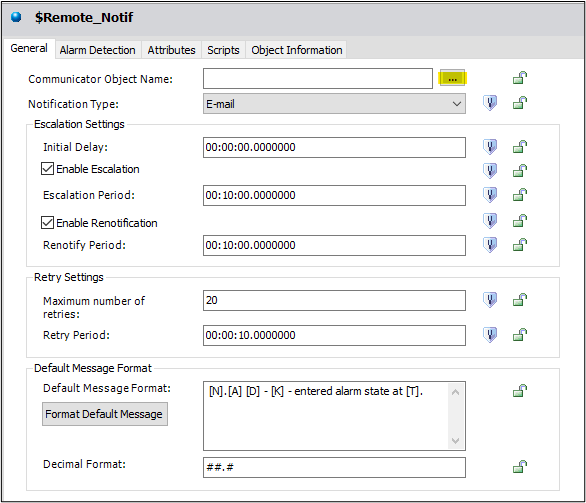
11. If you opened the Galaxy Browser from the previous step, then select the communicator object and select the “OK” button.
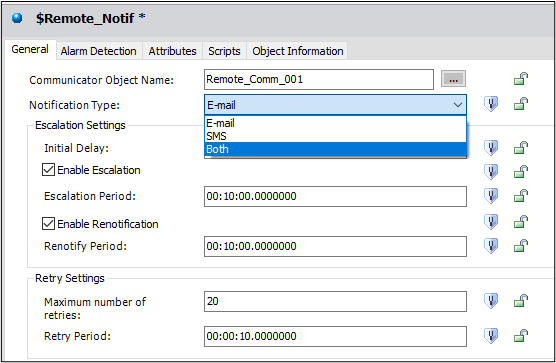
12. Next you can select the drop-down box for “Notification Type”. Here you can select E-mail notification, SMS notification, or both.
Note: For the purpose of this document the selection “Both” was applied.
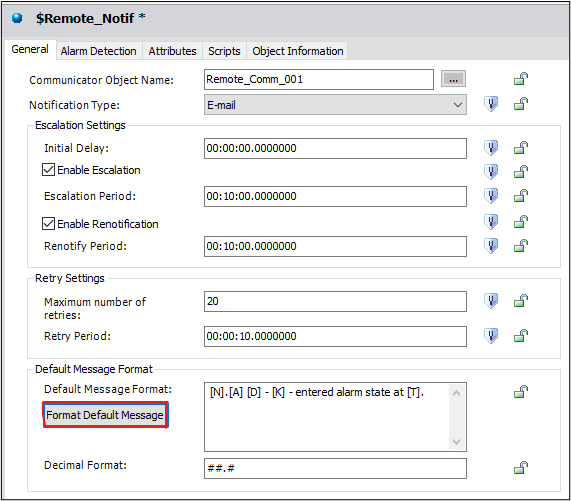
13. If you would like to modify the information contained within the notification, then you may select the “Format Default Message” button. If you choose to keep the default selection, then proceed directly to Section 3.
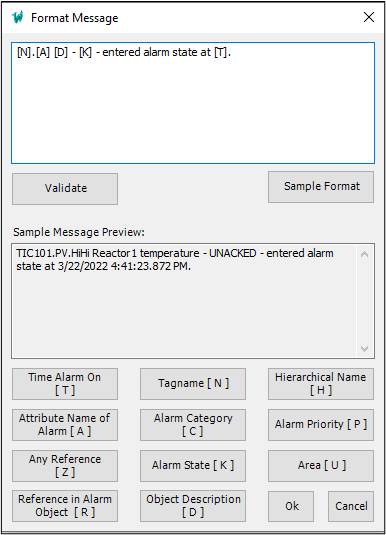
14. Below is an image of the default format for notifications, which includes a brief example. You can delete, add, and/or modify this as you please. When finished, click “OK”.
Section 3 – Configuring the Remote Notifier’s Detector
Part 1 – Configuring the Remote Notifier for Static Addressing
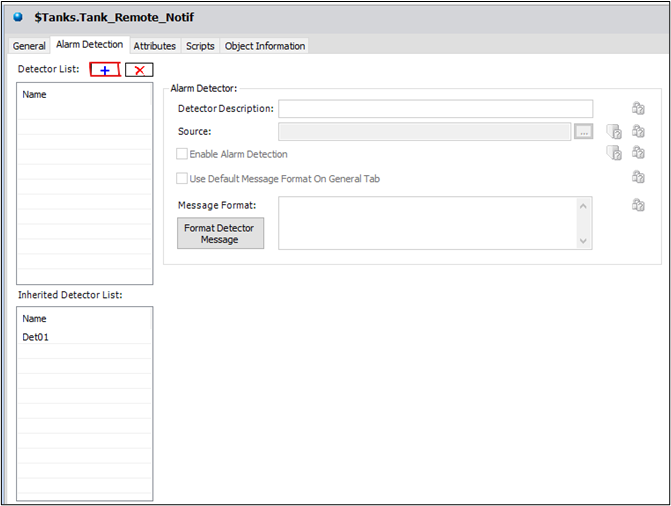
15. Continue by selecting the “Alarm Detection” tab. We will add our first detector by clicking on the “+” button.
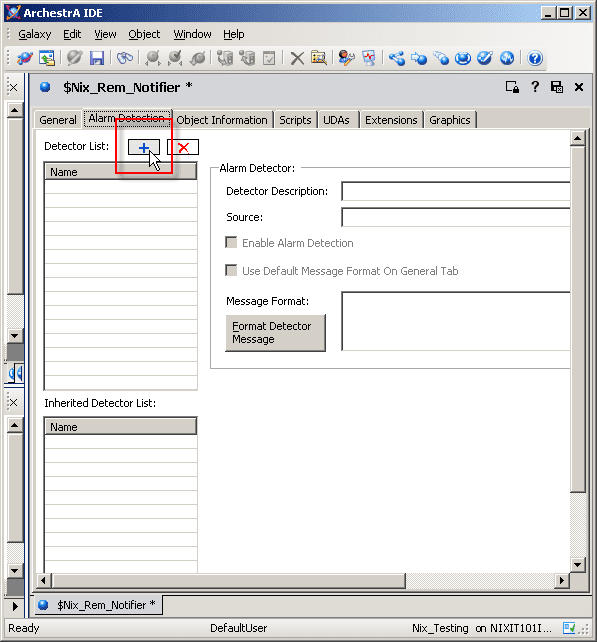
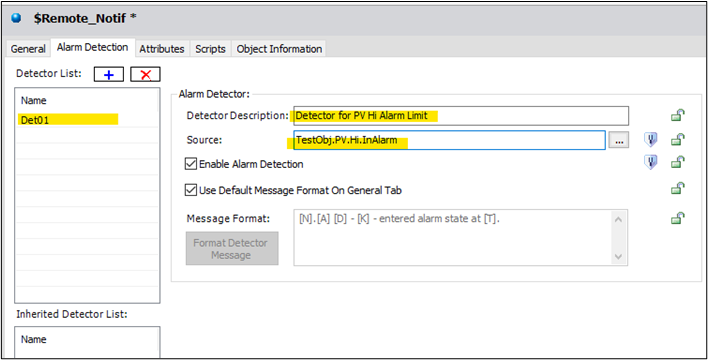
16. After adding a new detector you can name it as you please in the “Detector List”, add a description, and of course define the source.
Note: In the example below we are going to generate a notification based on a field attribute titled “PV” from a user defined object titled “TestObj” in a Hi alarm state.
Part 2 – Configuring the Remote Notifier for Relative Addressing
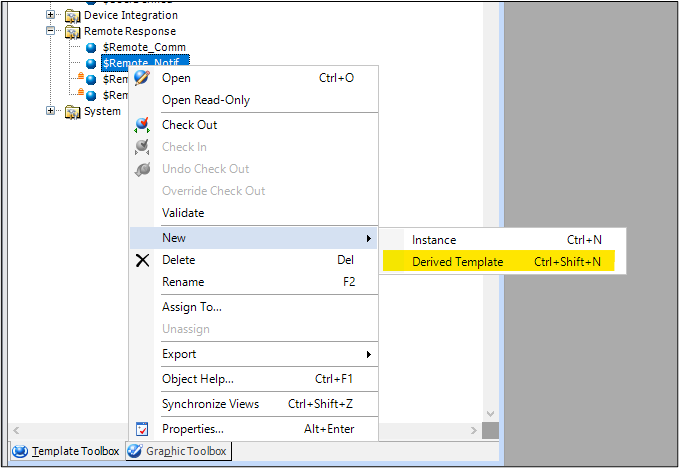
17. To configure the Remote Notifier for relative addressing, you will begin by creating a new derived template from the remote notifier.
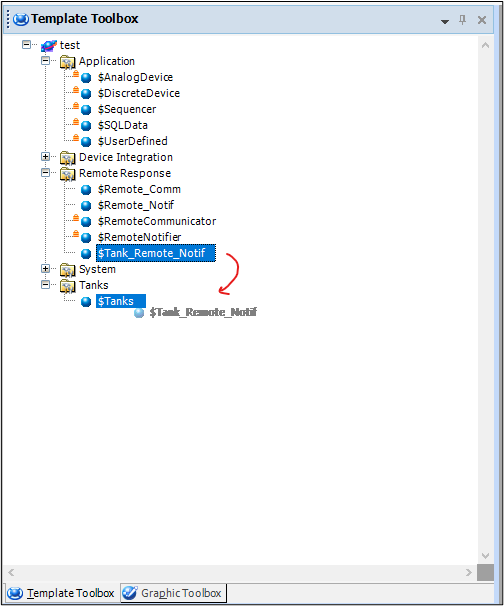
18. Then you can simply drag-and-drop the new Remote Notifier template to your Application Object (i.e. object for tank value, etc…).
19. Now right-click on the notifier object, and then select “Open”.
Note: Follow Section 2 at this point to configure the relationship between the notifier and the communicator before proceeding to step 20.
20. Continue by selecting the “Alarm Detection” tab. We will add our first detector by clicking on the “+” button.
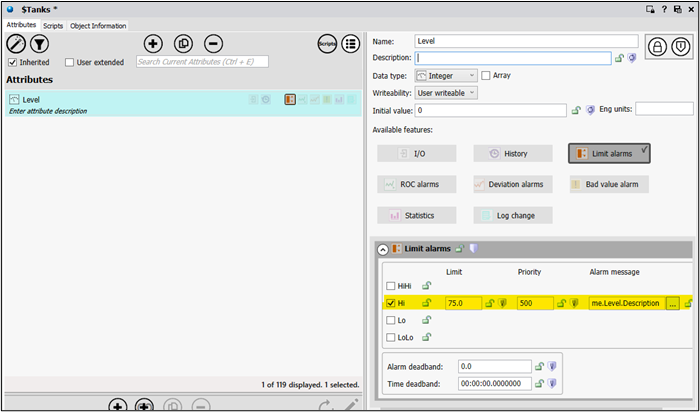
21. Below is an image of the Application Oject that our notifier is attached to. As you can see, we have a field attribute titled “Level” with a Hi alarm value. This is the information we will use for our notifier’s detector.
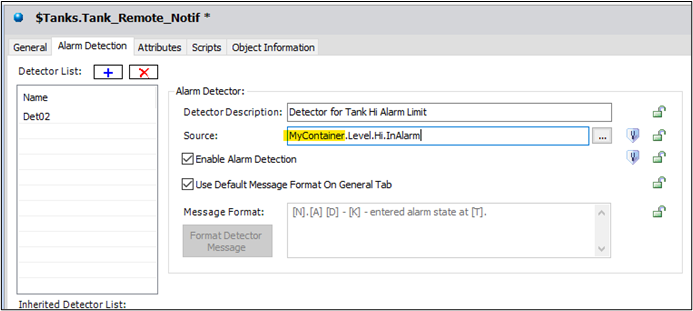
22. Taking the information from our Application Object (previous step), we can define our detector’s source. Because this notifier is a child of the “$Primary_Tanks” template we can say that the primary source is “MyContainer”. This means it will look at the parent object (instance) for the attribute “Level”. Then we could point to the status, the Hi.InAlarm extension, the AlarmInhibit extension, and so on. For the purpose of this document we will reference the Hi.InAlarm extension.
The reasoning for this is that if you plan on having 500 instances of your Application Object, then it would be incredibly time consuming to go into each instance of the notifier to define the Application Object path instance name as the source.
All Industrial Software Solutions Tech Notes are provided "as is" without warranty of any kind.