

How to create a connection between Wonderware Data Access Server (DA Server) and Matrikon OPC Explorer
SUMMARY
The AVEVA Operations Integration Servers (OI Servers) all have the ability to serve clients using three built in protocols: DDE, Suitelink, and OPC. The Matrikon OPC Explorer is a free product from Matrikon (provider of many IO OPC Servers) and can be useful in verifying connectivity an displaying values when troubleshooting communications to an AVEVA OPC Protocol. The way to connect to the different AVEVA OI Servers is the same, only the name of the server and the tags you are looking for may change. This document lists the steps necessary to connect to the AVEVA OI Server via OPC item naming using the Matrikon OPC Explorer (in this example we use OI.MBTCP Server for Modbus Ethernet protocol).
APPLIES TO
- Wonderware OI Servers – All versions
- Matrikon OPC Explorer – version 4.0
PREREQUISITES
It is expected that users have already downloaded and installed the Wonderware DA Server and the Matrikon OPC Explorer.
- DA Servers can be downloaded from our Downloads page.
- Matrikon OPC Explorer can be downloaded from the Matrikon OPC Explorer page.
PROCEDURE
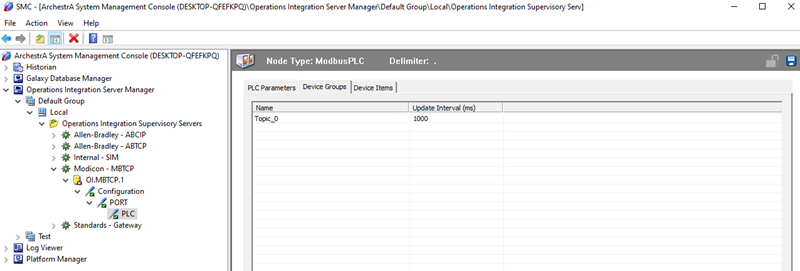
- The OI Server should be properly installed, configured, and communicating with the PLC. This example is using MBTCP (AVEVA OI Server for Modbus Ethernet protocol) with all of the OI Server objects and items with default values (i.e. Device Group = Topic_0).
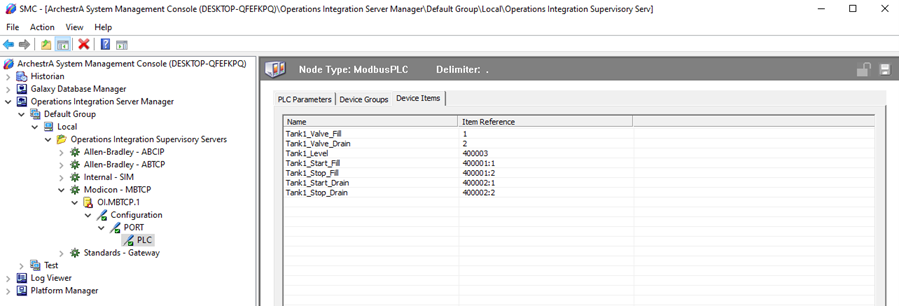
Note: Optionally you could enter Device Items here (like in the figure below) this would make these items available for browsing from an OPC Client.
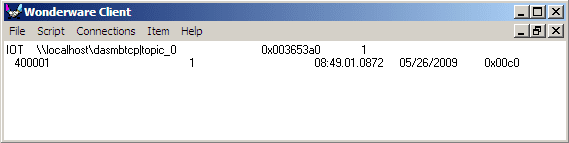
- Verify Suitelink or DDE (not OPC) communication to the PLC using the WWClient described in Tech Note 62 “How to monitor and troubleshoot communication using Wonderware Client utility”. In the figure below, you can see the DAServer is communicating to a memory register in the PLC with good quality (0x00c0).
3. Be sure to close your WWClient application before continuing.
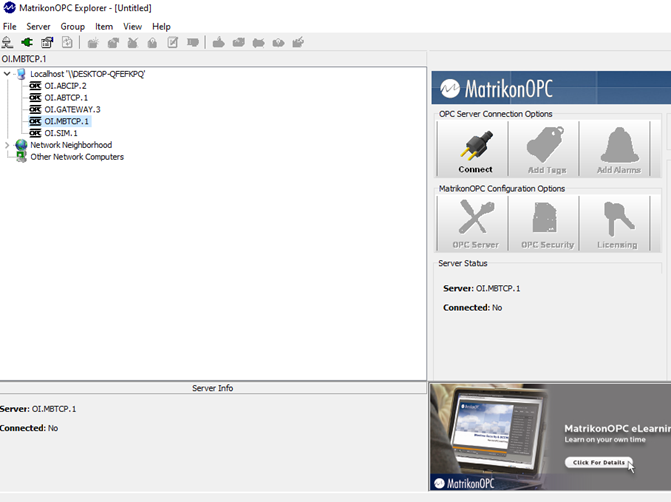
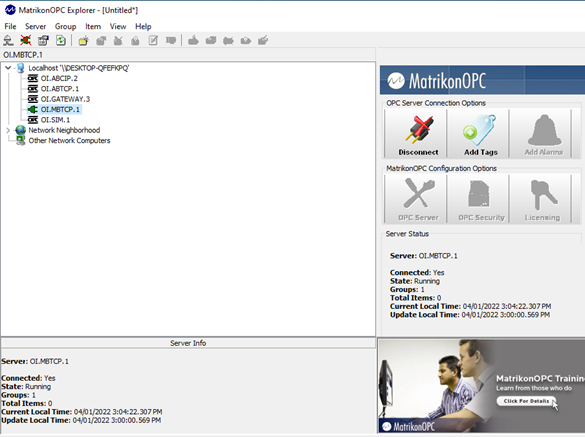
4. Start your OPC client. This example is using MatrikonOPC Explorer. The picture below shows that the utility found five OPC servers on the local machine (localhost) and displays them in a tree view. It will find all the locally installed OPC servers and display them in this list.
5. By selecting the OI.MBTCP.1 server on the left, then under the OPC Server Connection Options listing to the right, the “Connect” option becomes selectable.
6. Click Connect button to initiate the connection to the OPC Server.
Note: OPC clients can connect to OPC servers using one of the following modes:
- In-Proc – in this mode the OPC Server becomes a part of OPC Client process, one user at a time and this connection mode wants to start the OPC server. In-Proc connection can only be run locally on the same PC and is usually a .dll file type.
- or Out-Proc – in this mode the OPC Server is a standalone application, which multiple users/clients can connect to and the connection expects the OPC server to already be running; the Out-Proc connection can work either on local PC or across network and is usually a .exe file type
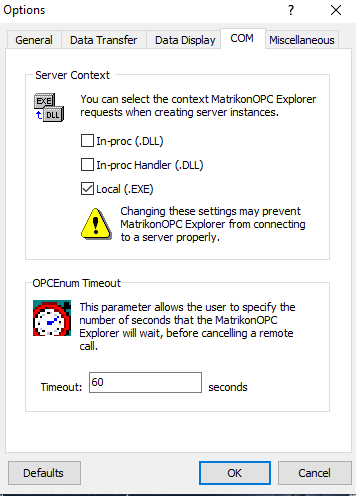
Connection mode is a client-side setting. The default setting for most OPC clients is to locally connect In-Proc. To check or change the connection mode in the MatrikonOPC Explorer go to View -> Options -> COM tab. To enable Out-Proc connection mode (if needed) un-check the boxes for In-Proc and In-Proc Handler (see the screenshot below for reference).
7. Once connected the icon should turn into a receptacle plug icon with an red “X” on it and the “Add Tags” selection should now be available (not grayed out), under the OPC Server Connection Options listing to the right.
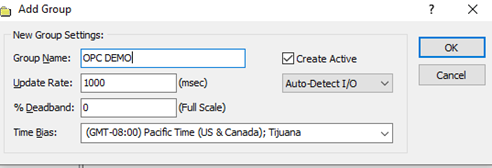
8. Click the “Add Tags” and create a group name for the tags. In this example the group name was called OPC DEMO. The rest of the options you can leave as default. Click OK.
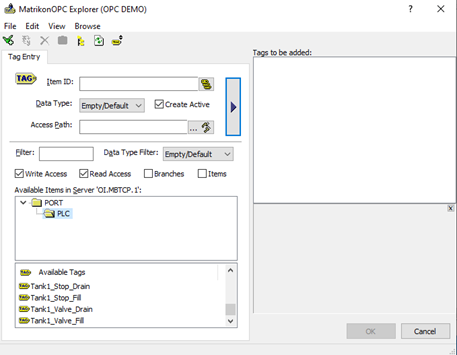
9. The Tag Entry window should now be displayed. Now browse the Available items in Server section to find the OPC path to the available tags you are looking for. You do this by selecting the ‘+’ (plus) sign next to Port item you are looking for, in this example New_TCPIP_PORT_000.
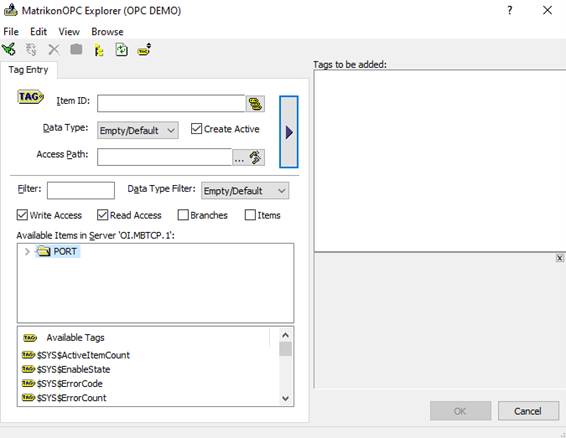
10. Then continue to browse using the ‘+’ sign until you find the PLC item you are looking for and then select that item. In this example select the item in the tree under New_TCPIP_PORT_000, New_ModbusPLC_000.
11. Then drop down to the Available Tags section and select one of the available system tags, they start with $SYS$, ($SYS$Status was used in the example figure below).
Note: For a complete list of system tags available and their uses, see the OI Server User’s Guide.
All Industrial Software Solutions Tech Notes are provided "as is" without warranty of any kind.