

How to Modify Default Actions for ArchestrA Graphics
SUMMARY
It may become useful to use an Industrial Graphic (previously called ArchestrA graphic) for a purpose other than the original design. For example, say you like the look of the ArchestrA graphic titled “ButtonGlossyDotMomentaryOrange”, but you want to use it for both a direct type action and then use the same graphic for a toggle type action. This document will relay a general procedure to accomplish this by using the preceding example.
APPLIES TO
- Application Server
- InTouch
- Operations Management Interface
PROCEDURE
Part 1 – Preparation
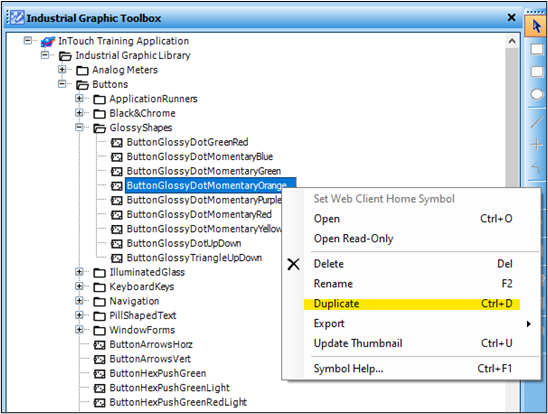
- The first thing is to locate the graphic you are interested in modifying. For the purpose of this document we will use the “ButtonGlossyDotMomentaryOrange” button. To begin, create a duplicate of the graphic to retain the original properties of the graphic.
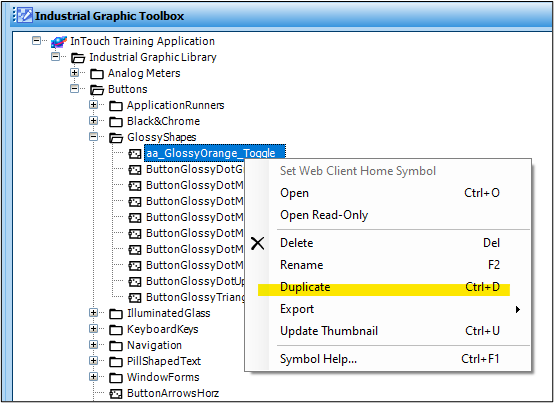
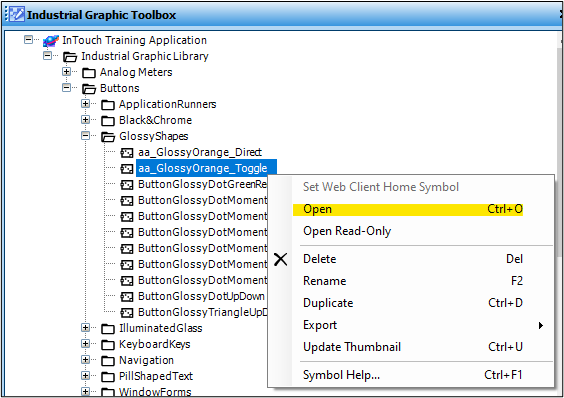
- As you can see from the image below, we named the first duplicate of the graphic “aa_GlossyOrange_Toggle“. Now another duplicate “aa_GlossyOrange_Direct” will be generated for the purpose of a direct type animation.
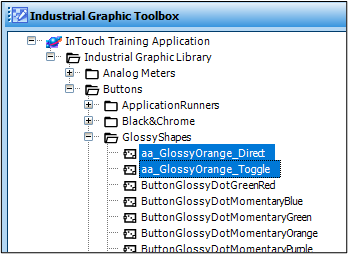
- Highlighted below you can see that two duplicates of the Industrial Graphic “ButtonGlossyDotMomentaryOrange” have been created. One for use with toggle type actions, and another for direct type actions.
Part 2 – Using Industrial Graphic for a Direct Type Action
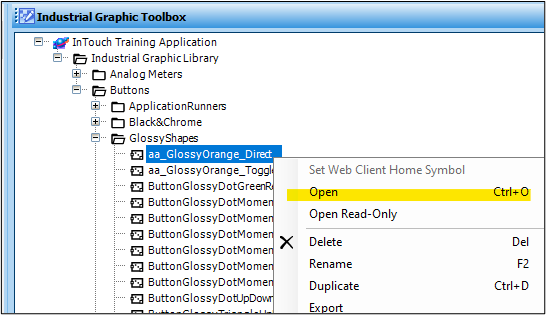
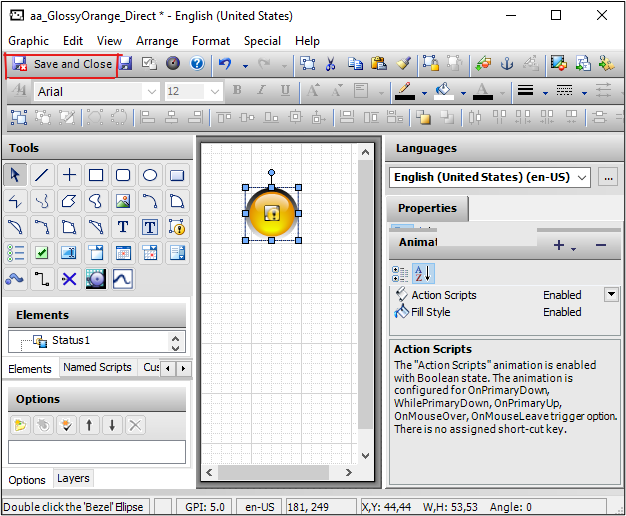
- We will begin the modification with the “direct action” button. To edit the “aa_GlossyOrange_Direct” graphic (created in Part 1) you can right-click it and select “Open“ or double-click the graphic.
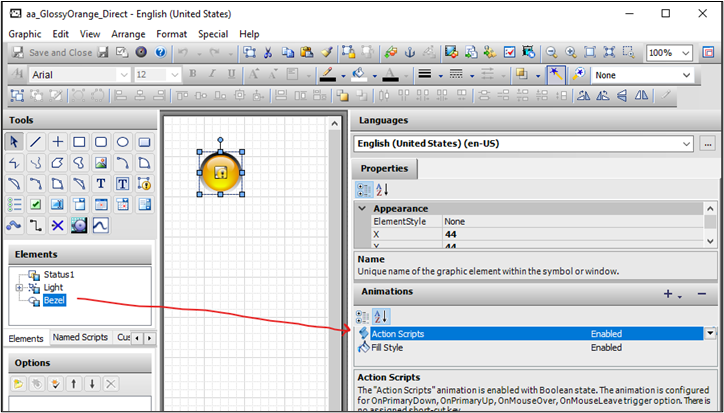
- You may have to browse the graphics elements to find the element linked to “Action Scripts“. The graphic used for the purpose of this document happens to have the action script associated to the “Bezel” element. To modify the action script, double-click on the “Action Scripts” animation.
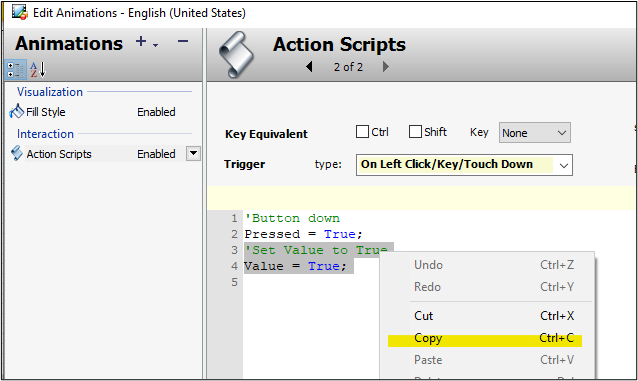
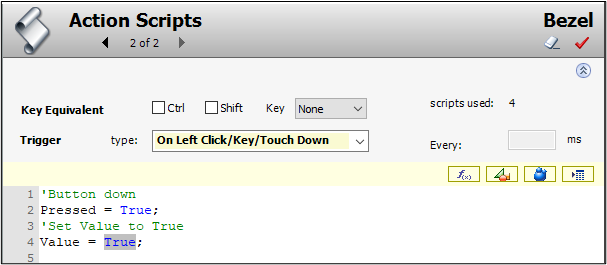
- The “Edit Animations” will open. Here we will copy the contents of the “On Left Click/Key Down” trigger type related to the value.
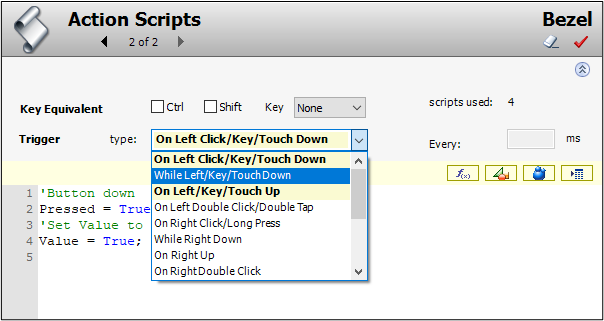
- Now select the trigger type drop-down box and select the “While Left/Key Down” type.
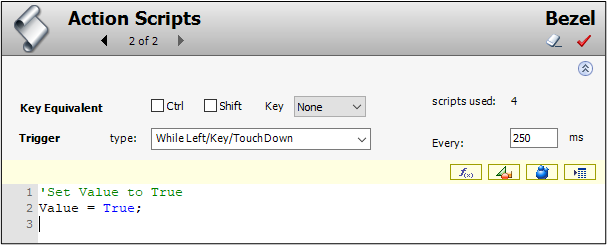
- Paste the contents that had been copied in step 6. This step is used to assure that, if the button is held down, the value of ‘1’ will be passed to the item. Then click OK to save and close the window.
- At this point you can make any additional modifications you see fit. When finished, click the “Save and Close” button located below the file bar.
- If using the Integrated Development Environment (IDE) to edit the graphic, will be prompted to check the graphic back in.
Note: This dialog will not appear if you have previously checked the “Don’t Prompt for Check In comments in the future” checkbox. You can prevent this message from appearing again in the future by checking the “Don’t Prompt for Check In comments in the future.” checkbox.
Part 3 – Using Industrial Graphic for a Toggle Type Action
- Now we will edit the button duplicate that will be used for a toggle action. Once again, double-click or right-click on the graphic “aa_GlossyOrange_Toggle” (created in the Part 1) and select “Open” to proceed.
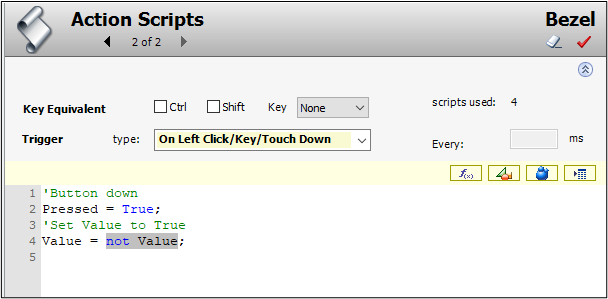
- Similar to Step 5, locate the “Bezel” element and locate the associated “Action Scripts”. To modify the action script, double-click on the “Action Scripts” animation. Once the Action Scripts editor opens, we will remove the static assignment of “True” from the “On Left Click/Key Down” trigger type.
- Replace the value of “True” with “not Value“. The reason for this is that a toggle action only deals with two values. This assignment is basically telling the value to be equal to the opposite of its current value.
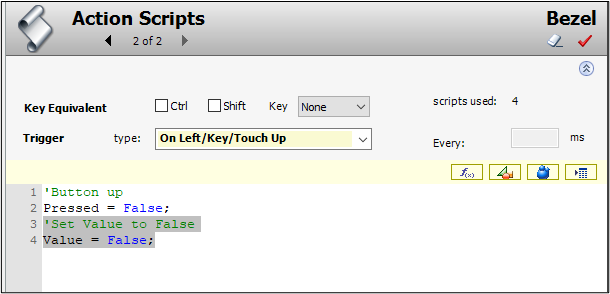
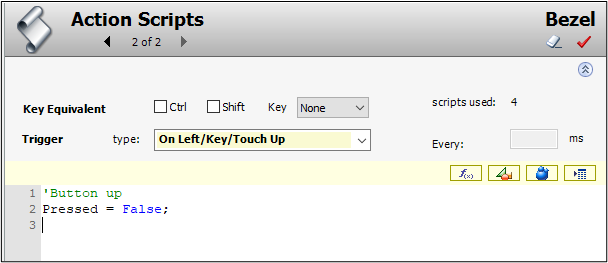
- Now navigate to the “On Left/Key/Touch Up” trigger type. We will delete the contents of this trigger type related to the value, because the value associated to a “toggle” should not be changed until the next time the button is pressed. However, for animation purposes we still want the value of “False” passed to the custom property “Pressed“.
- When finished click the “OK” button to exit the “Edit Animations” window. At this point you can make any additional modifications you see fit. When finished, click the “Save and Close” button in the Symbol Editor, located below the file bar.
- Once again, if using the IDE, you will be prompted to check the graphic back in unless the “Don’t Prompt for Check In comments in the future” checkbox had previously been checked.
SYNOPSIS
When the steps above are completed there will be two buttons each with a separate action.
- aa_GlossyOrange_Direct that will poke a value of 1 as long as the button is held down
- aa_GlossyOrange_Toggle will immediately toggle the value as soon as the button is pressed.
All Industrial Software Solutions Tech Notes are provided "as is" without warranty of any kind.