

How to Automate the Update Function Feature in Wonderware ActiveFactory IndustrialWorkbook
SUMMARY
It may be necessary for a developer to create a report using the Historian Client Workbook add-in (a part of the AVEVA Historian Client tool set) for users to view tag data. These reports can grow quite large and the Refresh Sheet function does not refresh new cell population. Because of this, users would need to select and refresh every individual function in the workbook. This document provides the procedures necessary to automate the Refresh Function on every function in the AVEVA Historian Client Workbook.
NOTE: The Workbook add-in is an add-on for Microsoft Excel. You must choose the 32-bit Microsoft Office add-ins during the installation of Historian Client (these can be added later through a “modify” operation). All Historian Client Microsoft Add-ins require 32-bit Office.
APPLIES TO
- AVEVA Historian Client – All versions
PROCEDURE
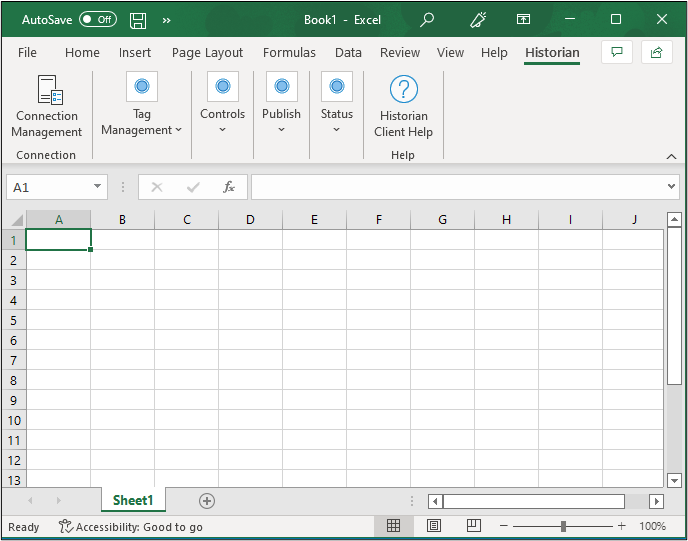
- First open AVEVA Historian Client Workbook from Start->All Programs->Microsoft Excel
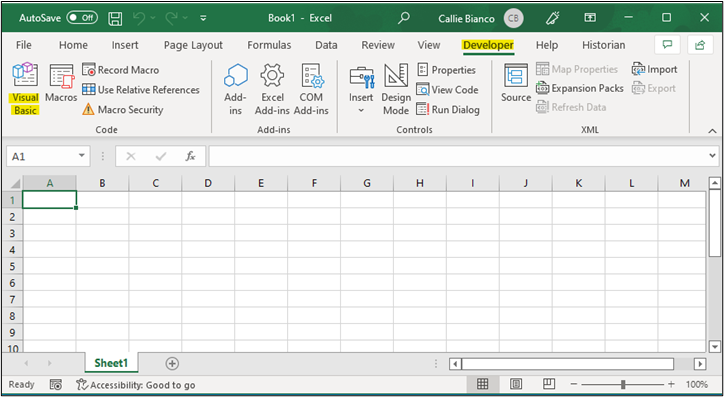
- Next install the reference to AVEVA Historian Client Workbook, so that you will have an access to AVEVA Historian Client specific functions. You will need the “Developer” menu enabled in Excel (File -> Options -> Customize Ribbon -> Main Tabs). Once the Developer menu is enabled, go there and click “Visual Basic”
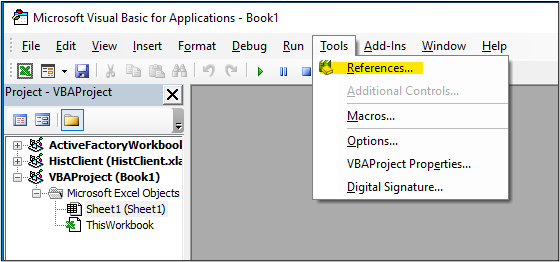
- When the Visual Basic Editor opens, select Tools->References.
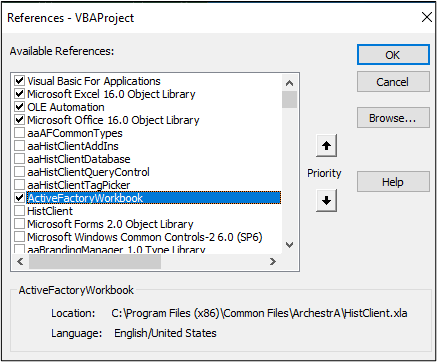
- The References VBAProject window will open. Scroll down through the list until you find “ActiveFactoryWorkbook” and check the box. When finished press the OK button and close Microsoft Visual Basic – Historian Client Workbook window.
- Next create your new report using Workbook Excel. Here you can automate the workbook by providing dynamic start and end times or even a hybrid of each. For example:
Start Date: =now()-1
End Date: =now()
NOTE: Take note of where the first cell containing the function is located. For instance, in the example below there are two starting positions. You must use the R1C1 system (Row/Column). In the example below, we have one at cell R2C1 (A2) and one at R2C3 (C2).

- Now that the report has been created and we have taken note of which cell the function begins, we will proceed by going to the Developer menu and selecting “Macros”.

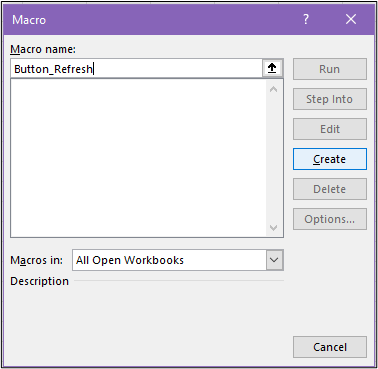
- The Macro window will appear. To create a new macro you will first need to enter a name for the macro (for the purpose of this document I chose to name the macro Button_Refresh). Once you have entered a name click Create.
NOTE: To have the macro run as soon as the report is opened name the macro Auto_Open (without quotes). You could also create two macros here, which would be:
1) Auto_Open to have the macro run as soon as the report is opened, and
2) Button_Refresh so the macro can be utilized at any point in time.
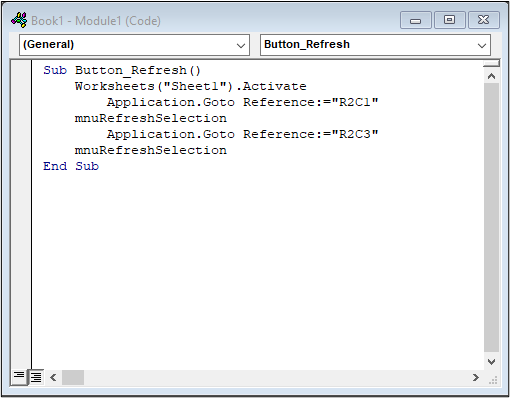
- Within a new module you will now write the macro. When finished in the editor, close the “Microsoft Visual Basic” window.
A copy of the macro used in this Tech Note has been written below:
Sub Button_Refresh()
Worksheets(“Sheet1″).Activate
Application.Goto Reference:=”{function starting position}”
mnuRefreshSelection
Application.Goto Reference:=”{function starting position}”
mnuRefreshSelection
End Sub
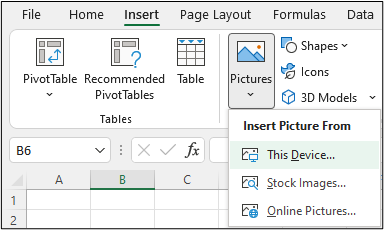
- Now that the macro has been written we will import a picture of a button that the users can click on to run the script. To do this first create an image of a button and save it somewhere on your system. Then select Insert->Picture->From Device.
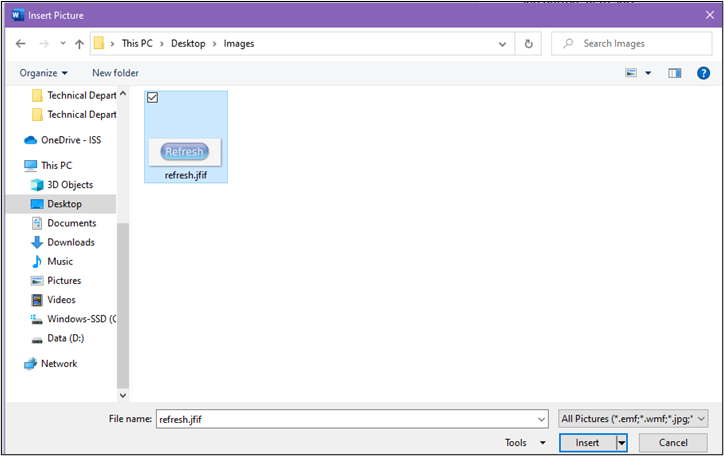
- Locate your button and click Insert.
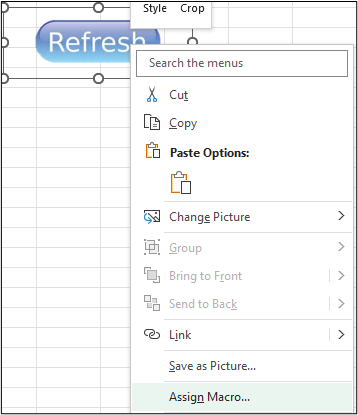
- Now that the button has been imported we need to assign the newly created macro to the button. To do this right-click on the button and select “Assign Macro”
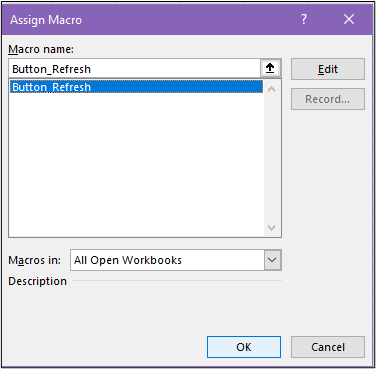
- Select your newly created macro and click OK. You now have a button in the AVEVA Historian Client Workbook that users can click on to refresh all of the functions you created in the report.
AVEVA Historian Client Workgroup Methods
The following methods execute Workbook menu commands
| Method | Used to |
| mnuAbout | Open the About dialog box |
| mnuAddDSN | Open the Server List Configuration dialog box |
| mnuAggregates | Open the Aggregate Values wizard |
| mnuAlarm | Open the Alarm Values wizard |
| mnuAnalysis | Open the Tag Analysis wizard |
| mnuBaseDate | Open the Set Base Date/Time dialog box |
| mnuConvert | Convert the function in the selected cell to values |
| mnuConvertSheet | Convert the functions in the active sheet to values |
| mnuEditFunction | Open the appropriate wizard for the selected function |
| mnuHelp | Open the Help file |
| mnuHistory | Open the History Values wizard |
| mnuInSQL | Open the Server Details dialog box |
| mnuLive | mnuLive Open the Live Values wizard |
| mnuOptions | Open the Options dialog box |
| mnuQuery | Open the Direct Query dialog box |
| mnuRefreshSelection | Refresh the selected function |
| mnuRefreshSheet | Refresh the active worksheet |
| mnuSnapSearch | Open the Event Snapshot Tag Selection dialog box |
| mnuSnapShot | Open the Event Snapshot Values wizard |
| mnuSumTagSearch | Open the Summary Tag Selection dialog box |
| mnuSumTagValues | Open the Summary Values wizard |
| mnuTagDesc | Open the Tag Details wizard |
| mnuTagSearch | Open the Tag Selection dialog box |
All Industrial Software Solutions Tech Notes are provided "as is" without warranty of any kind.