

Troubleshooting Historian Client Connection to AVEVA Historian Server
SUMMARY
When experiencing problems connecting to an AVEVA Historian Server from an AVEVA Historian Client such as Trend, there are several steps that can be used to troubleshoot the problem. This tech note details the correct steps to take to initiate communication. Assume that there is a running Historian Server on your network which is able to accept client connections from other client nodes.
APPLIES TO:
- AVEVA Historian Server – all versions
- AVEVA Historian Client – all versions
PROCEDURE
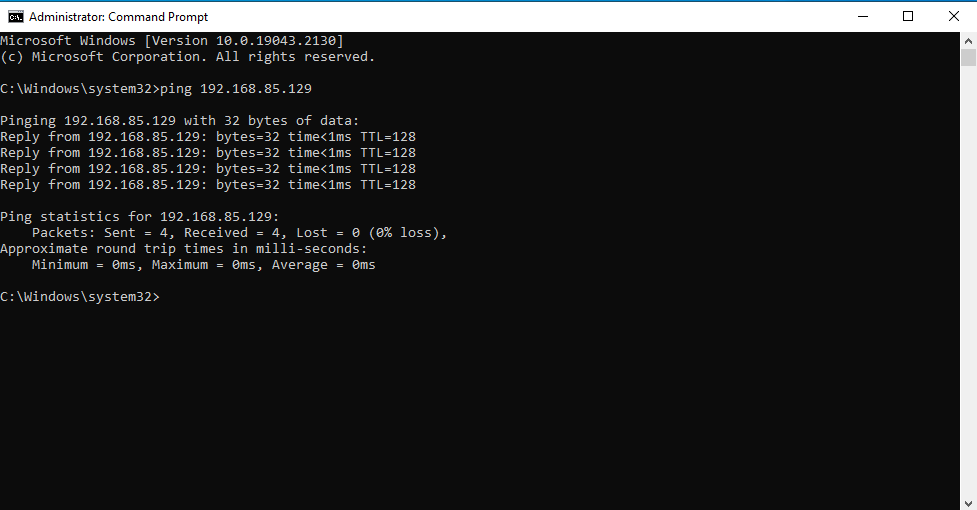
- First, we must confirm basic network connectivity by using the ping command (which can be launched by going to Start button -> Run -> typing cmd -> then in the command window typing ping. You must know the node name or IP address of the Historian Server computer. Make sure that if you are pinging by node name that the IP address resolved is correct.
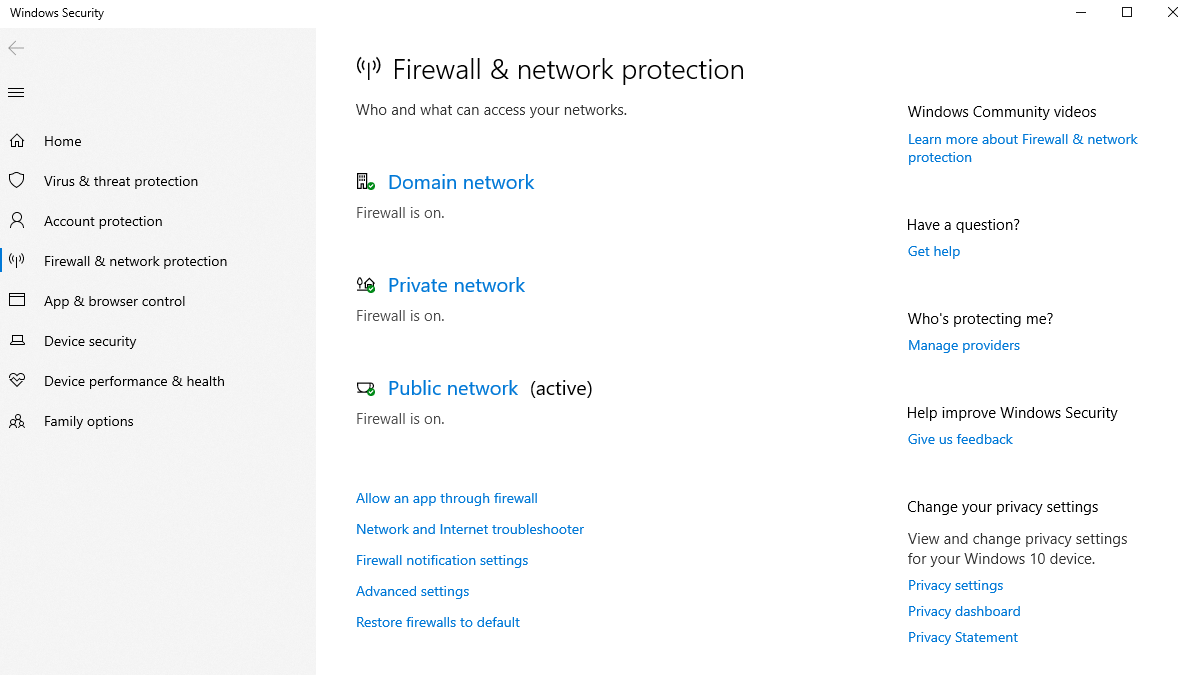
- Next, we need to make sure that there aren’t any devices or software that could be blocking communication on specific TCP ports. If there are hardware firewalls or routers on the network, try bypassing them to see if the connection succeeds. Also, check for firewall software installed on the Windows OS, such as the Windows Firewall. The OS Configuration Utility will add the necessary exceptions to the Windows Firewall (but not other 3rd party firewall software). The OS Configuration Utility can be applied by installing a recent patch to AVEVA software. If you’re not sure these exceptions have been added to the Windows Firewall and cannot download the OS Configuration Utility, the Windows Firewall can be temporarily deactivated manually by a local Administrator. Double-click the Windows Firewall in your Windows Control Panel, and turn it off:
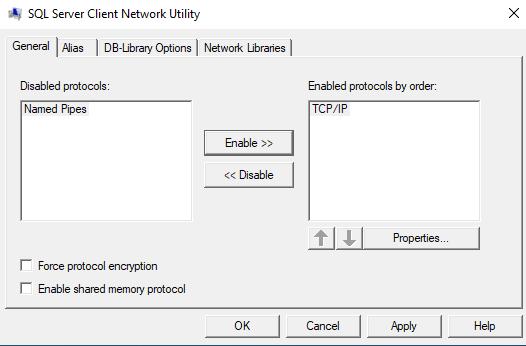
- If at this point there are still problem connecting to Historian Server, we need to check on the SQL client settings. First, we need to make sure the correct protocols are enabled. Click on Start -> Run type “cliconfg” in the Open: dialog and click on OK. This will start the SQL Server Client Network Utility. Make sure that TCP/IP is enabled and the default port under “Properties” is set to 1433:
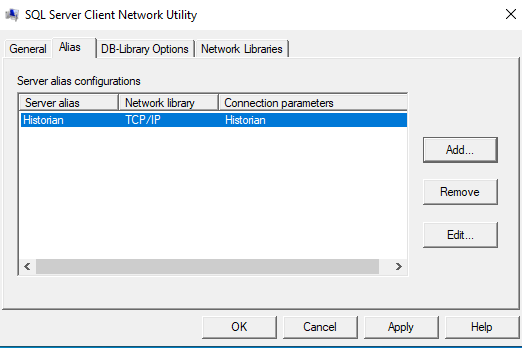
Next, select the “Alias” tab and make sure that any configured aliases are correct. Specifically, make sure that the connection parameters reference the correct node name or IP address. Also, make sure the alias(es) are configured to use port 1433:
At this point we have confirmed network connectivity along with SQL client related networking options. If you are still having problems connecting it may be caused by other network or operating system related issues. Please contact Industrial Software Solutions Support at [email protected] for further assistance.
All Industrial Software Solutions Tech Notes are provided "as is" without warranty of any kind.