

Introduction to Object Wizards
This Training Document is avaiable for public viewing. Access to our full library of training documents is included with any current Industrial Software Solutions Training Subscription.
To learn more about ISS Training Subscriptions and pricing, please contact us.
CONTACT US
OVERVIEW
An Object Wizard can be added to any derived template to provide a simplified user interface for configuring instances (assets) derived from the template. When configuring an instance derived from a template with Object Wizards, it may have a series of user selectable Choices and Options that guide you through the process of the configuration. Each Choice and Option may have one or more attributes, symbols, and/or scripts associated with it.
Object Wizards can integrate a wide variety of configuration possibilities, which can reduce many levels of the template derivation hierarchy. The result is fewer templates to manage and a simpler process to create and configure instances.
APPLIES TO:
- AVEVA Application Server 2017 and later
EXPLANATION
There are different ways of modeling templates, including building super objects with all possible attributes, symbols, and scripts within one template, using multiple derivations to add necessary attributes, symbols, and scripts to each level of derived template, and creating Object Wizards.
The following tables compare building super objects and multiple derivations to using Object Wizards. As examples, the comparisons are based on building templates with attributes only.
| Building Super Objects | Using Object Wizards |
|---|---|
| Add all possible attributes to templates | Add all possible attributes to templates |
| All derived objects have all attributes | Derived objects only include necessary attributes as determined by Object Wizard configuration |
| All attributes deployed to runtime | Only necessary attributes deployed to runtime |
| Using Multiple Derivations | Using Object Wizards |
|---|---|
| Add common attributes to first-level template | Add all possible attributes to templates |
| Add attributes and features to each derived object to meet requirements | Attributes and features are determined by the Object Wizard configuration for each derived object |
| More levels of derivation, harder to maintain | Reduced levels of derivation, easier to maintain |
Wizard Options
The Object Wizard presents a series of prompts and questions, from which you can select answers to build an instance as needed. For example, you might be building an instance that represents a piece of field equipment, such as a pump, motor, or valve. You can configure the instance by selecting an answer for each prompt or question listed in the Wizard Options panes.
An Object Wizard can have Choice Groups and Options. A Choice Group is presented with a drop- down list of two or more responses (Choices), from which you can select a response. An Option is presented as a check box that can be checked (true or on) or unchecked (false or off).
Along with configuring each available Wizard Option by selecting a Choice of a Choice Group or checking the check box of an Option, the associated attributes, symbols, and/or scripts can be set to be available or not for the instance.
Additionally, based on the configured Wizard Options, the settings of an attribute or a symbol might be configured as well. For example, checking an Option might enable the History feature for the associated attribute or the value of a custom property might be set to a new value.
IMPLEMENTATION
For our example, we will add Object Wizard options to a pre-built Counter object which already has all the attributes, scripts and symbols for three different counter variations built into it.
You can download a copy of the aaPKG file and import it into your galaxy from here ($Counter.zip).
Add and Configure a Choice Group
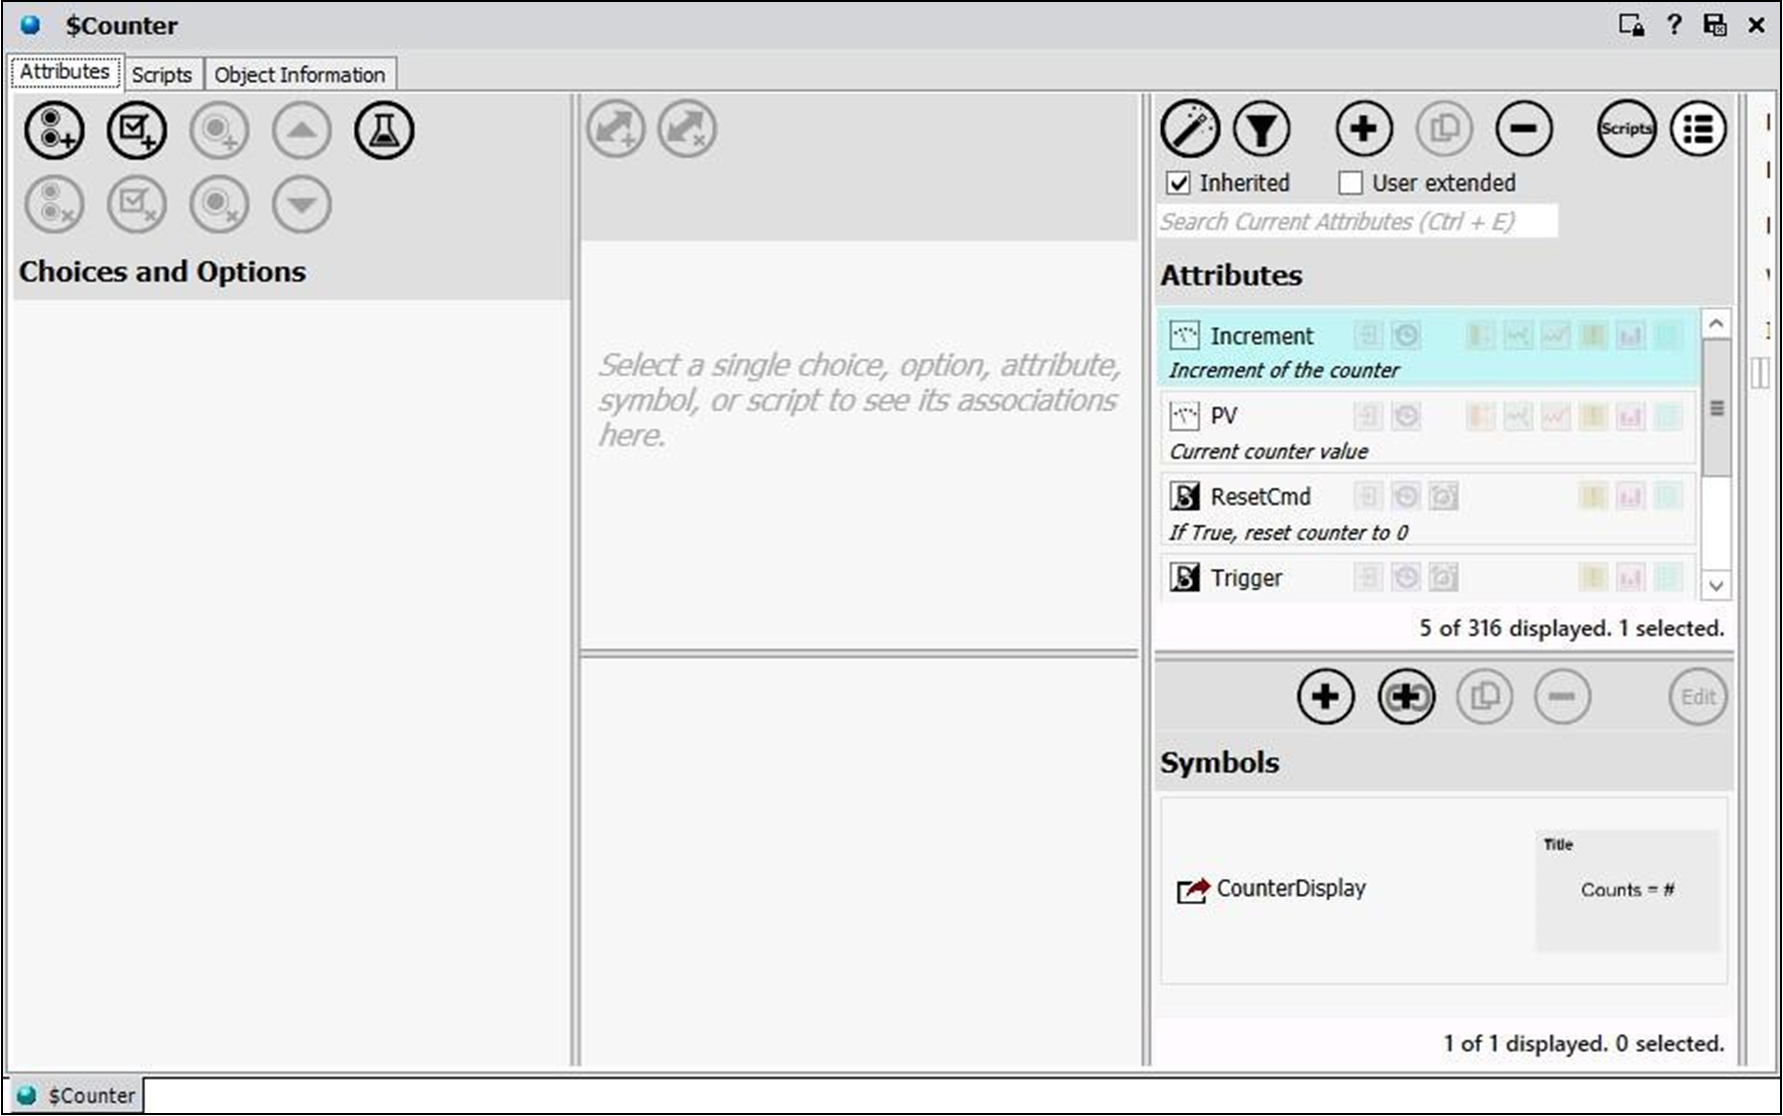
- Launch the IDE. In the Template Toolbox \ Training \ Project toolset, double-click the $Counter template to open its configuration editor.NOTE: If the Choices and Options and Settings panes are not visible, click the Configure Wizard Options button located above the Attributes pane.
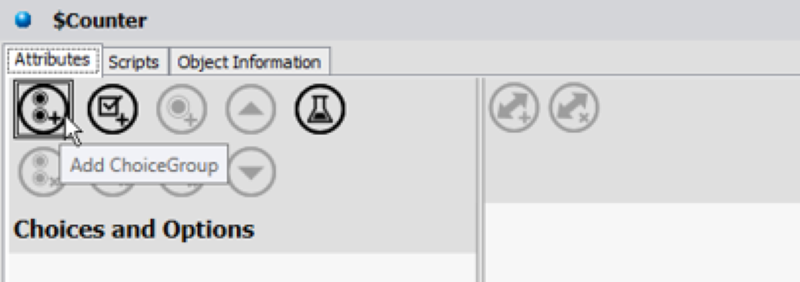
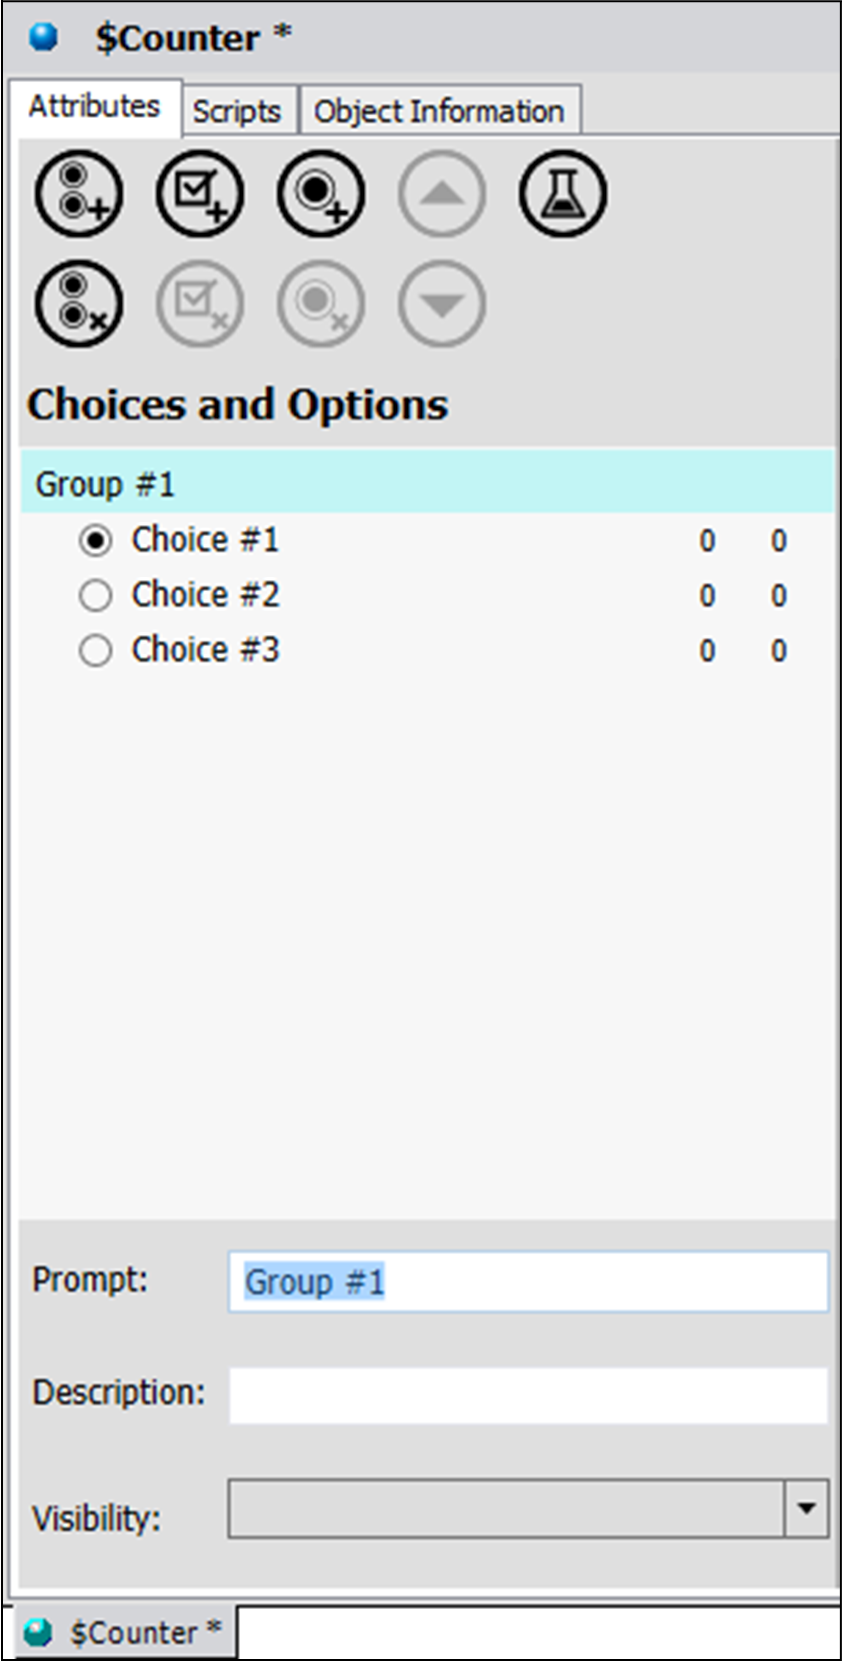
- In the Attributes tab, Choices and Options pane, click Add ChoiceGroup.
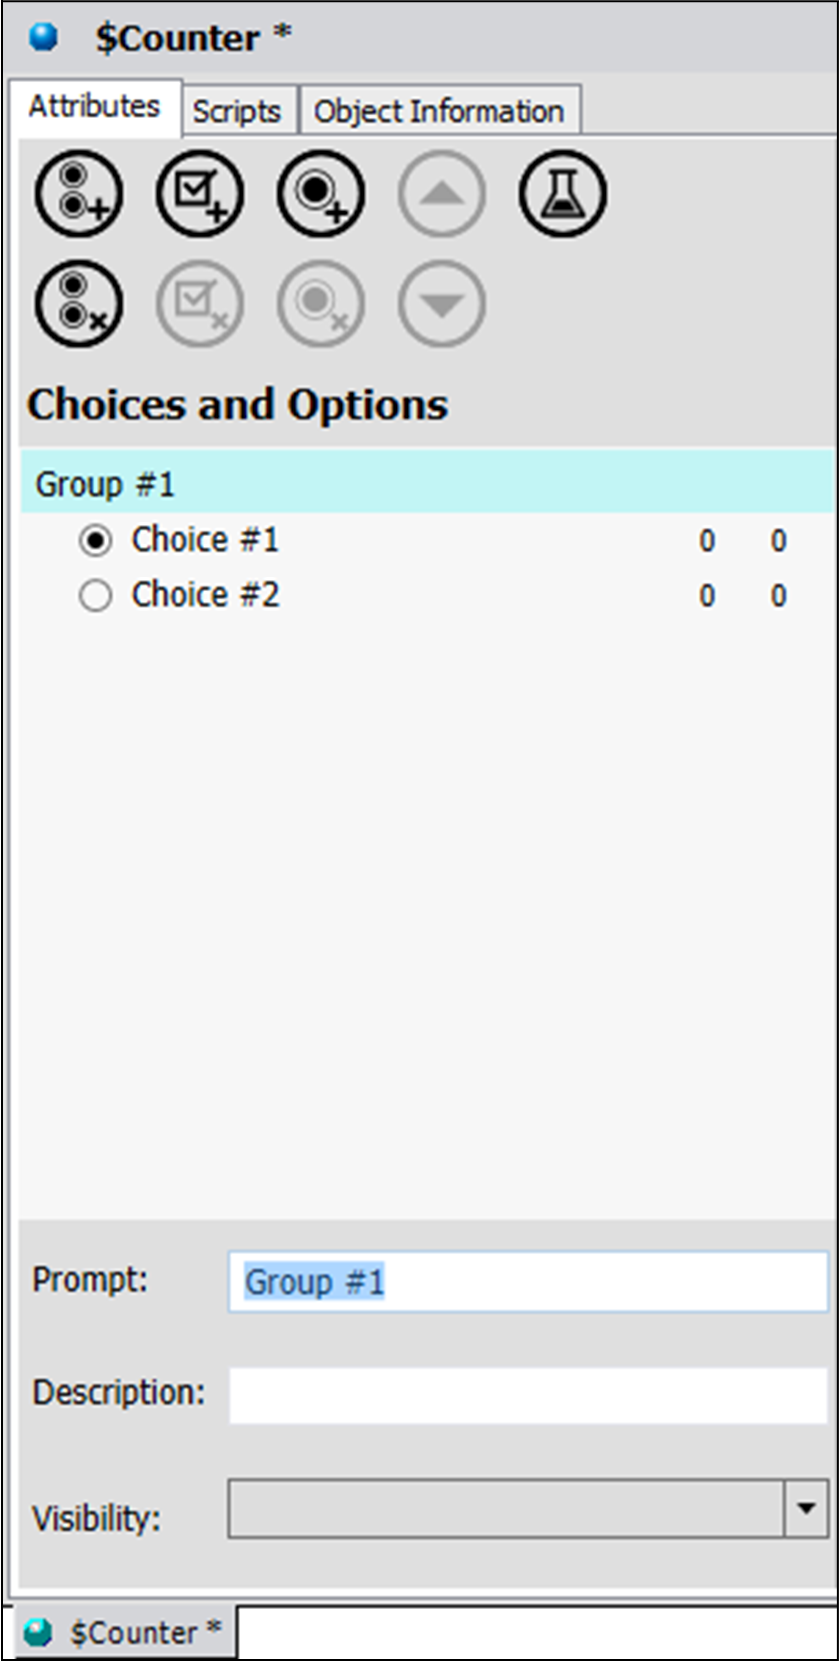
A Choice Group with two Choices is added in the Choices and Options pane. By default, the Choice Group Prompt is Group #1 and the Choices are Choice #1 and Choice #2. You will add another Choice in the next step.Notice that the Prompt, Description, and Visibility fields appear at the bottom of the Choices and Options pane. These fields can be used to configure the Choice Group, Choices, and Options.
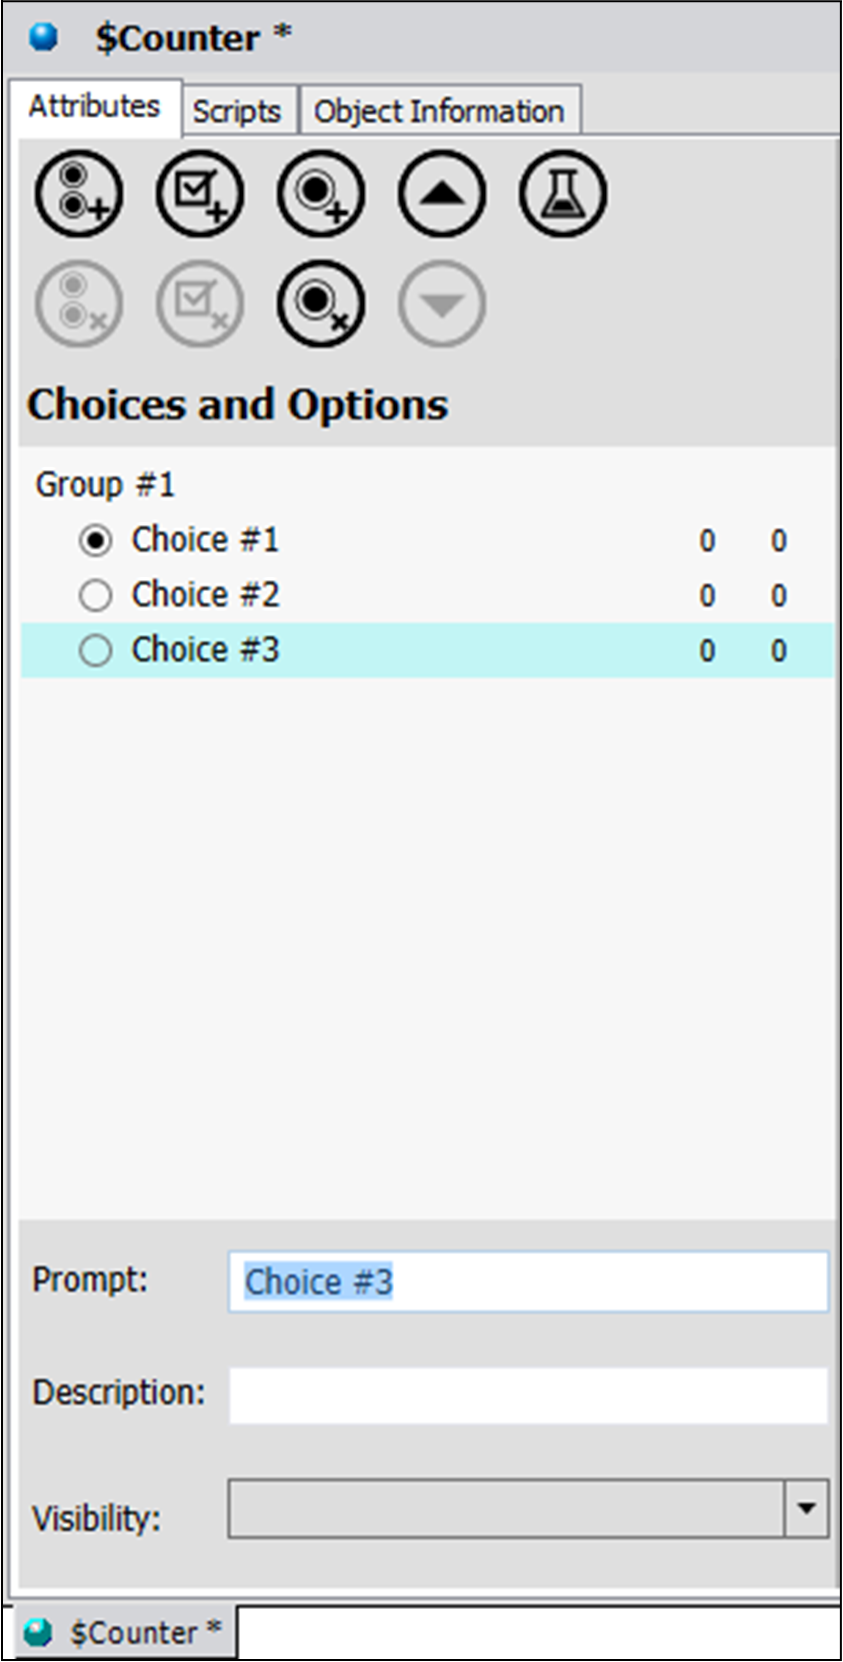
- In the Choices and Options pane, click the Add Choice button to add another Choice for the Choice Group.
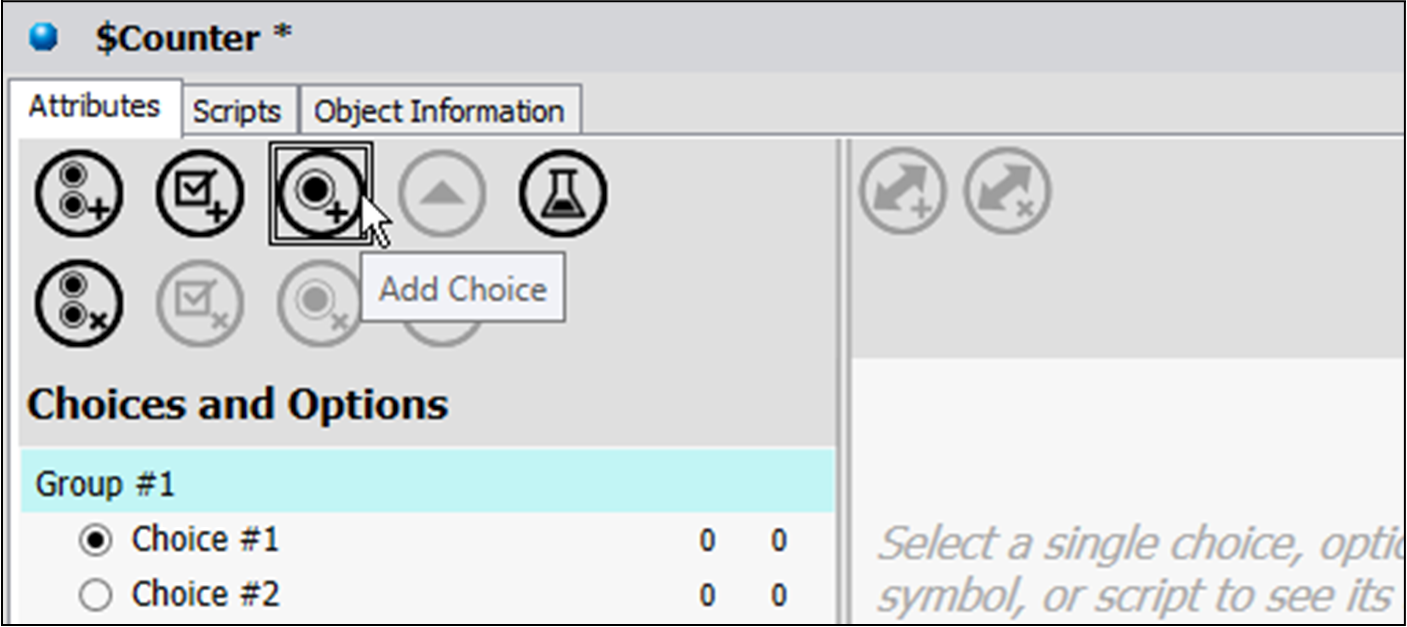
A new Choice named Choice #3 is added to Group #1.
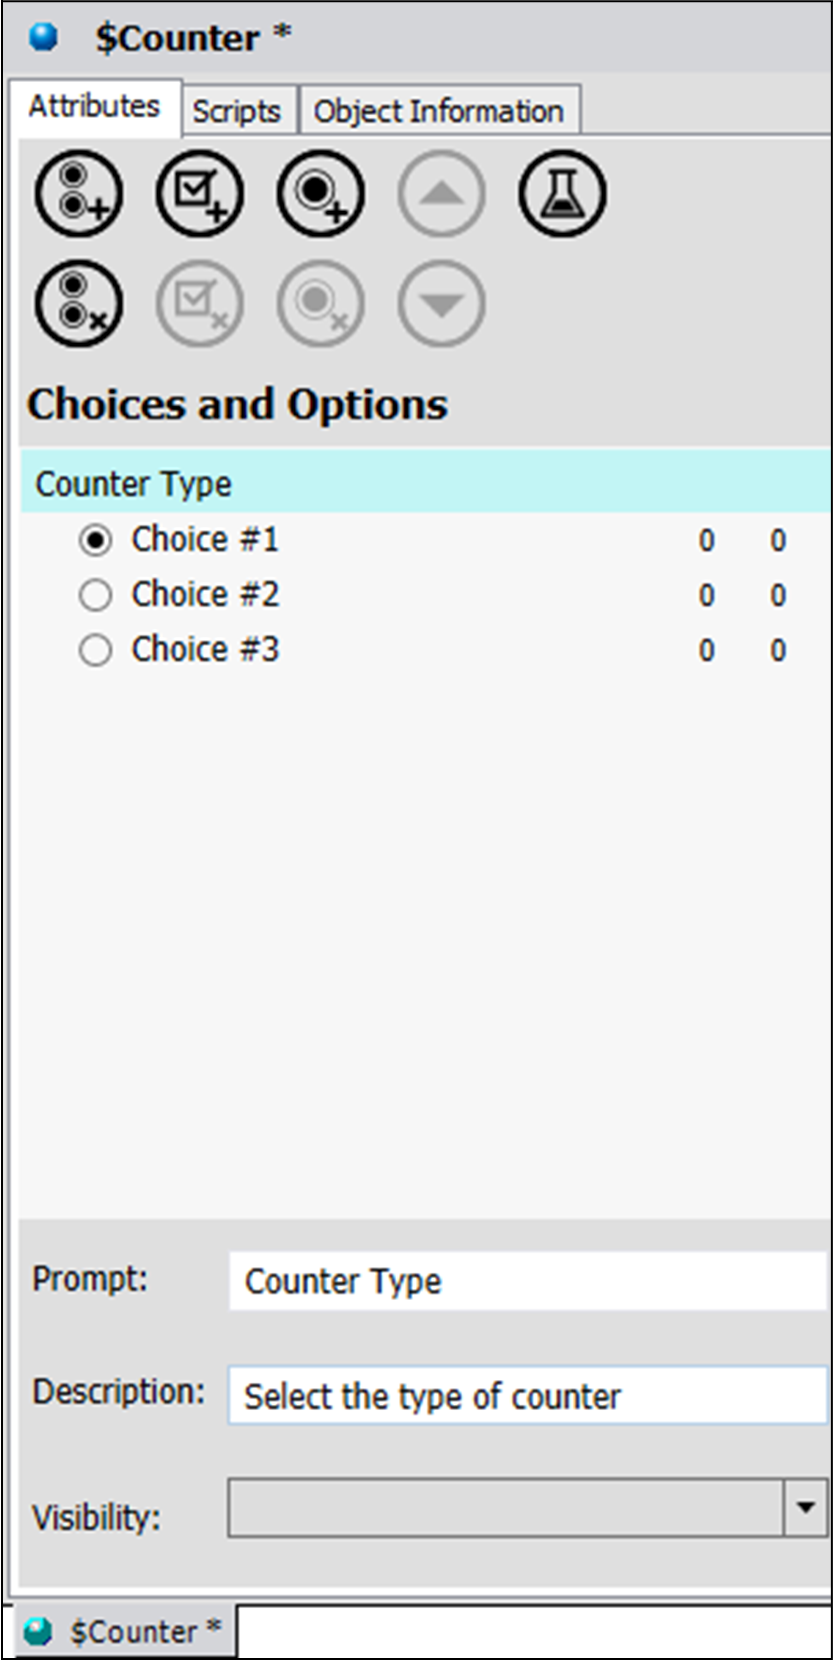
- In the Choices and Options pane, select Group #1.
- In Prompt, enter the prompt for the group as Counter Type and press Enter.
The Group #1 prompt changes to Counter Type.
- In Description, enter Select the type of counter and press Enter.Descriptions are used as tooltips for the settings.
- Repeat steps 5 & 6 to configure prompts and descriptions for the Choices:
Default Prompt New Prompt Description Choice #1 Scan Counter is triggered every scan Choice #2 Trigger Counter is triggered when the Trigger attribute is set to True Choice #3 Input Counter is triggered when the data changes in the Value attribute
Associate Attributes, Scripts, and Symbols to Choices
Now you will associate attributes, scripts, and symbols to the Scan, Trigger, and Input Choices.
- In the Choices and Options pane, select the Scan Choice.
- If the Scripts pane is not visible, you will need to show Click the Show Scripts button just above the Attributes pane.
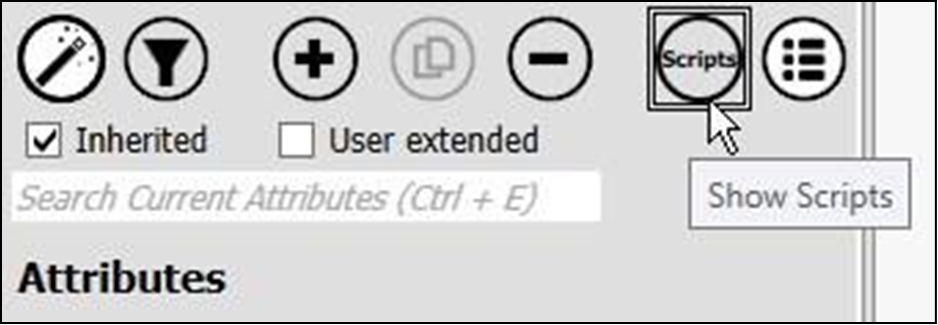
The Scripts pane appears below the Symbols pane. If needed, resize the Scripts pane to see the scripts.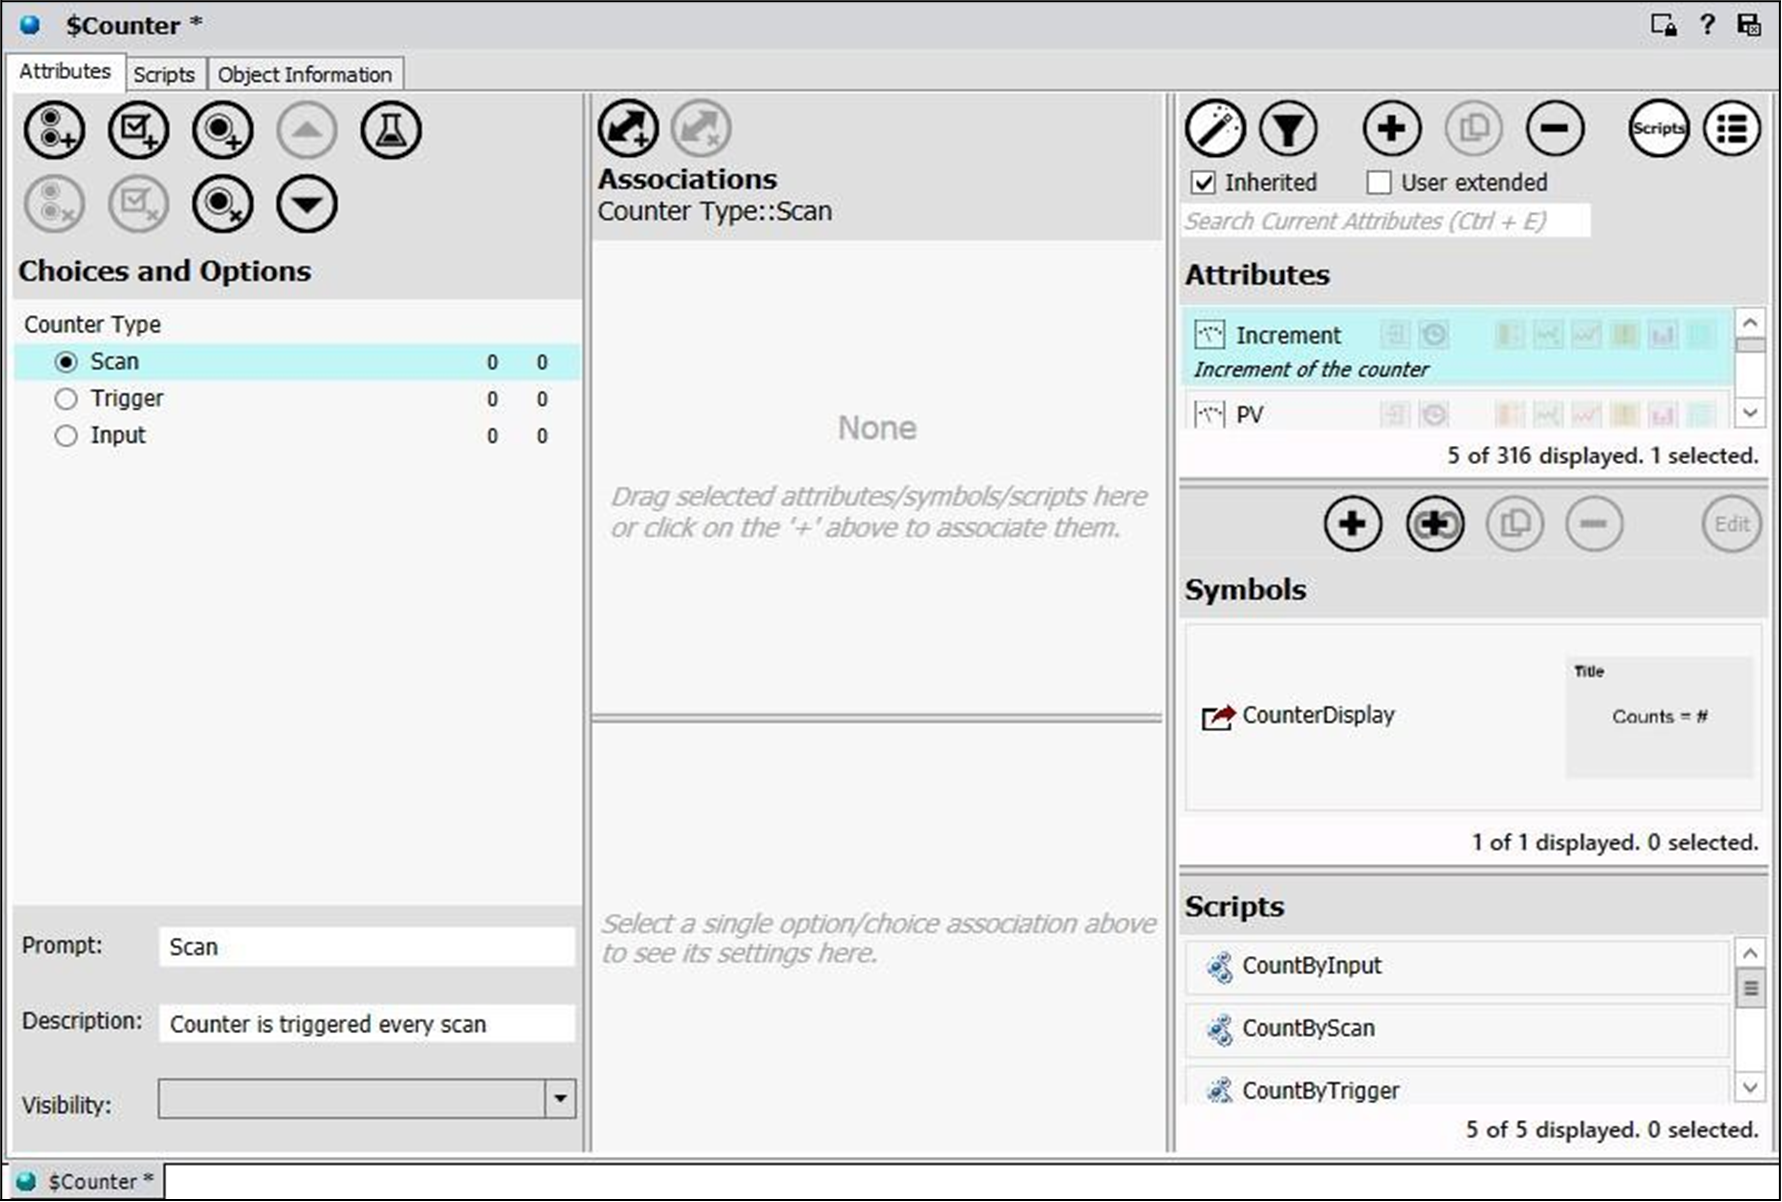
- In the Scripts pane, select the CountByScan script and drag it into the Associations
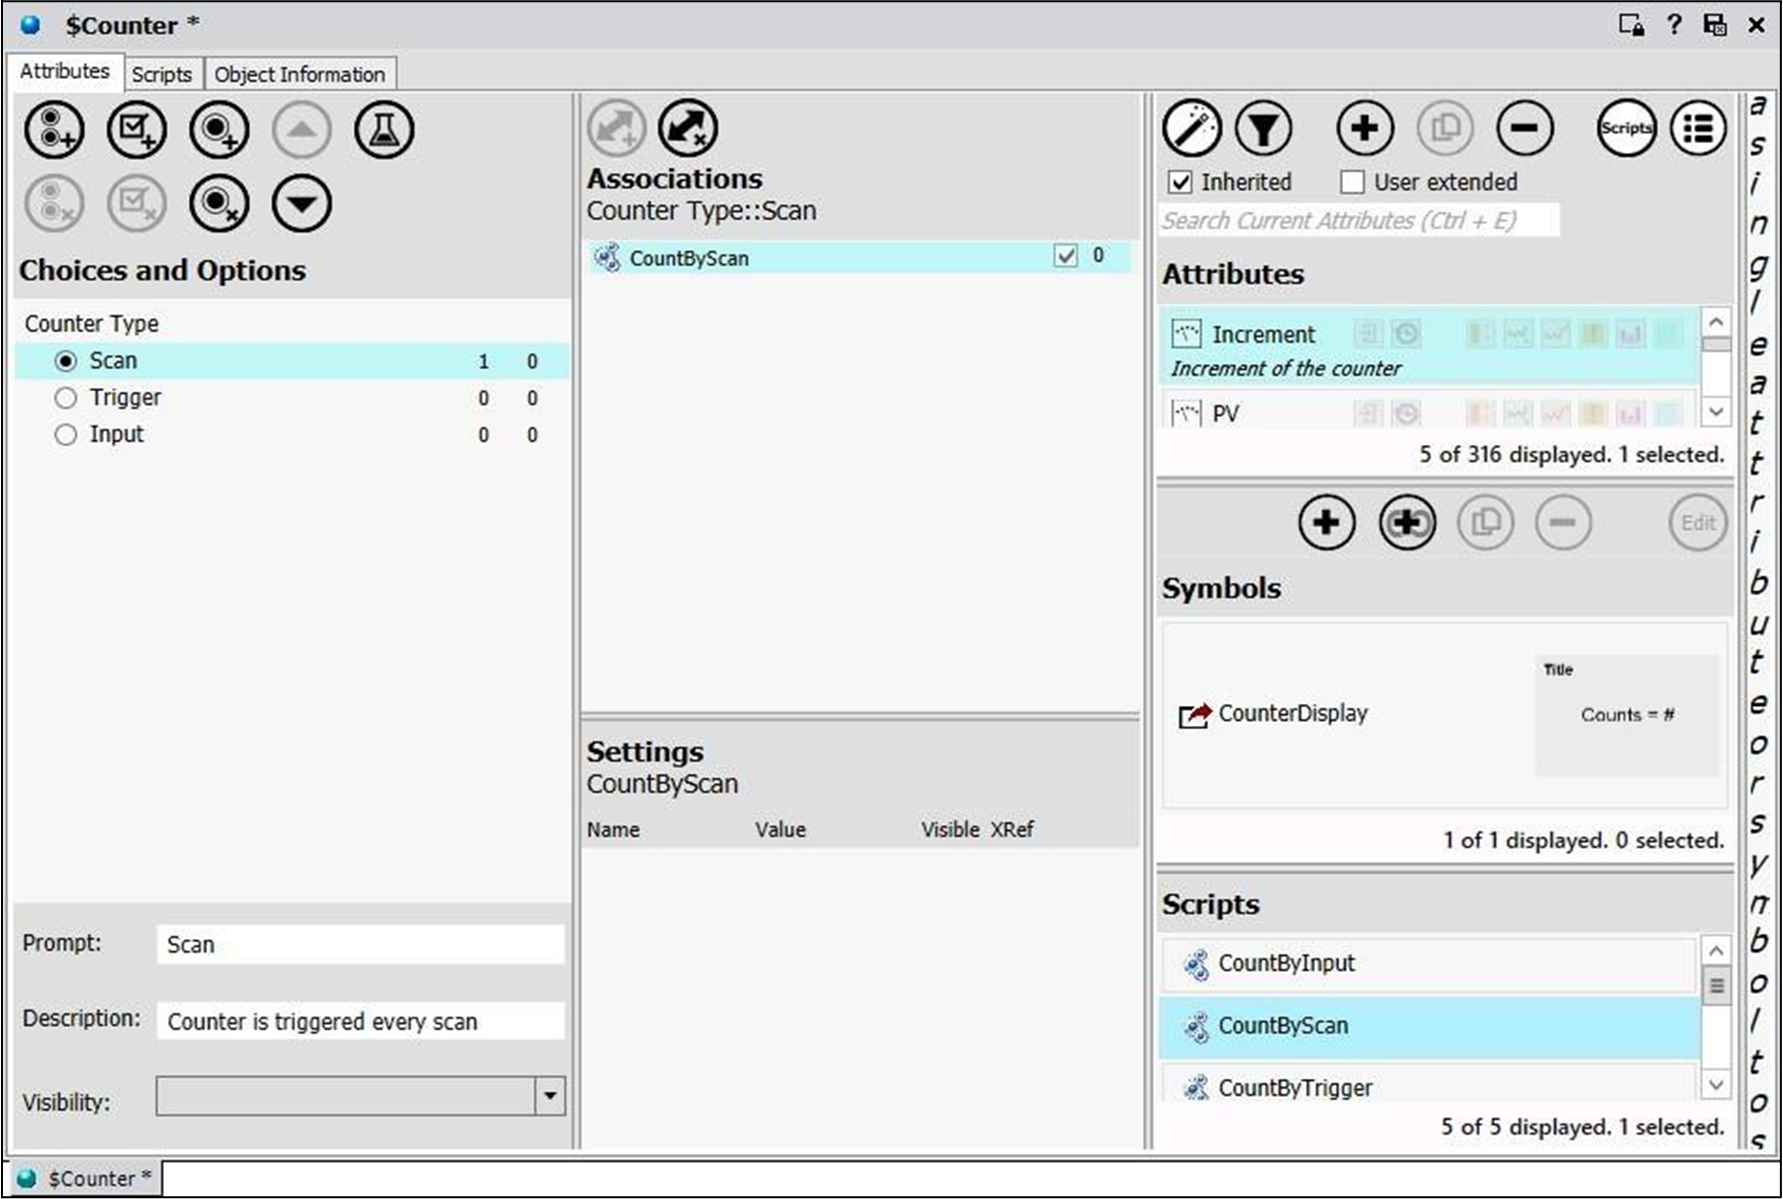 Note: For the Scan type, the counter is triggered by the AppEngine’s scan period. It is not triggered by a specific attribute, so no attributes need to be associated with this choice.
- In the Symbols pane, select CounterDisplay and drag it to the Associations
- In Associations, ensure CounterDisplay is selected.
- In Settings, from the drop-down list for CounterType, select Scan.
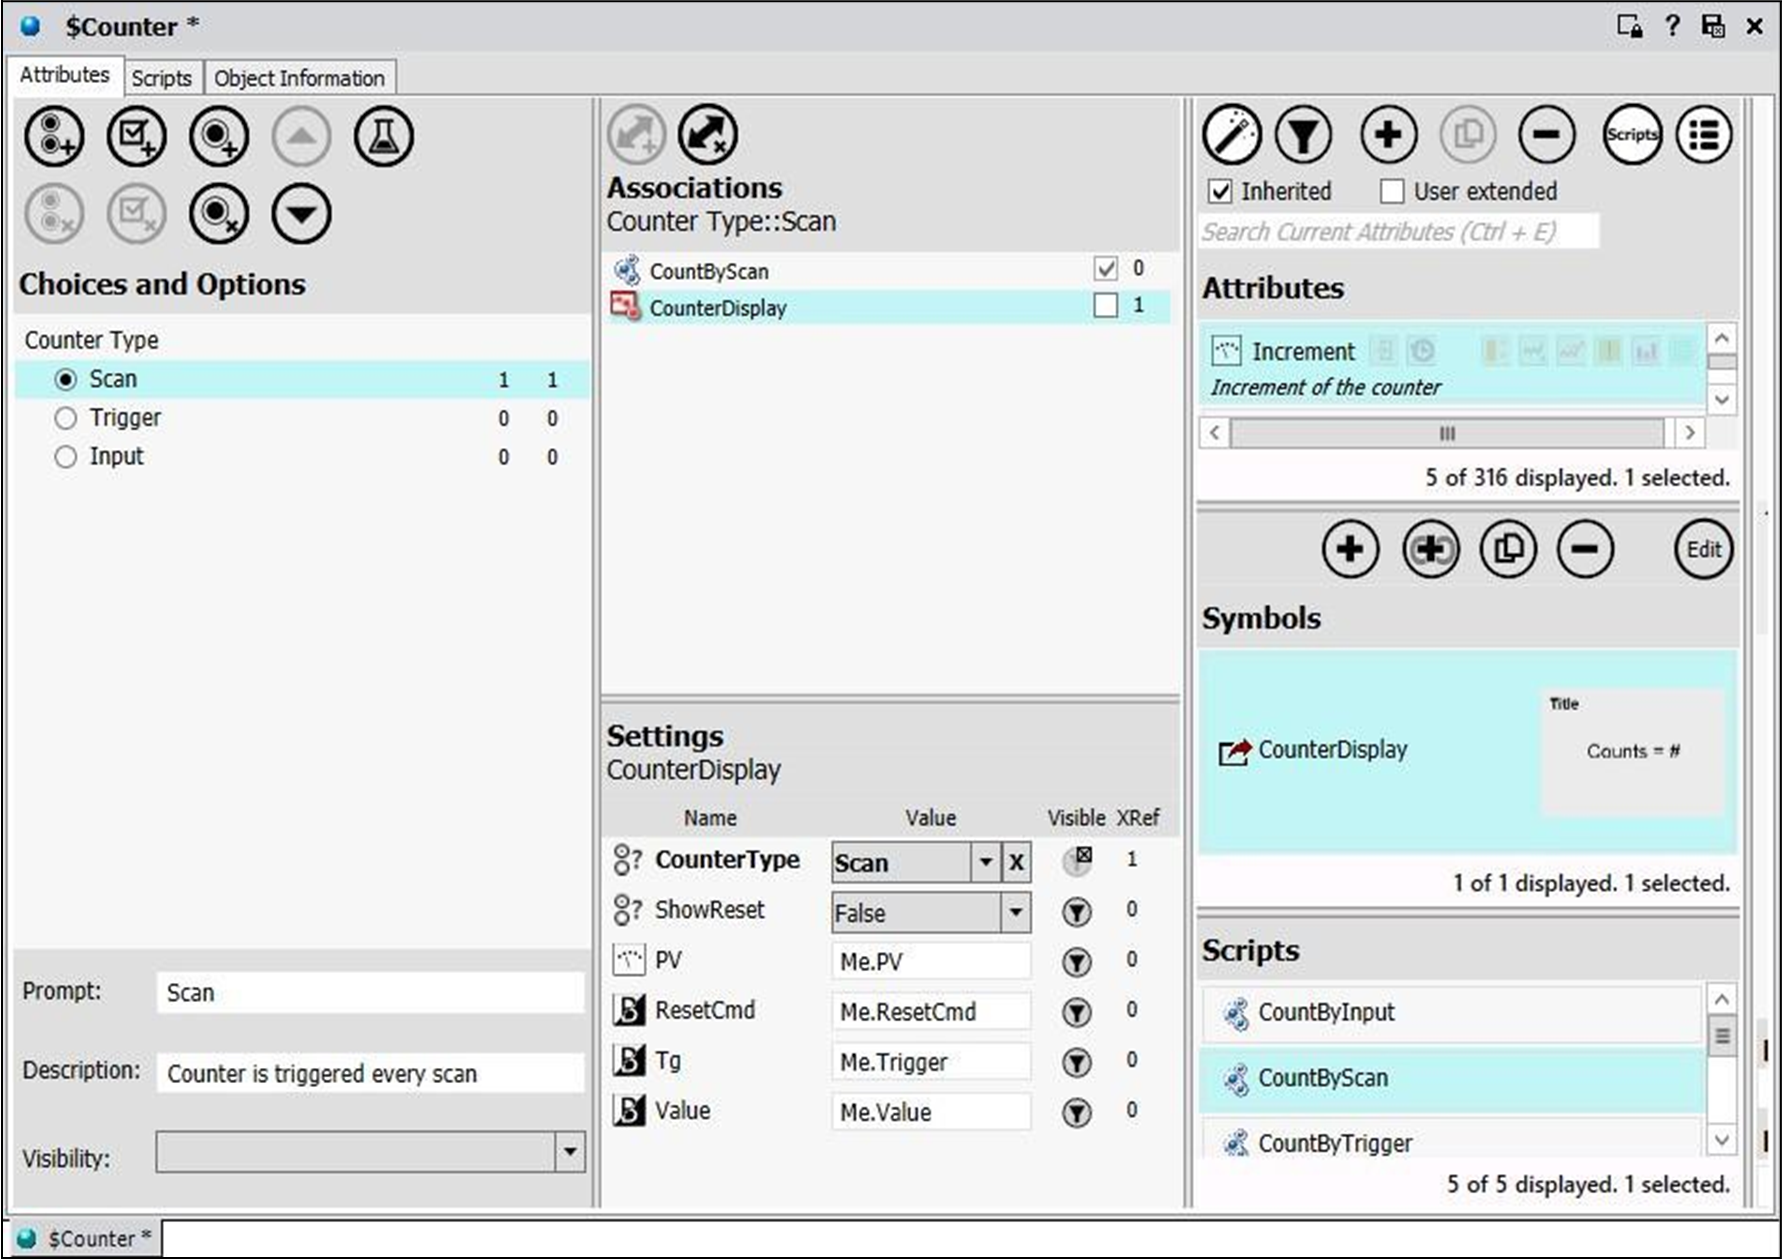 By associating the symbol to the Choice, it is possible to override the default settings of the symbol’s properties when that choice is selected.Notice that the visibility of the CounterType setting is automatically set to hidden, as reflected in the Visible icon for the setting. When an instance is set to count by scan, the symbol will be set to Scan automatically and will not be changeable when it is embedded in another symbol, because the setting has been set to hidden.
- In the Choice and Options, select the Trigger Choice.
- In Attributes, select the Trigger attribute and drag it to the Associations pane.
- In the Scripts pane, select CountByTrigger and drag to the Associations pane.
- In the Symbols pane, select CounterDisplay and drag it to the Associations pane.
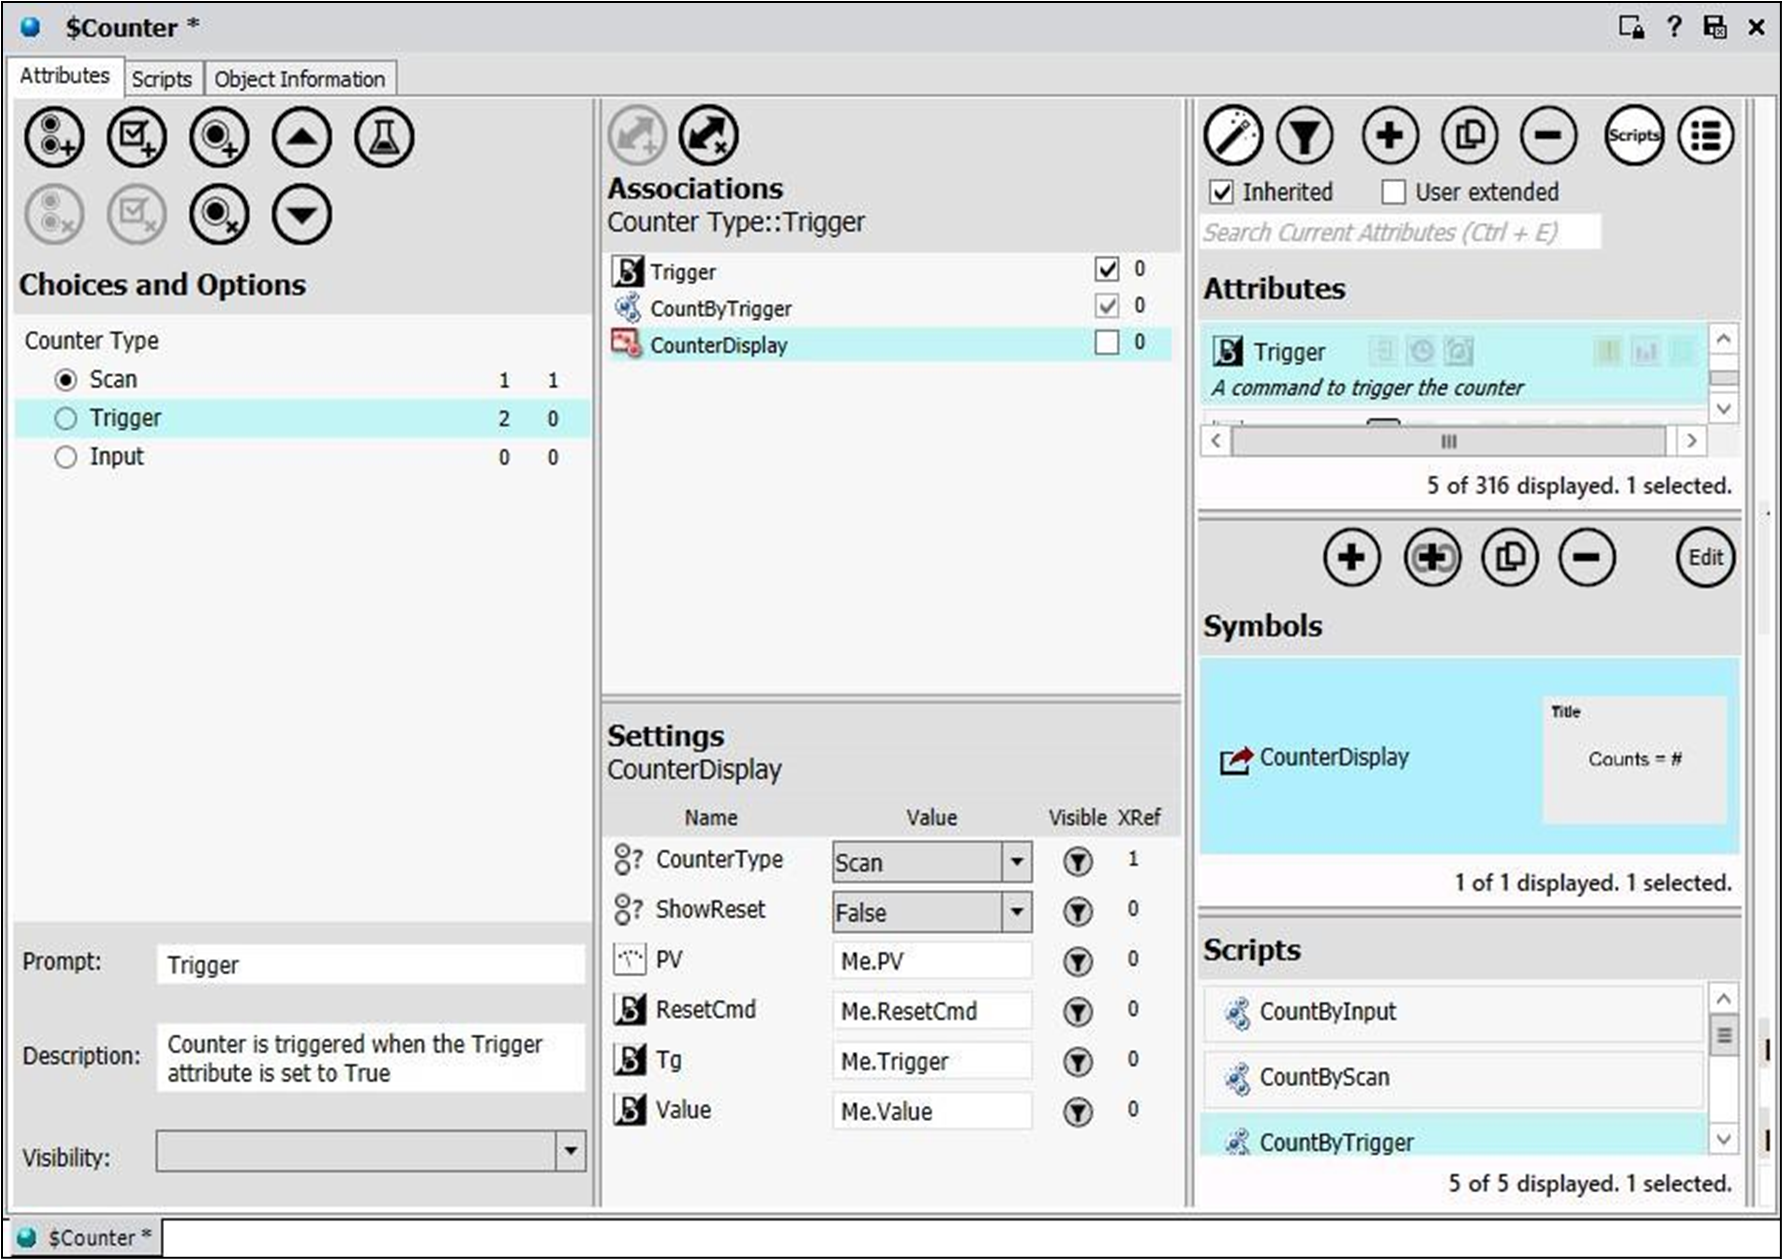
- In Associations, make sure CounterDisplay is selected.
- In Settings, set CounterType to Trigger.

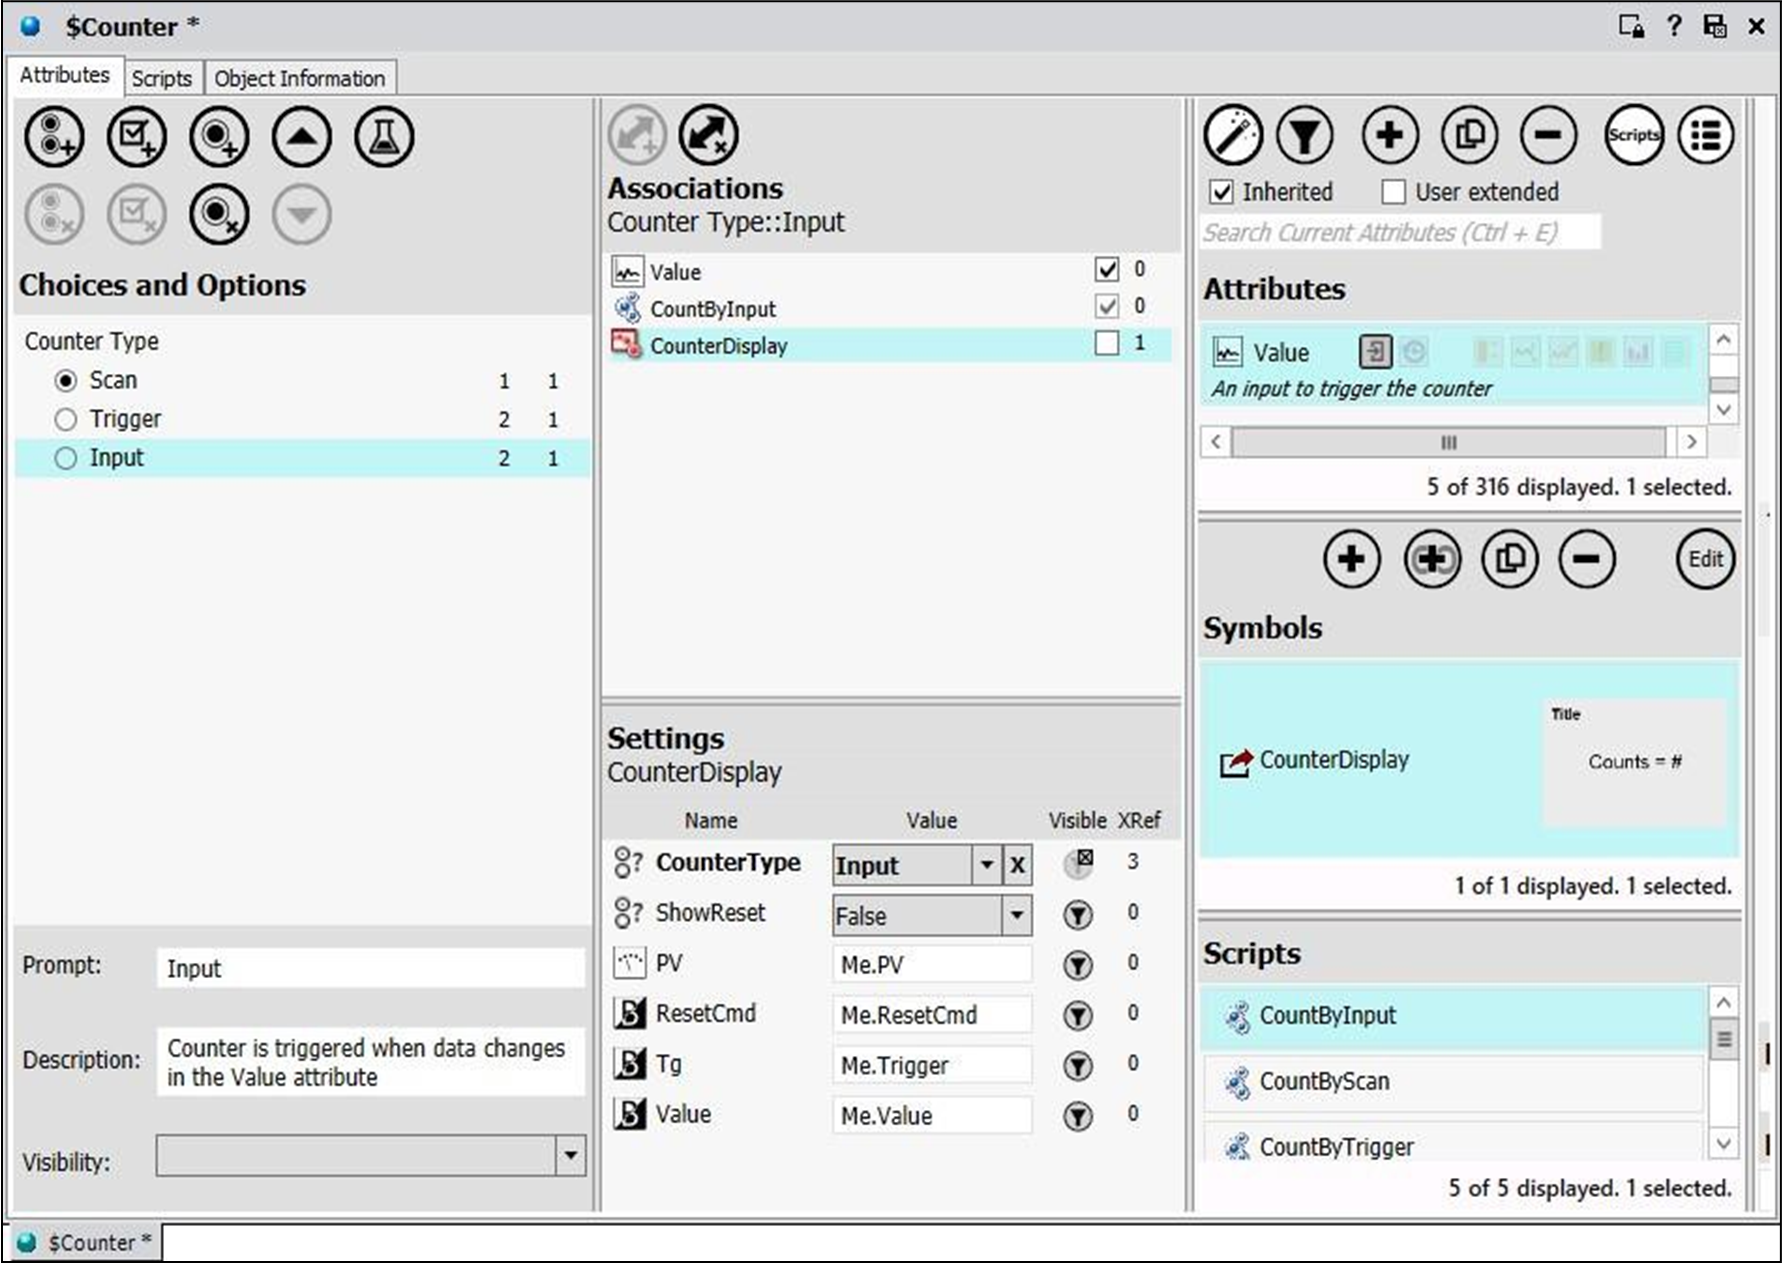
- In Choices and Options, select the Input Choice.
- In Attributes, select the Value attribute and drag it to the Associations pane.
- In Scripts, select CountByInput and drag it to the Associations pane.
- In Symbols, select CounterDisplay and drag it to the Associations pane.
- In Associations, make sure CounterDisplay is selected.
- In Settings, set CounterType to Input.
Add and Configure an Option
Now you will add an Option to show a reset button for the counter.
- In Choices and Options, click the Add Option button.
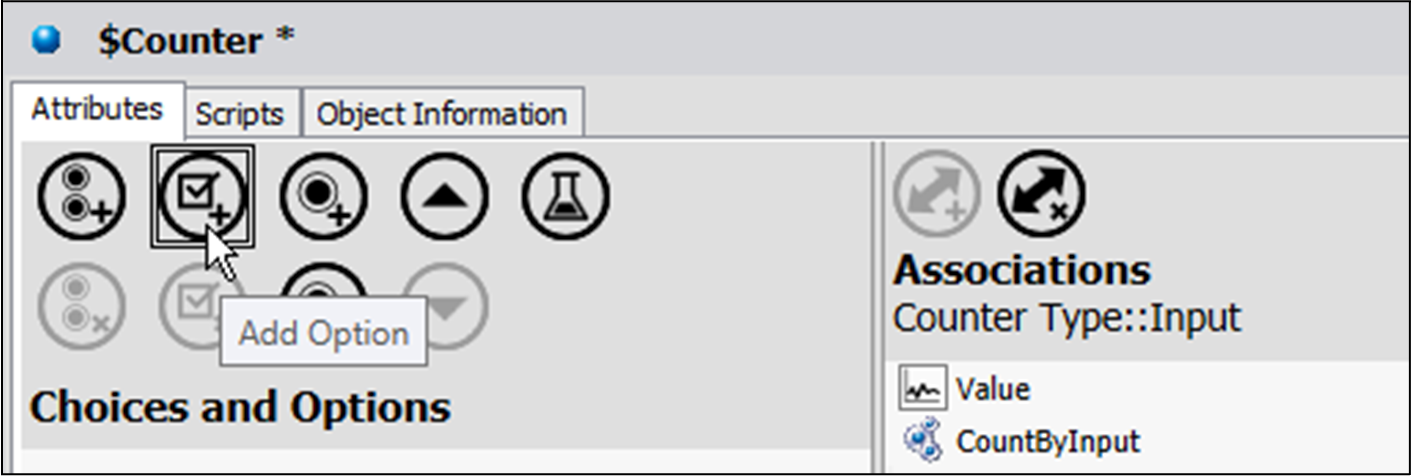
An option named Option #1 is added.
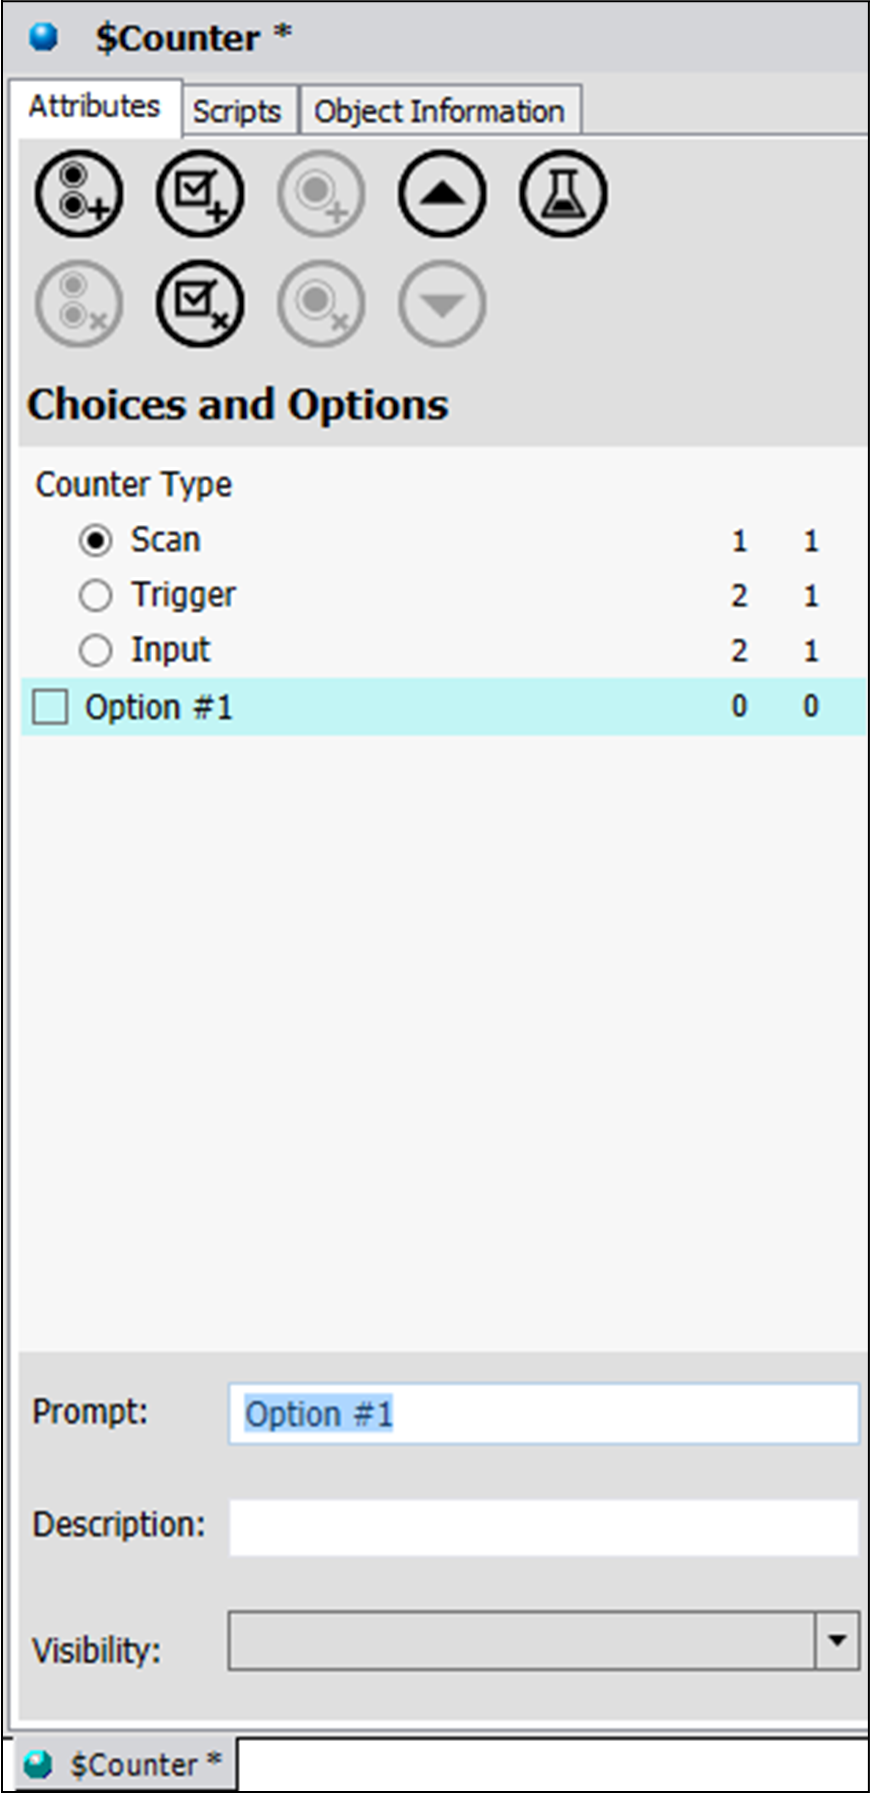
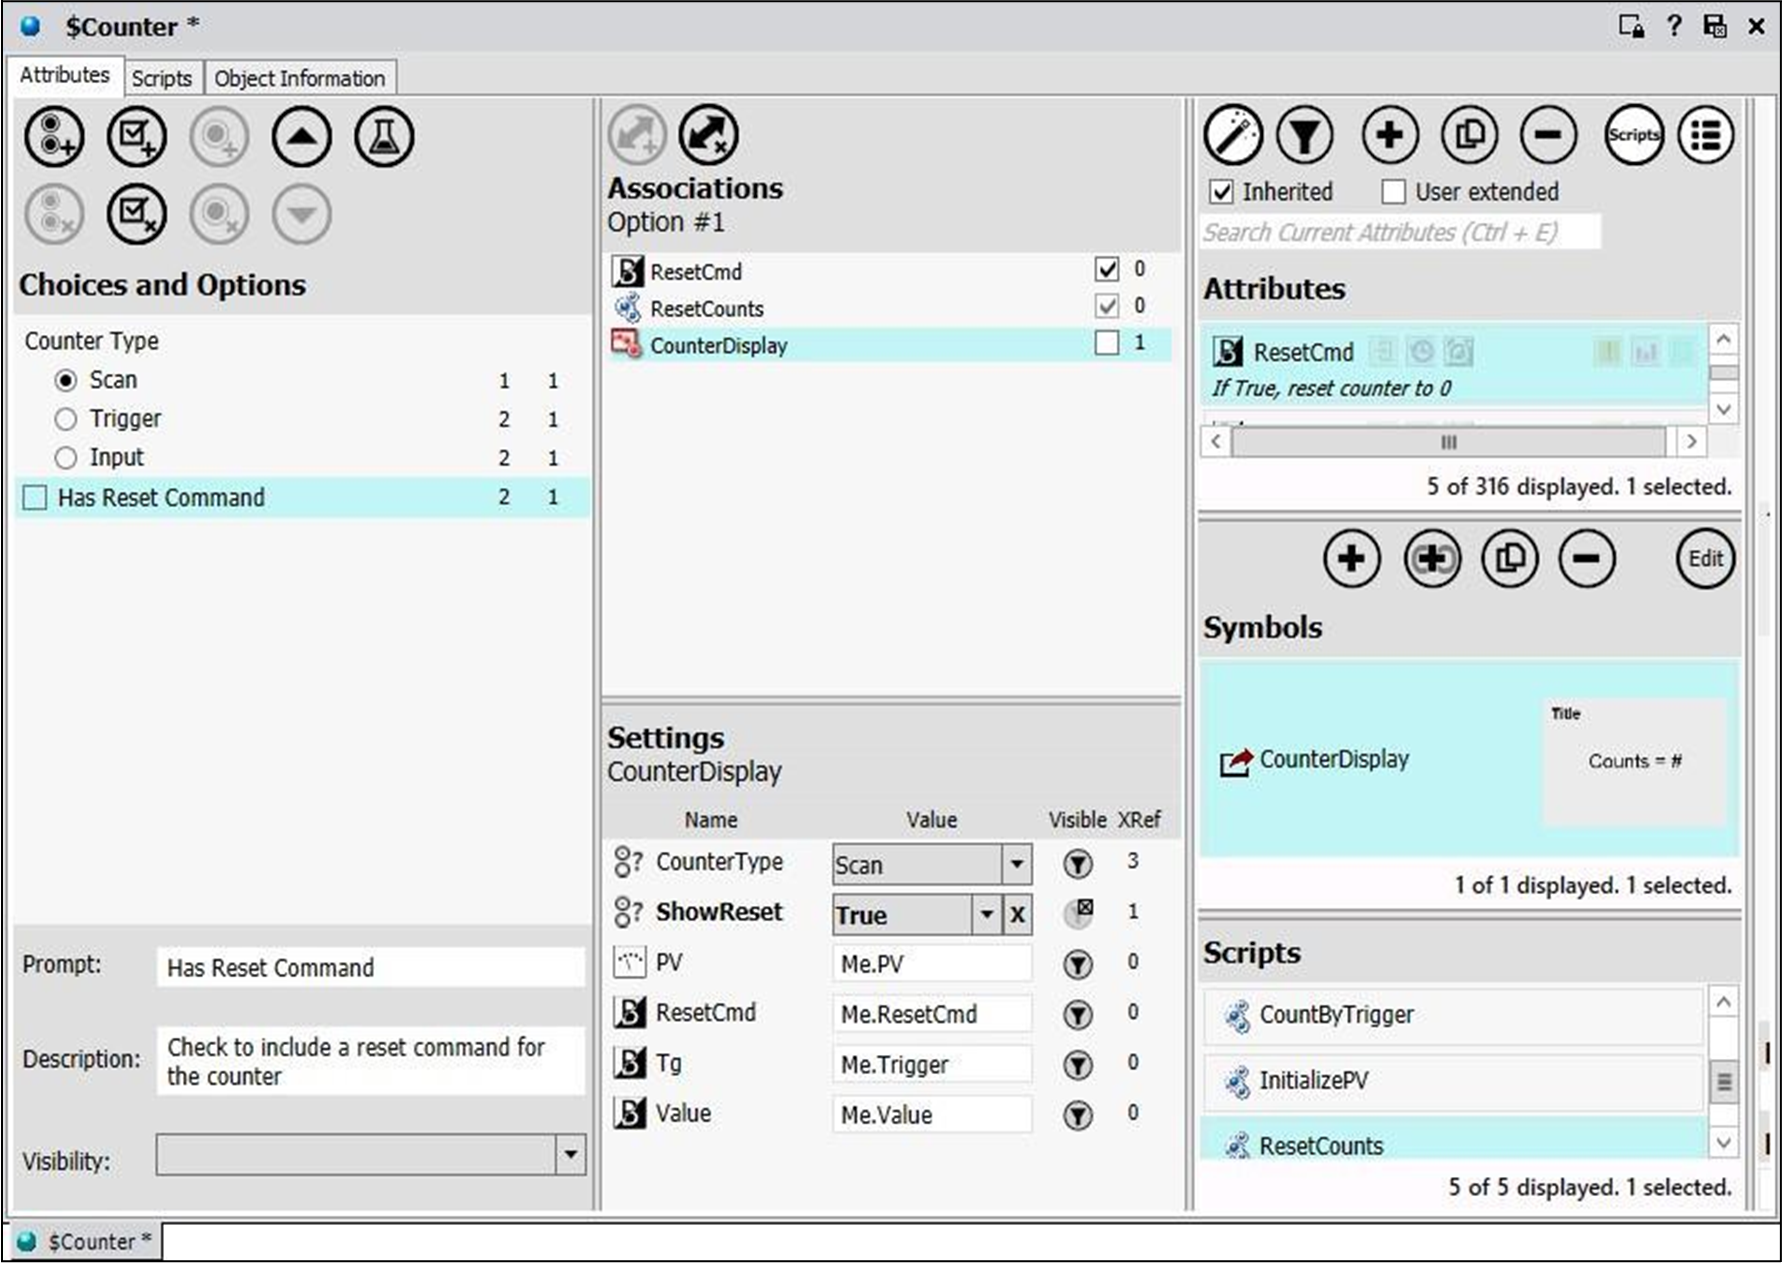
- With Option #1 selected, configure the option as follows:
Prompt: Has Reset Command Description: Check to include a reset control for the counter
- In Attributes, select ResetCmd and drag it to Associations.
- In Scripts, select ResetCounts and drag it to Associations.
- In Symbols, select CounterDisplay and rag it to Associations.
- With CounterDisplay selected, in Settings set ShowReset to True.
Test the Configuration
Finally, you will test what you have built.
- In Choice and Options, click the Test button.
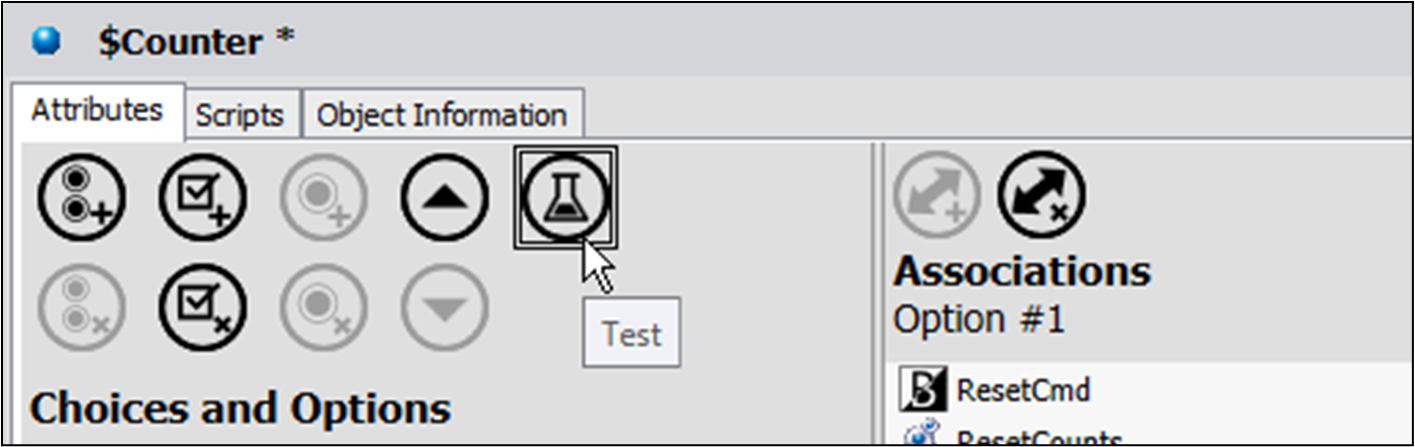
The display changes to testing mode.
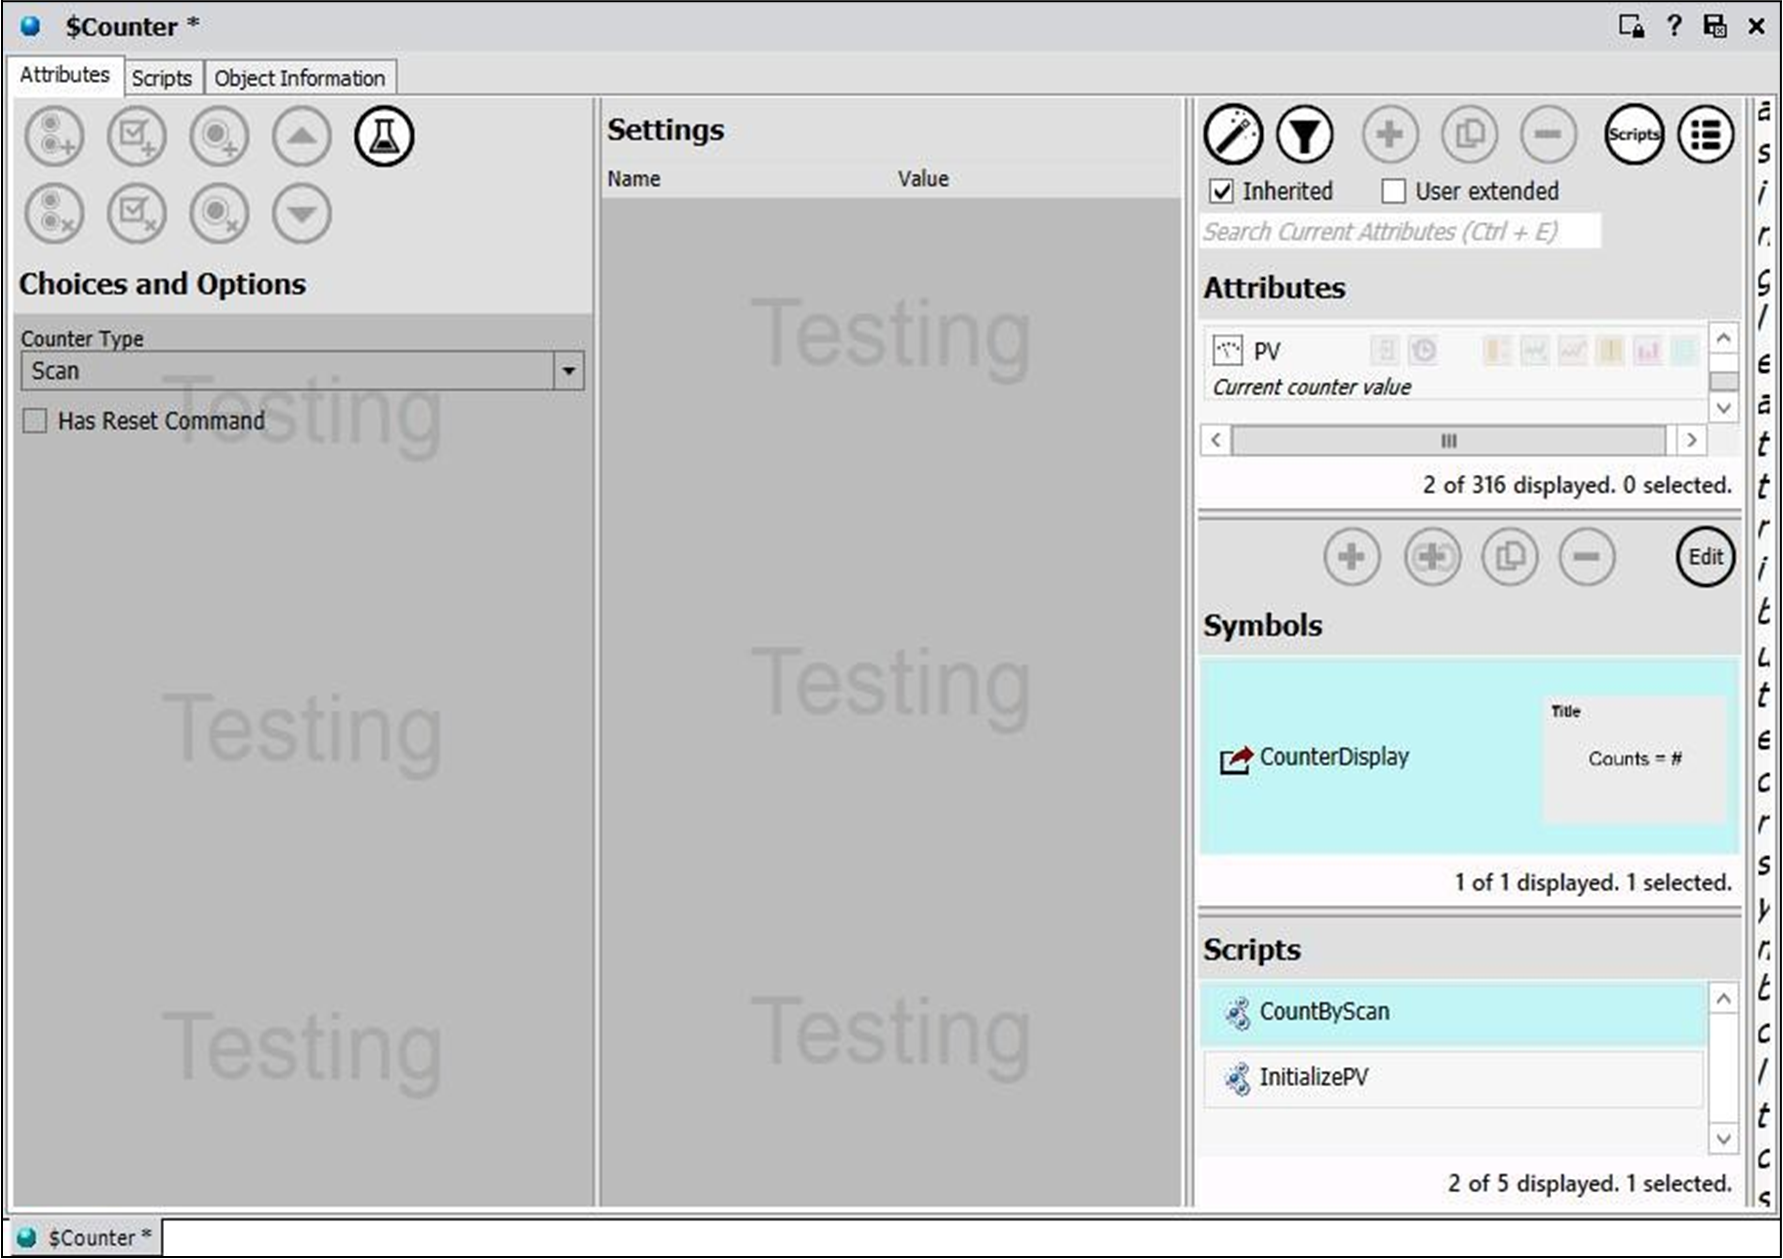
- In Choices and Options, select a different Counter Type and check and uncheck Has Reset Command to see the behaviors.For example, if you check Has Reset Command, you can see the ResetCmd attribute in Attributes list, a Reset button appears on the CounterDisplay symbol in the Symbols pane, and a ResetCounts script in the list of scripts.
- Click the Test button again to exit testing mode.
All Industrial Software Solutions Training Documents are provided "as is" without warranty of any kind.