

Using AVEVA License Server OFFLINE Activation
SUMMARY
AVEVA Licenses require license activation, a process whereby the authenticity of the license is verified against license records via the AVEVA License Activation Server and the license is bound to the license server from which the activation was initiated.
License activation requires communication over the Internet with the AVEVA License Activation Server. That communication can be either direct over the Internet (Online Activation) or indirect through a proxy computer (Offline Activation).
This Tech Note describes the process of activating an AVEVA license using OFFLINE activation.
You can also reference our Video Tech Note on Offline Activation for an overview of this process.
APPLIES TO
- AVEVA Enterprise License Server
PROCEDURE
- When purchasing a license for an AVEVA product, the deliverable that you will receive for your order will be an E-mail with multiple attachments – two PDF documents and a .zip archive. Select a machine to act as a License Server, then save and extract the .zip archive attachment to a location easily accessible from that server. The file extracted will be an XML file.
- When installing your AVEVA product, be sure to install the AVEVA Licensing components as well.
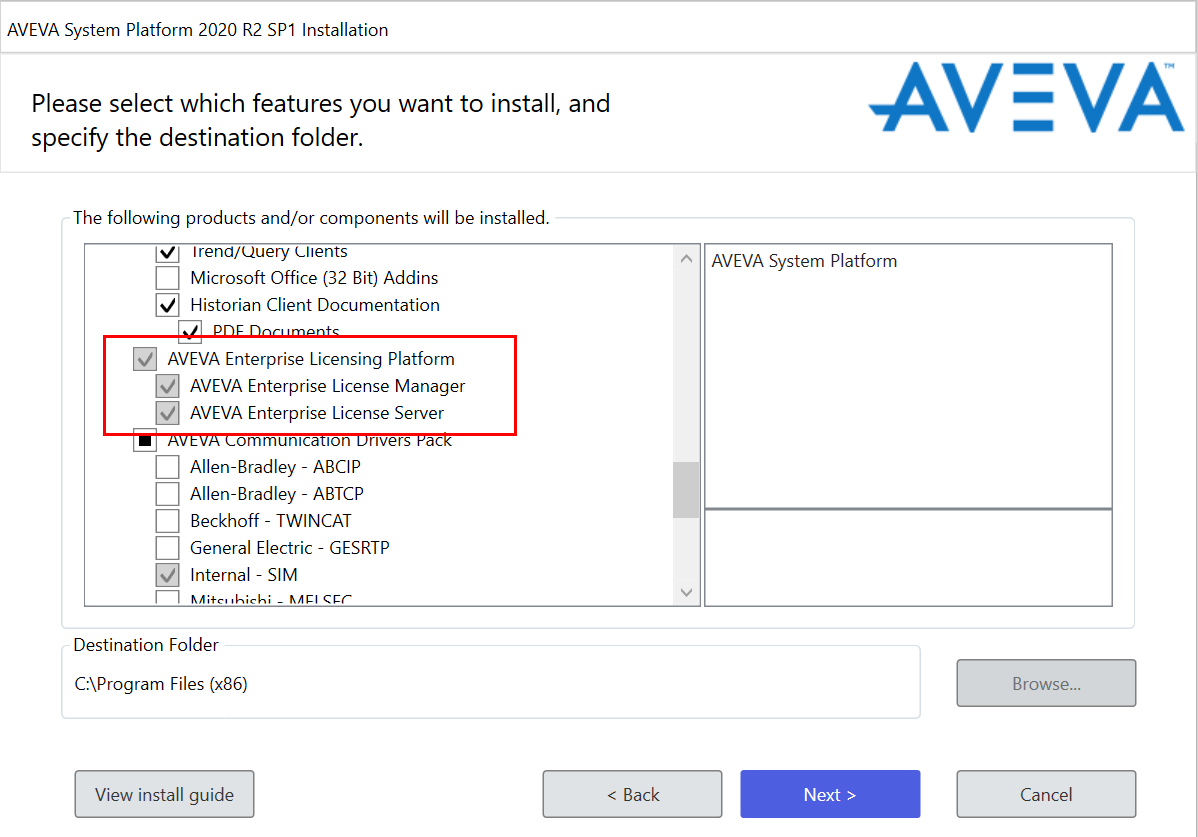
NOTE: For simplicity, the demonstration given in this tech note assumes both the License Server and the License Manager are installed on the same machine. If desired, those components can be split across multiple machines.
- Once the AVEVA products have been installed, you will need to run the Configurator. In addition to configuring any other installed AVEVA software, you will need to configure the AVEVA Enterprise License Server.
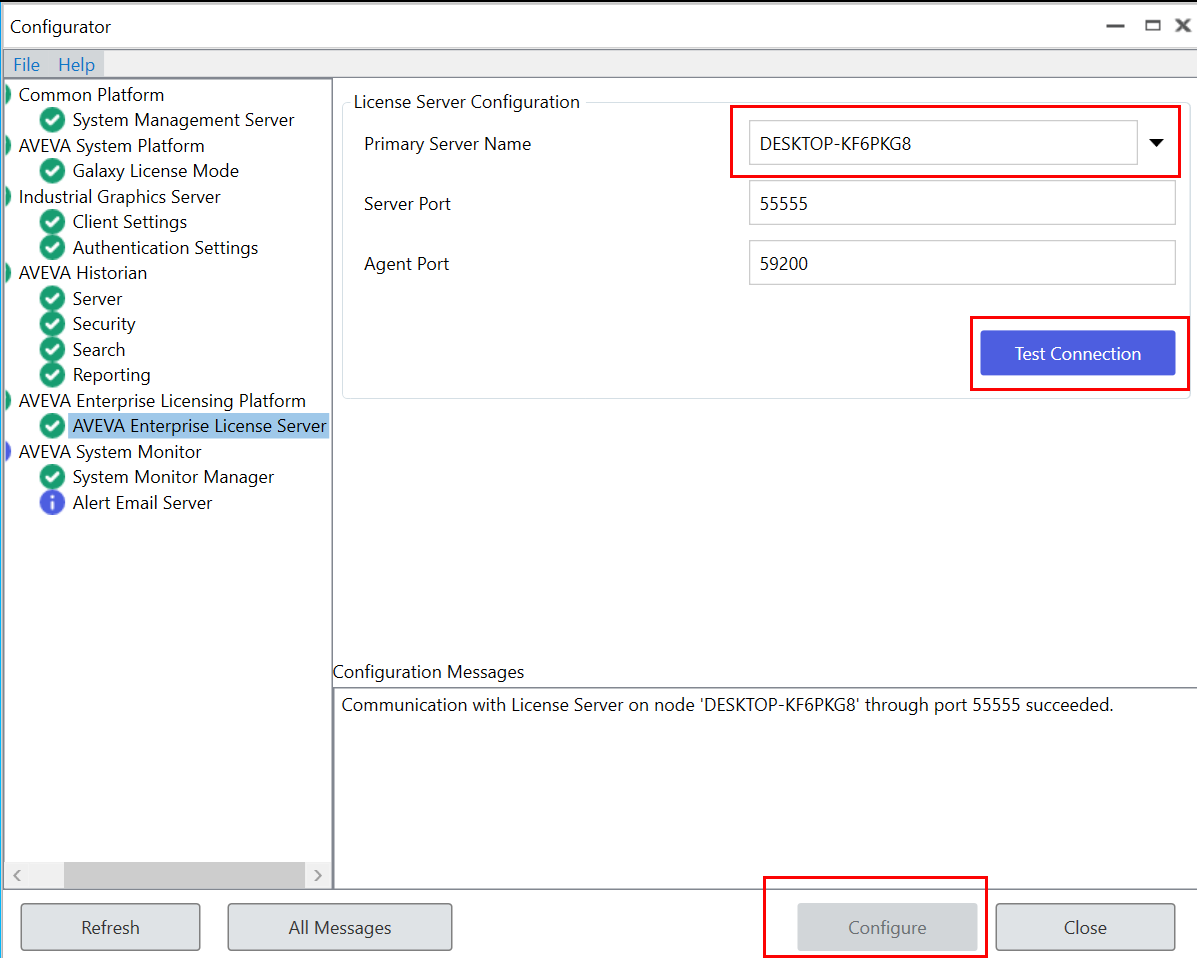
Enter the name of the computer where the License Server is installed, then click “Test Connection”. After a successful test, click “Configure”.
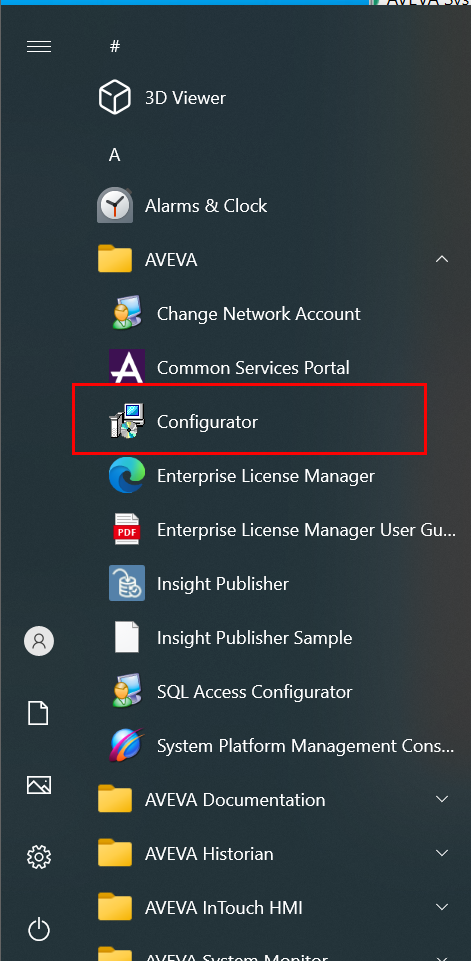
- To activate licenses on your AVEVA License Server, you must open and use the AVEVA Enterprise License Manager. The License Manager can be launched from Start > AVEVA > Enterprise License Manager.
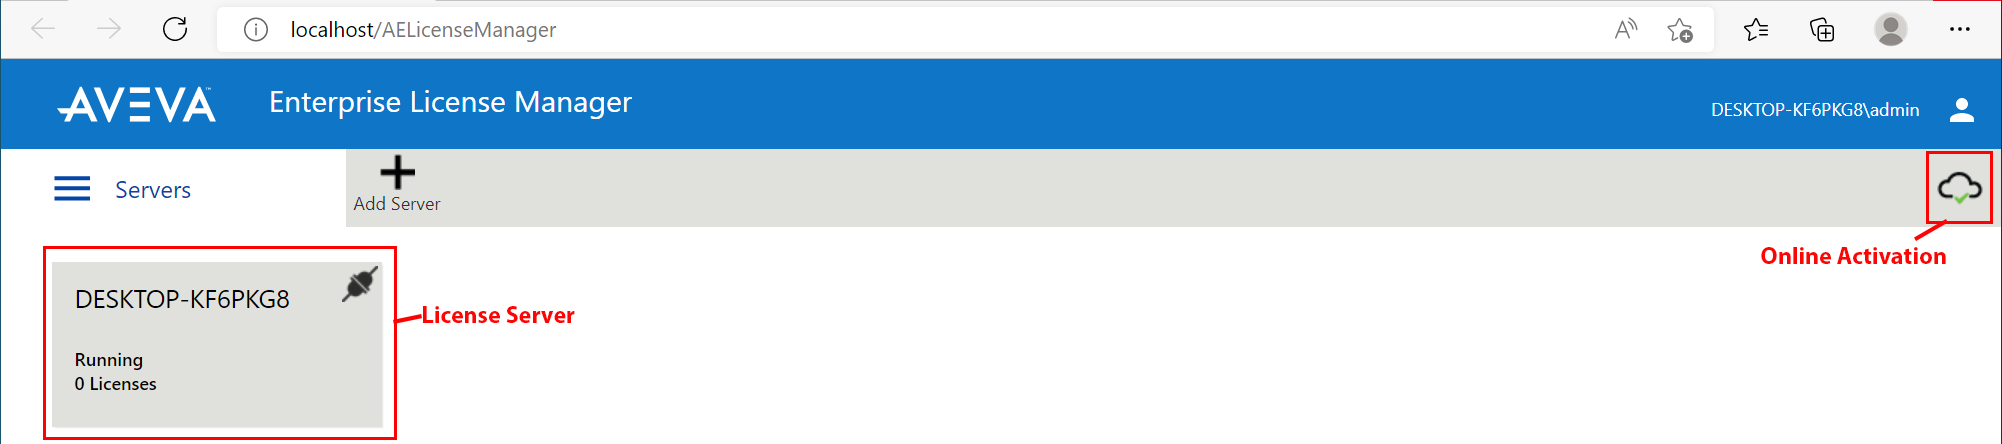
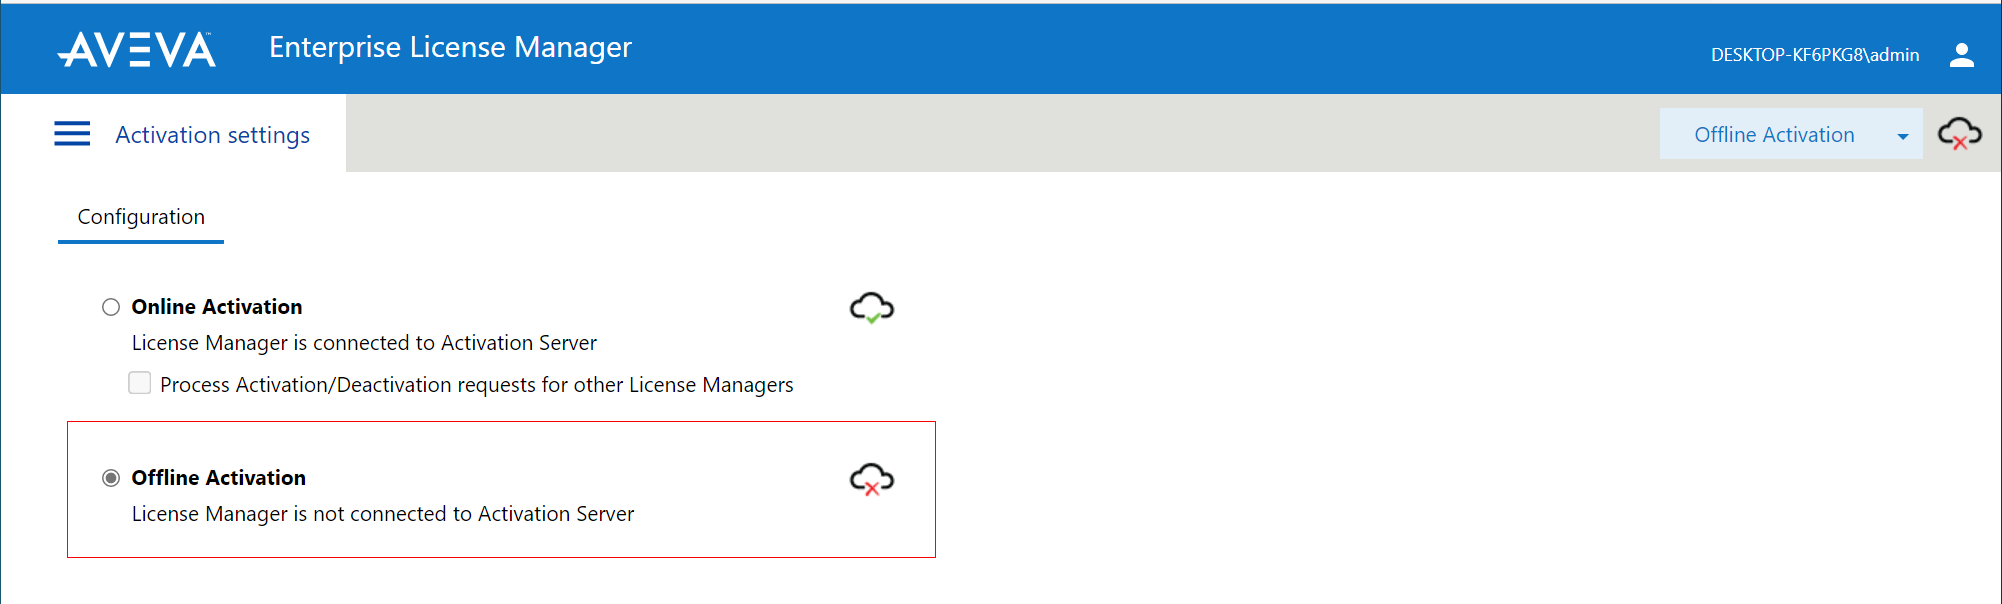
- On opening the License Manager to the Servers page you should see the local License Server listed. It will have the same name as the local computer. The License Manager is set, by default, to use Online Activation, which can be verified by the cloud icon in the top right corner. If there is a green check mark in the cloud, Online Activation is enabled. If there is a red X in the cloud, the License Manager is set for Offline Activation.
- If the server is set for Online Activation, you will need to change it. Click the menu icon in the top left corner and select Activation Settings.
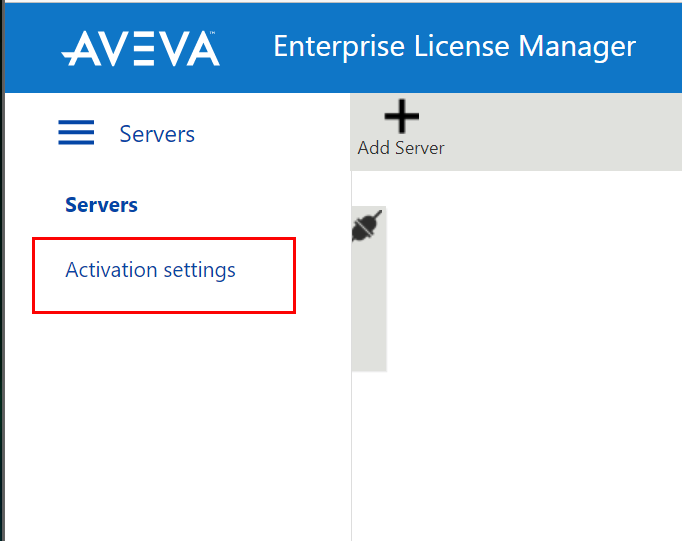
- On the Activation Settings page, select Offline Activation.
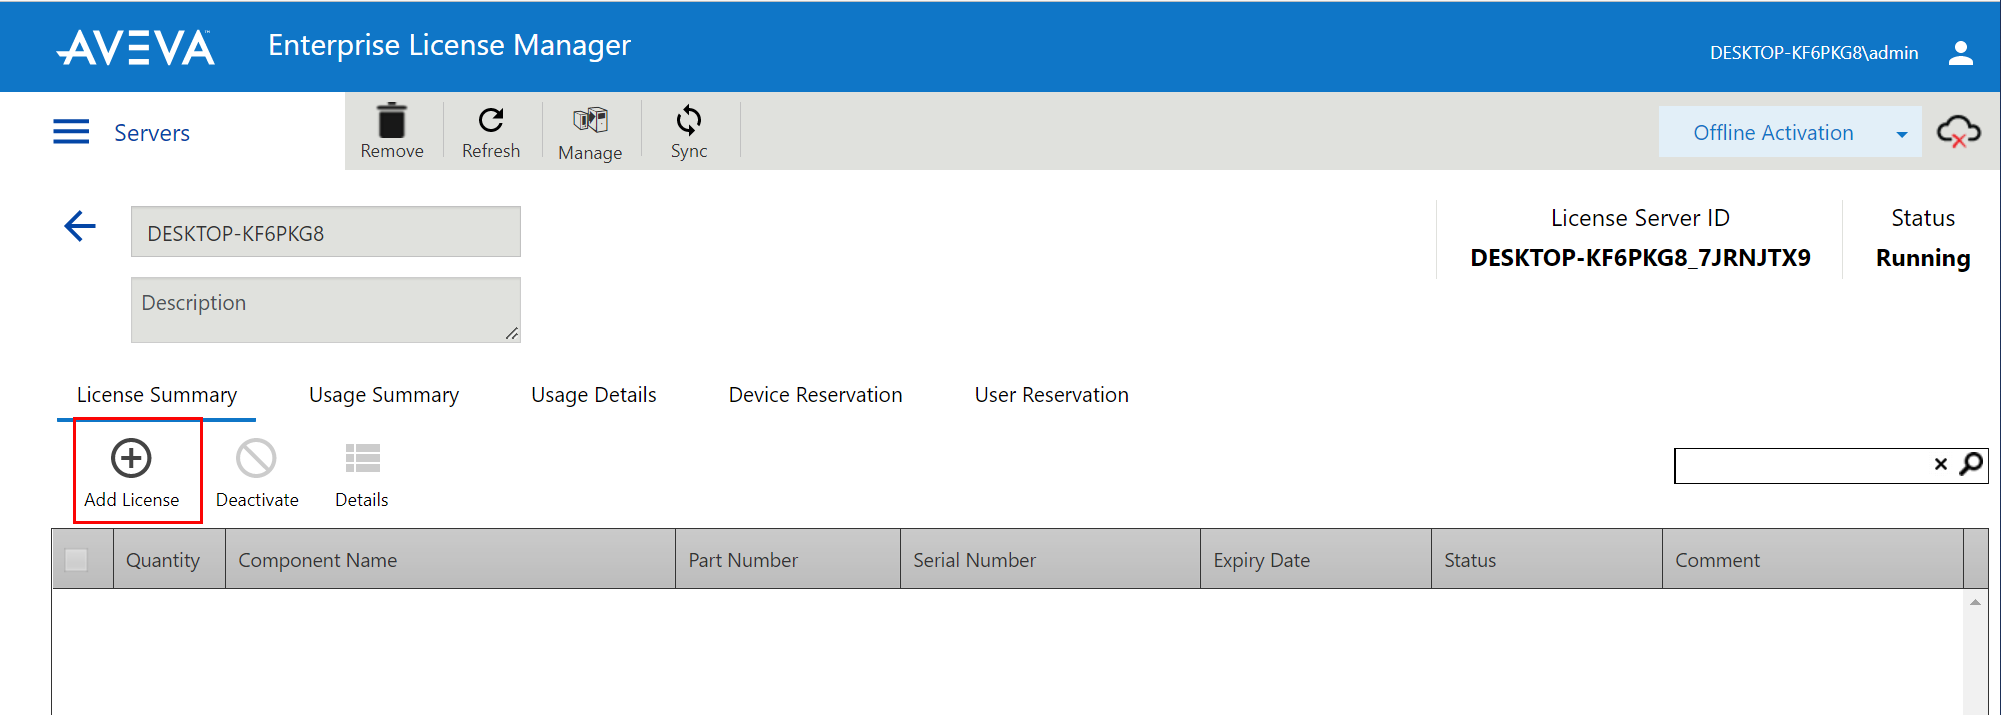
- Click on the server card to open the license activation page. Click on the Add License button to select a license to activate.
- Select the menu icon again and select Servers to return to the server page.
- The License Activation panel will slide out from the right side of the screen. Click the ellipses button next to the Browse field, then browse to and select the Entitlement XML file that you received in Email (Step 1). As soon as you select the file, the Activation Codes included in the entitlement are loaded into the License Activation panel.
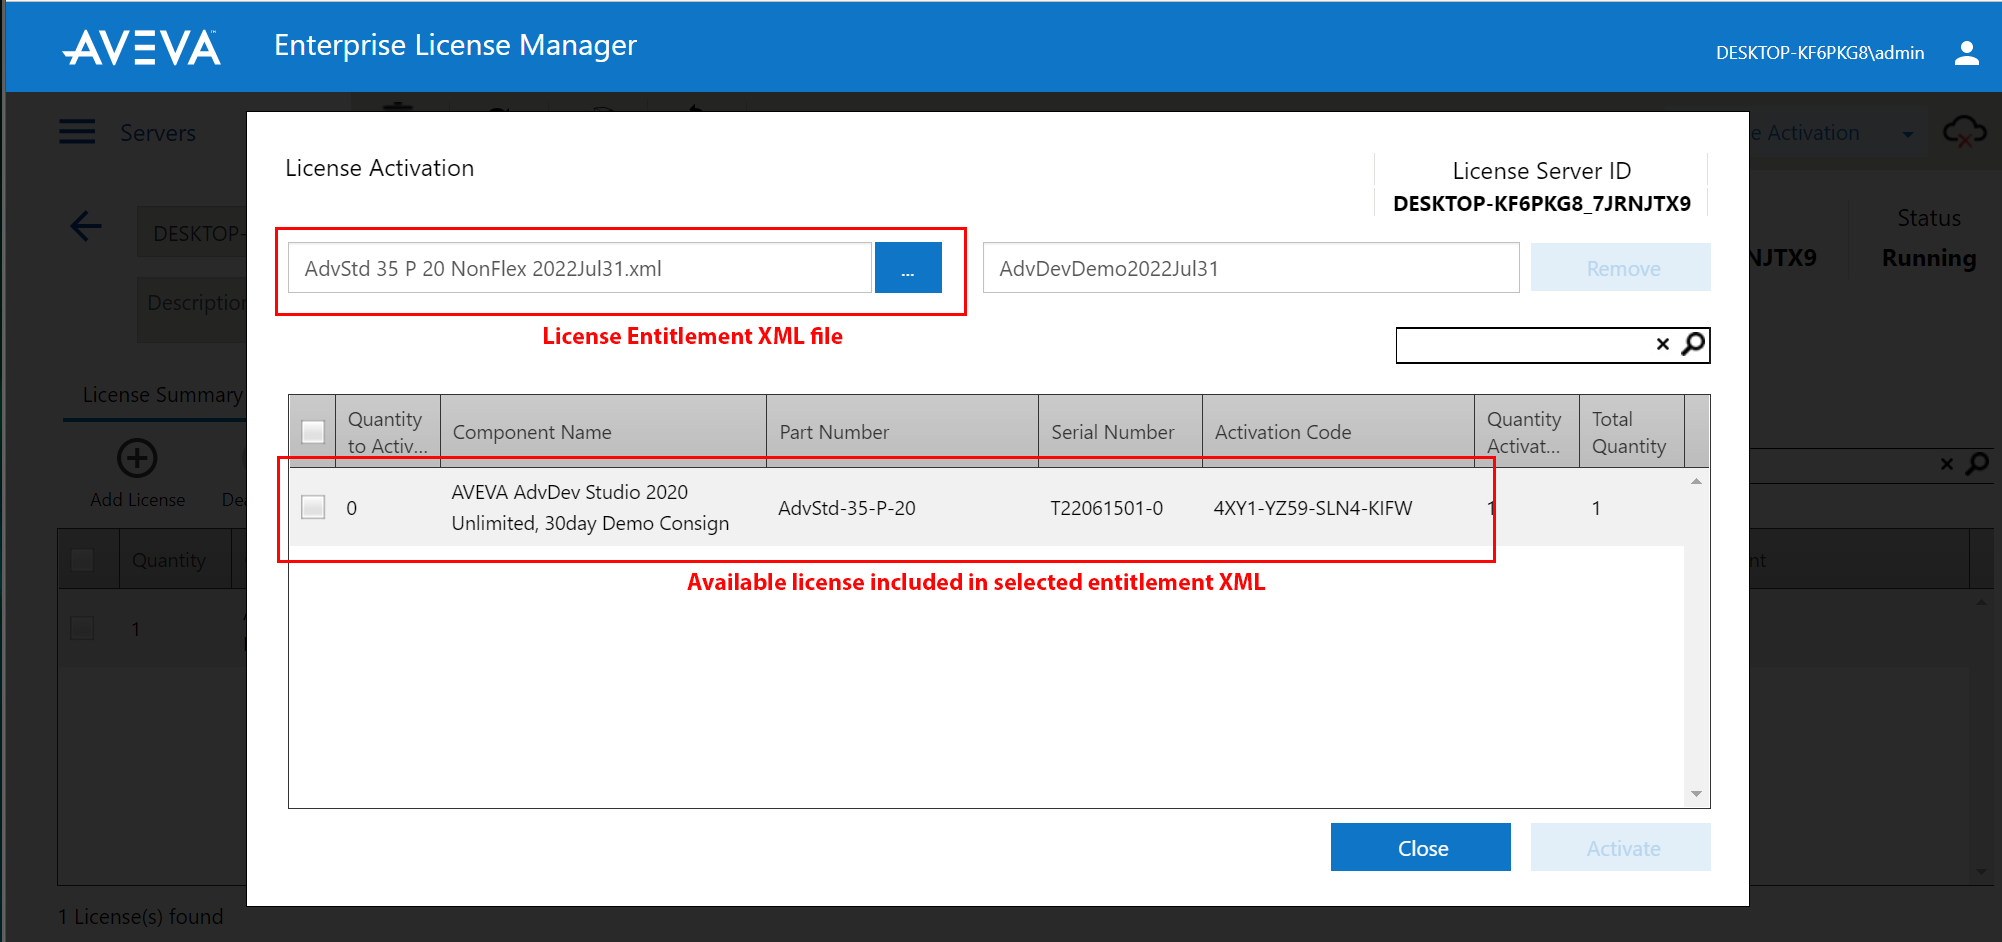
- Click on the box next to the license or licenses you wish to activate. A check mark will fill the box, indicating that the license has been selected. If the entitlement includes multiple licenses / activations, enter the quantity that you would like to activate on this server.
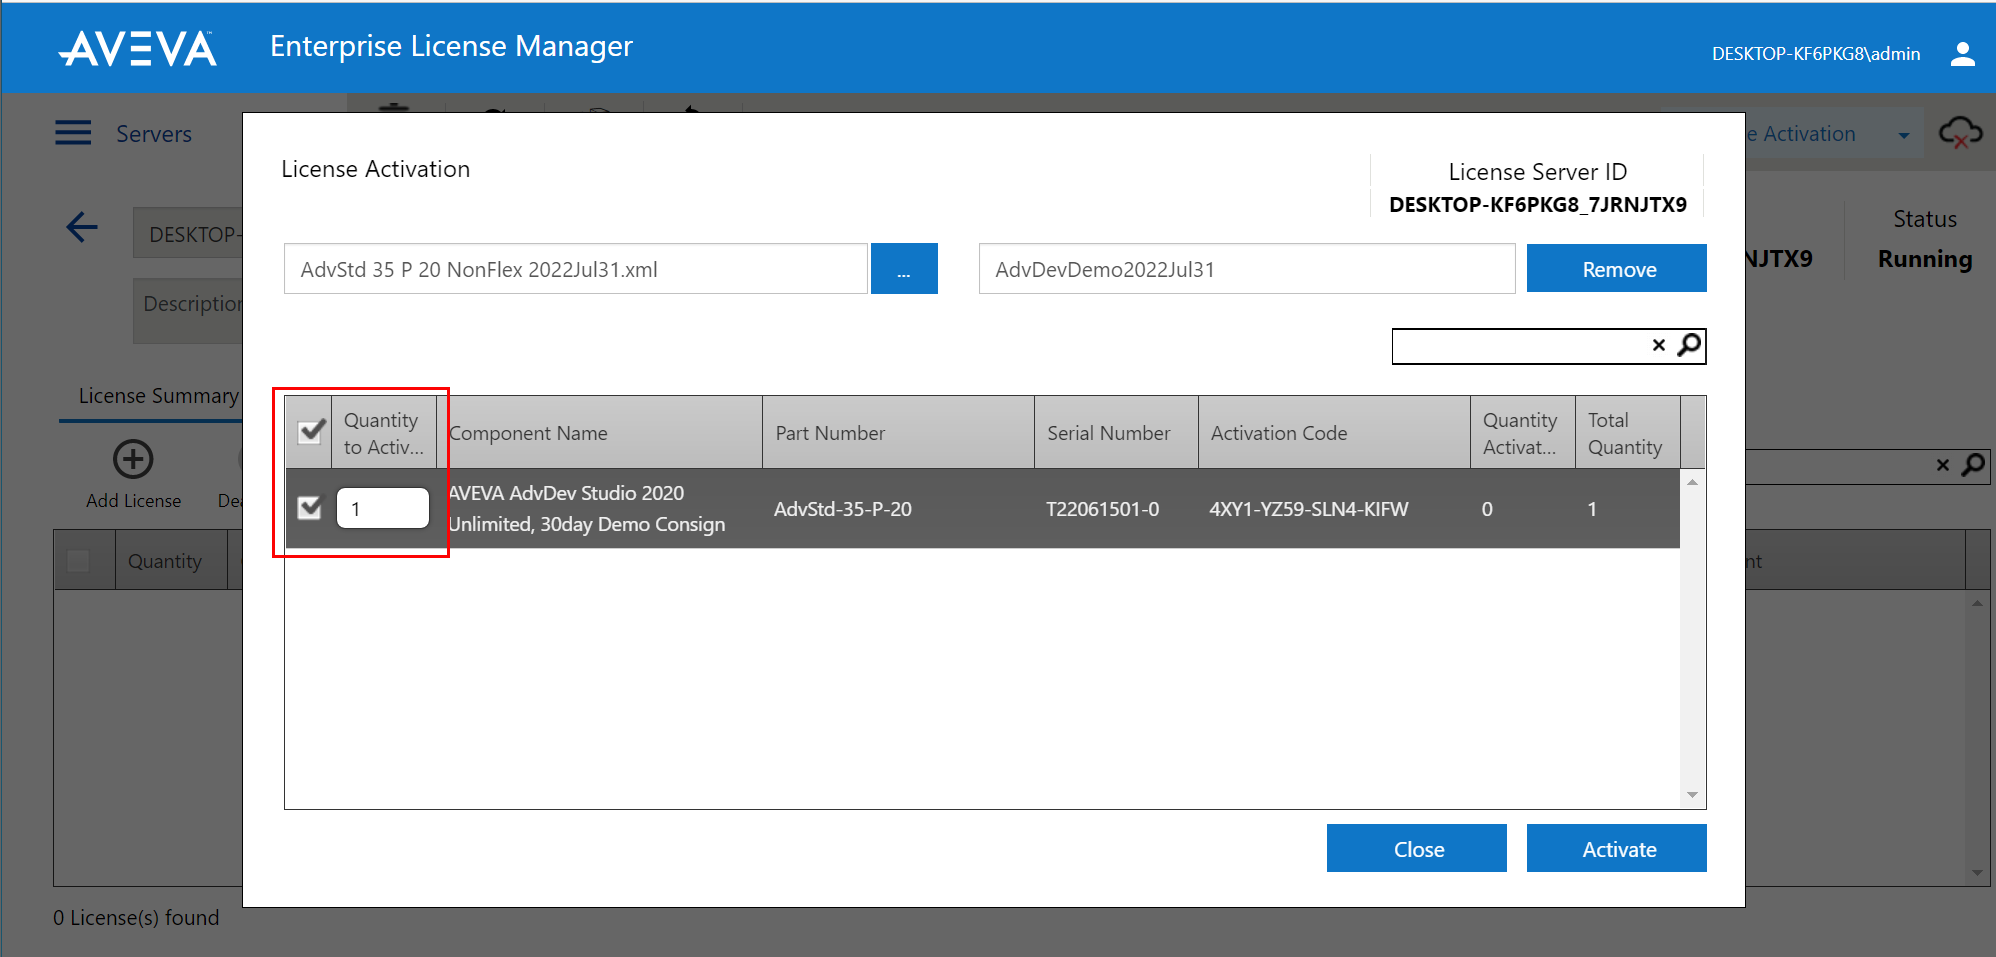
- Click the Activate button, after a short pause, the license will show in the License Manager with a status of “Pending Activation Request”. Additionally, the Offline Activation select menu will be highlighted yellow.
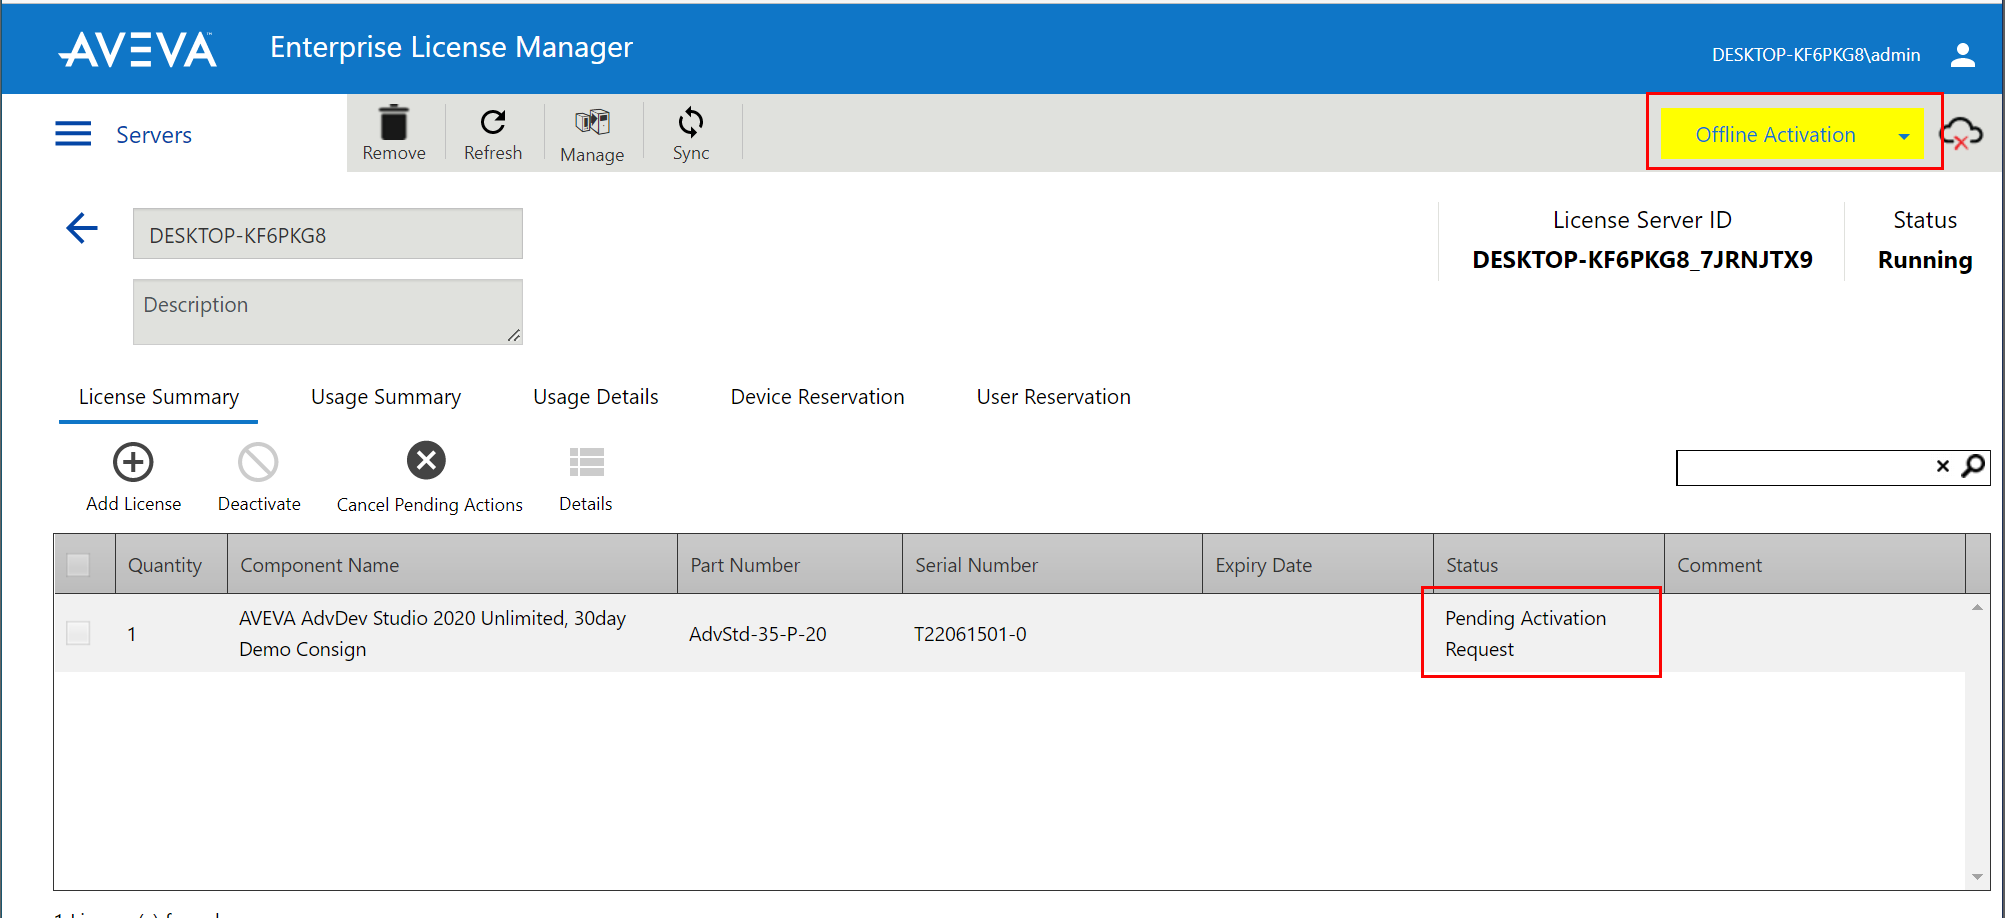
- Click the down arrow on the Offline Activation/Deactivation menu and select Request Activation/Deactivation.
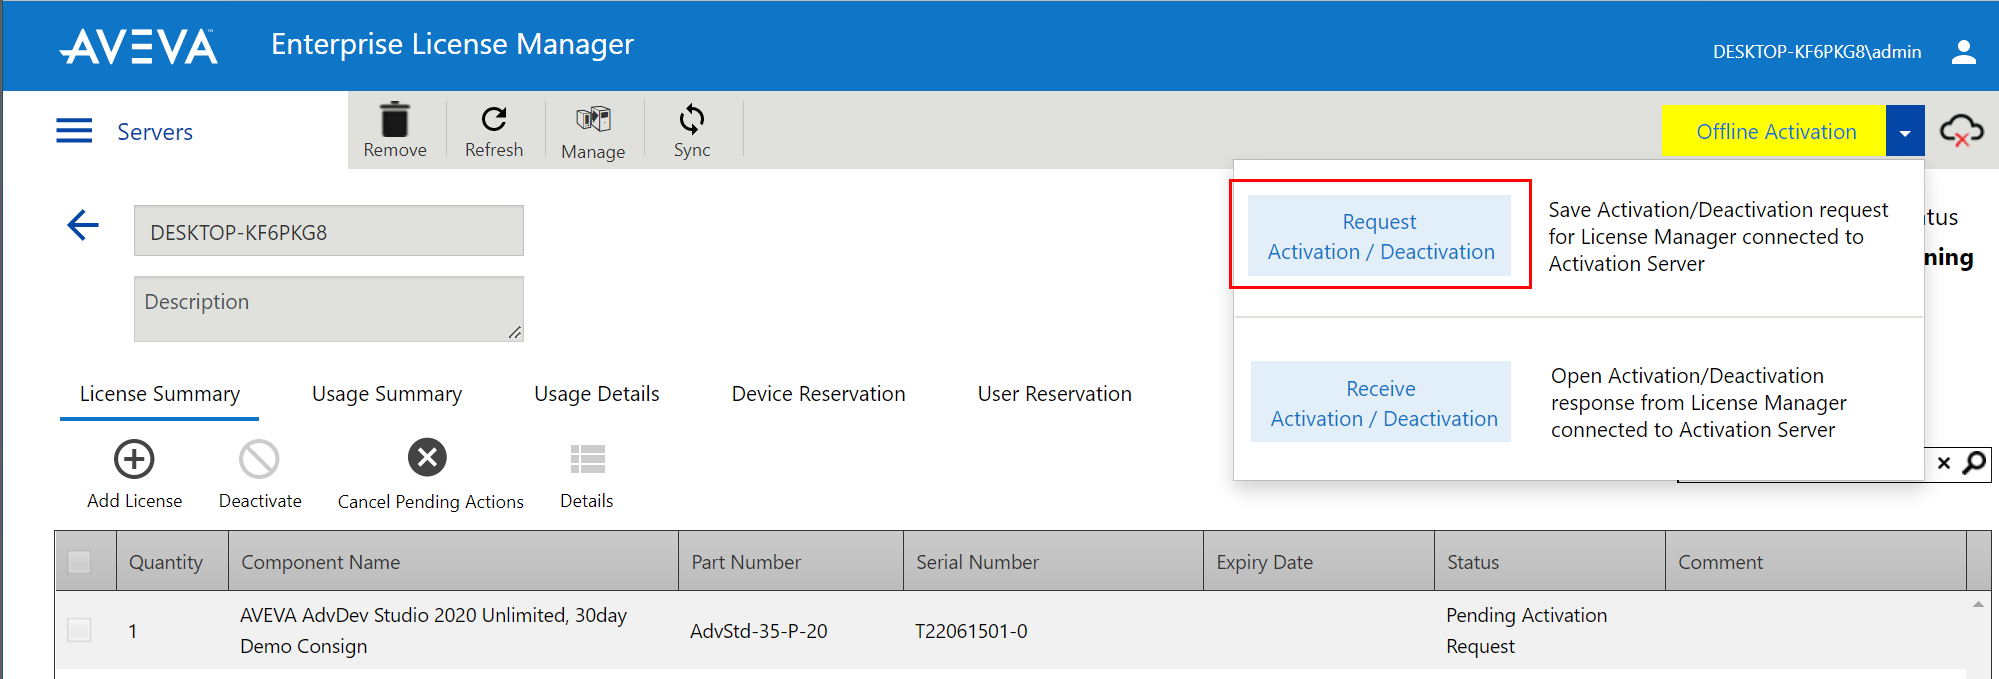
- Click Yes to confirm the activation.

- You will be prompted to download a file. The file’s name begins with “send” and ends with the .sync extension. This is the send.sync file. Save this file to a flash drive or other portable media.
- Locate a computer that has an open connection to the Internet. Insert your portable media. Open a browser (Edge, Chrome or Firefox) and navigate to URL http://licenseactivation.wonderware.com .
- Click the Choose File button. Browse to the location of your portable media and select the send.sync file. Enter the Captcha text seen in the image, then click Upload File.
NOTE: Make sure the Captcha code on the License Activation website has 5 characters and not 4 in the image. If it has 4, regenerate the code until it has 5.

- After a short pause, you will be prompted to save a new file. The file name begins with “recv” and has the .sync extension. This is the recv.sync file. Save this file to your portable media.
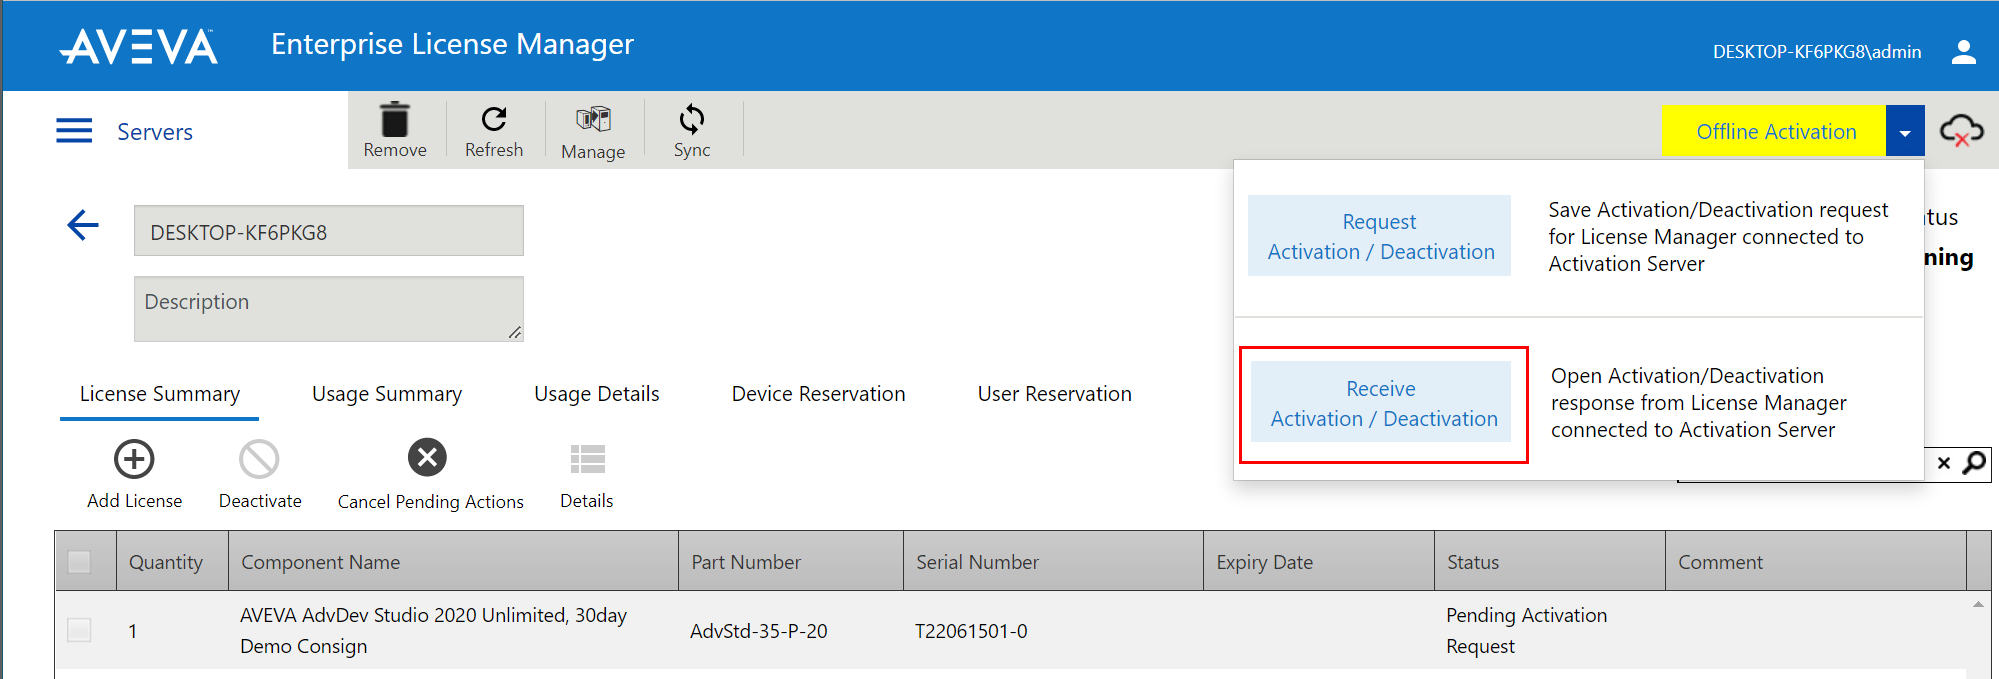
- Return to the offline License Server machine. Insert your portable media. On the Offline Activation select menu, select Receive Activation/Deactivation.
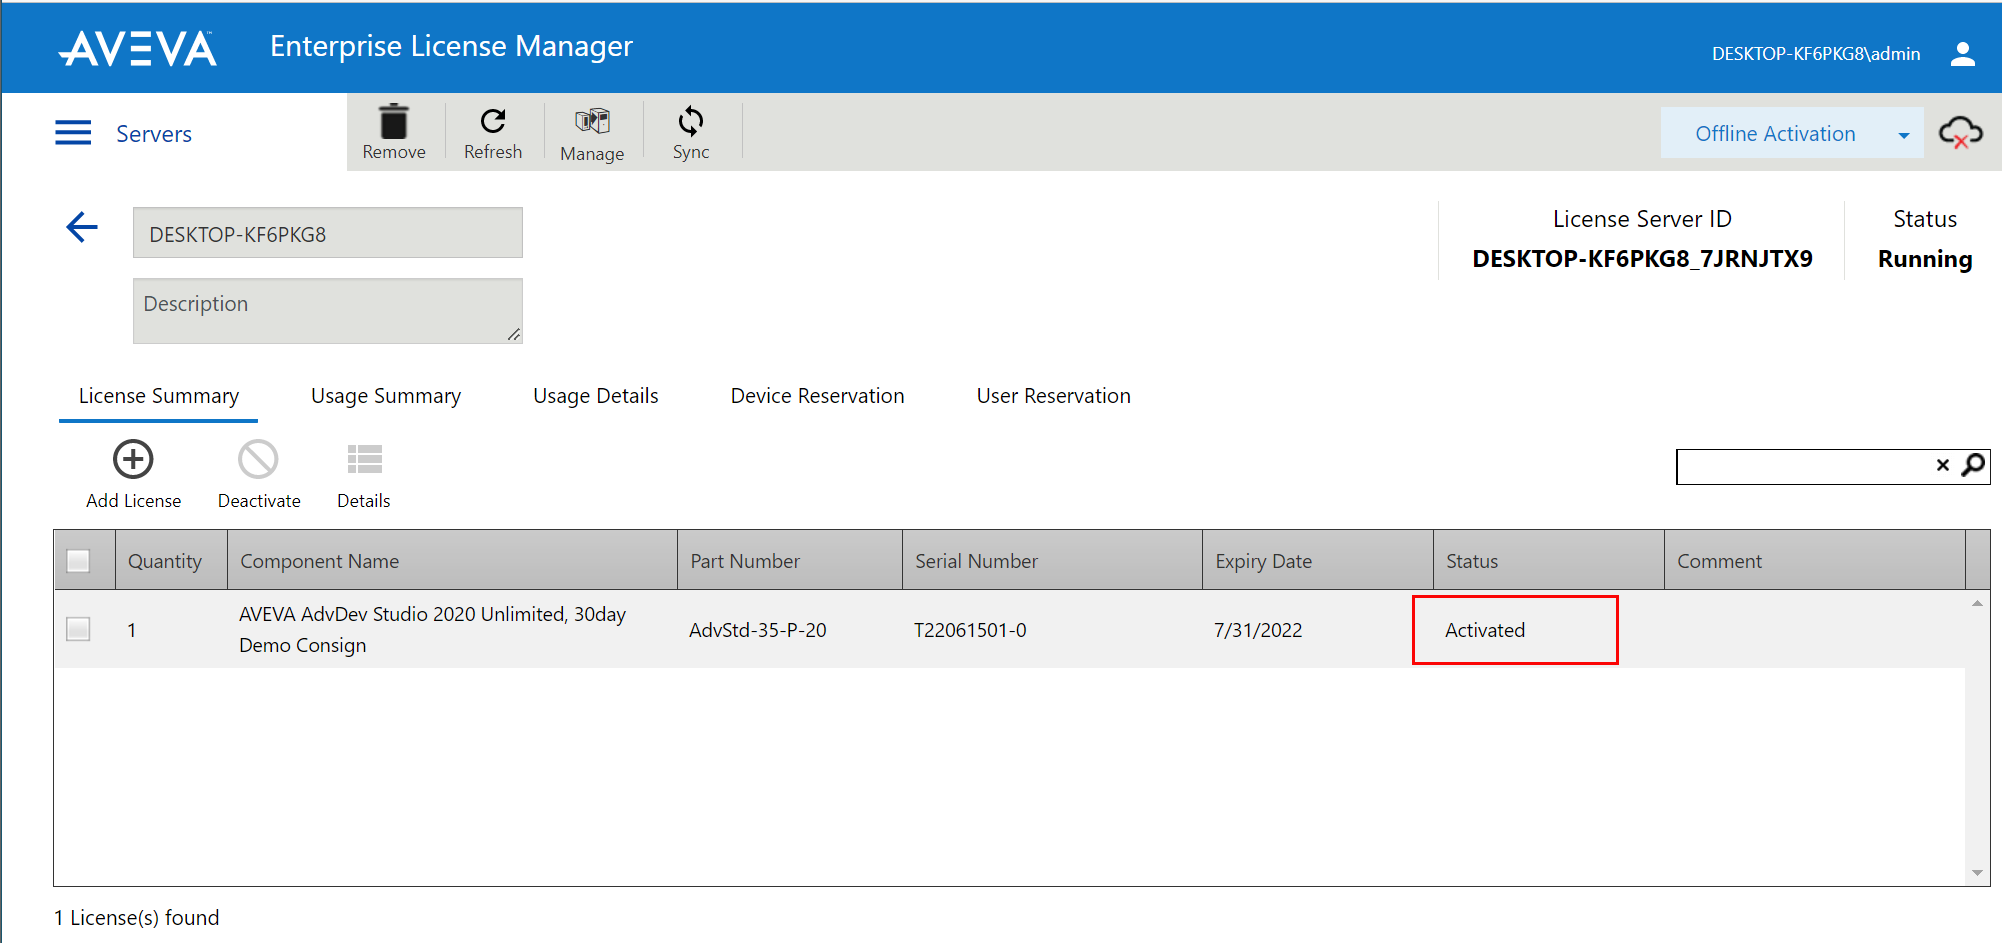
- Browse to your portable media and select the recv.sync file. After a short pause, the license server will refresh and show the license as activated.
All Industrial Software Solutions Tech Notes are provided "as is" without warranty of any kind.