

How to Implement Time Considerations with AVEVA Historian and IDAS Systems
SUMMARY
When working with AVEVA Historian and Remote IDAS, it is important to take time into serious consideration. With IDAS historical data storage there is a term called the “Real-Time Window“, which is a period of time behind and ahead of the AVEVA Historian system time, where values coming into the system are considered “valid” and will be stored properly.
With AVEVA Historian, the real-time window can be any value coming into the system between -30 seconds and +999 milliseconds. Time offset and discarded data can be a result of improper time synchronization. The purpose of this document is to help identify time issues between your AVEVA Historian and remote IDAS machines and correct them.
NOTE: This does not apply to MDAS storage. MDAS design is specific to late data. For the purposes of this document, we are using a local IDAS. In practice, these steps will actually apply to a Remote IDAS system (i.e. where the IDAS is not installed on the same node as Historian).
APPLIES TO
- AVEVA Historian (previously known as IndustrialSQL Server or InSQL) – all versions
- Remote IDAS Systems
CONDITION
If you are experiencing Time Synchronization Issues, you will see messages like the following in your System Platform Management Console (SMC) logs:
Time Sync Warning Message Type 1
Attempt to store values in the future; timestamps were overwritten with current time (WINDOWS10VM, 242, 2022/04/19 12:21:12.108, 2) [WINDOWS10VM; pipeserver.cpp; 2073; 318530]
Where 2022/04/19 12:21:12.108 is the current time on the Historian which was used to overwrite the timestamp by the source, and 2 is the time, in seconds, that the supplied timestamp was ahead of the server time
Time Sync Warning Message Type 2
Values in the past did not fit within the realtime window; discarding data (WINDOWS10VM, 242, 2022/04/19 12:21:12.108, 2022/04/19 12:27:13.714) [CLVSRVR04; pipeserver.cpp; 2629; 3]
Where WINDOWS10VM is the node sending data, 242 is the wwTagKey value for the tag with the old timestamp, 2022/04/19 12:21:12.108, is the timestamp of the value received by the Historian, and 2022/04/19 12:27:13.714 is the current time on the Historian.
PROCEDURE
- You’ll first need to identify the problem topic. You can do this using the wwTagKey parameter from the error messages. In our case this is 242.We can determine this by running a query against the Runtime database (DB). First, open up SQL Server Management Studio and connect to Historian, then create a new query in the Runtime DB.

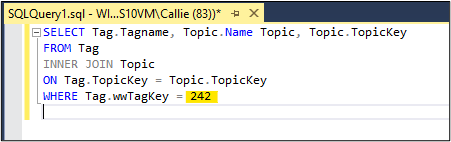
- Make sure you are running the query against the “Runtime” database, and then enter a query similar to the query below. When finished with the query select “Execute“.
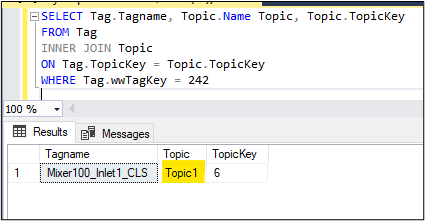
SELECT Tag.Tagname, Topic.Name Topic, Topic.TopicKey
FROM Tag
INNER JOIN Topic
ON Tag.TopicKey = Topic.TopicKey
WHERE Tag.wwTagKey = <wwTagKey parameter from Step 1 above>
- In the results, take note of the Topic.
- Open the SMC Historian Configuration, and then navigate to the IDAS. Locate the topic in question and take note of the node name for the topic.
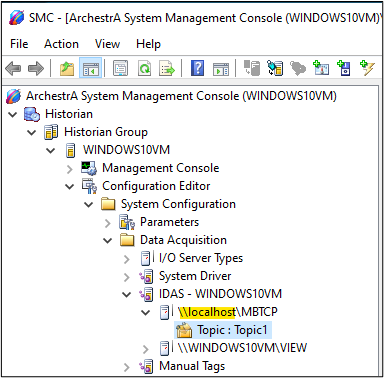
- Now that we have identified the computer name for the Topic in question, we can start the process of synchronizing the time between the IDAS node and the Historian node.
Note: ALL steps from this point forward will be configured on the remote IDAS system.
Begin by navigating to the directory where you want to create the batch file. When ready, create a new text document.
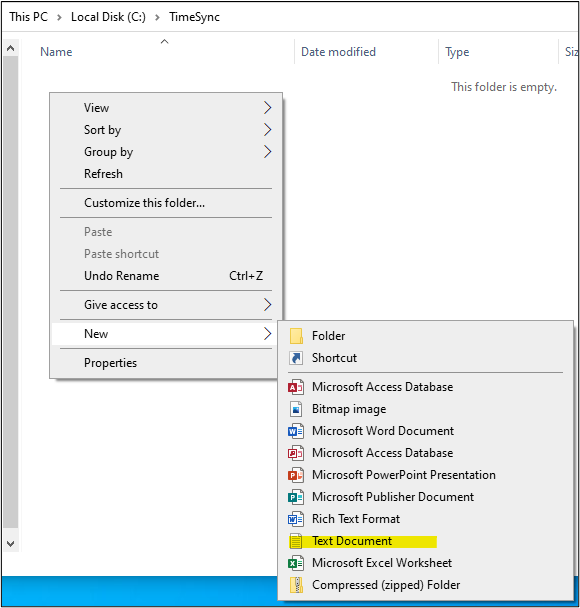
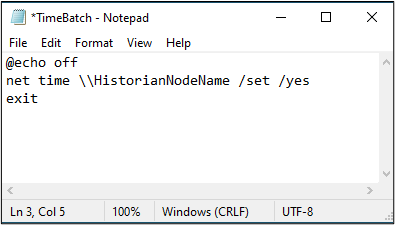
- Open a text editor like Microsoft Notepad. Enter the following script:
@echo off
net time \\HistorianNodeName /set /yes
exit
When finished, save and close the editor. Make sure to use the proper HistorianNodeName when you implement this script.
- Right-click on the newly created script file and select “Properties“.
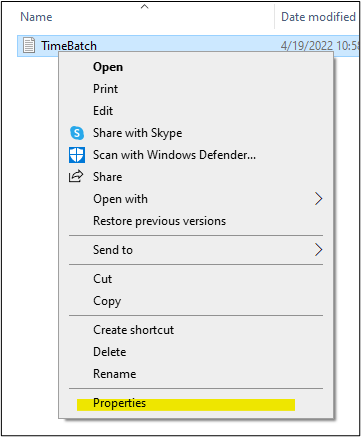
- In the first editable text field change the file extension from “.txt” to “.bat“. This will change the text file into a batch file. When finished click the “OK” button.Note: In order to see the .txt extension, the “File Name Extensions” checkbox must be enabled in the View à Show/Hide settings in Windows File Explorer.
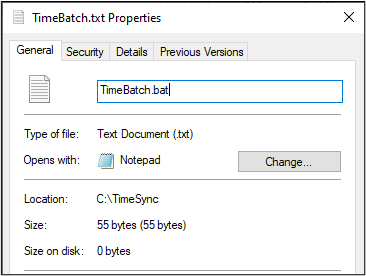
- A prompt will appear letting you know that changing the extension of a file may cause the file to become “unusable”. Select “Yes“.

- To verify that the change was successful you can simply observe the file’s icon, as displayed below.

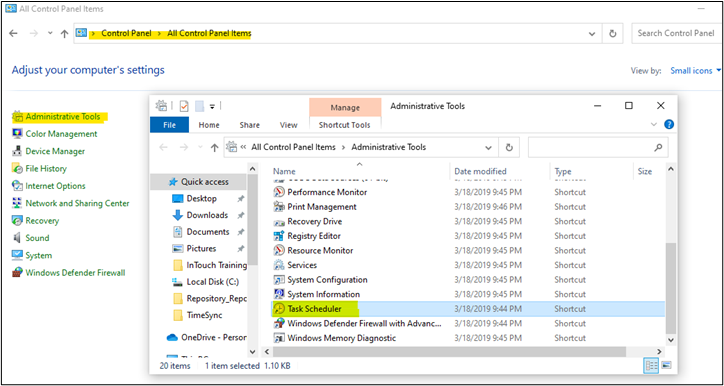
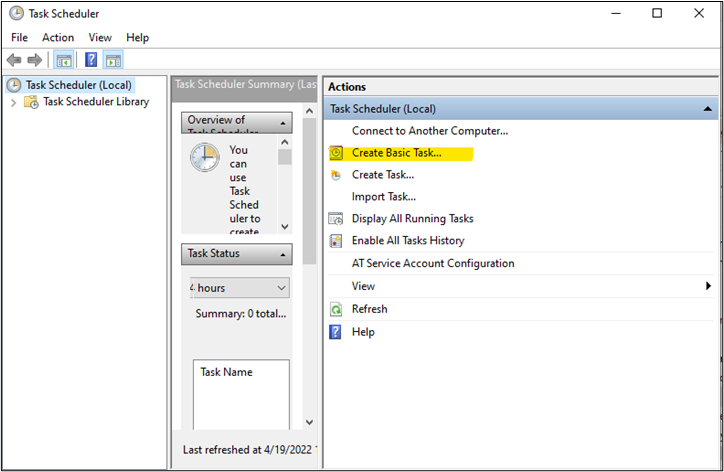
- Now open the “Control Panel“, and then open “Administrative Tools” and select “Task Scheduler”.
- In Task Scheduler, select the “Create Basic Task…” option.
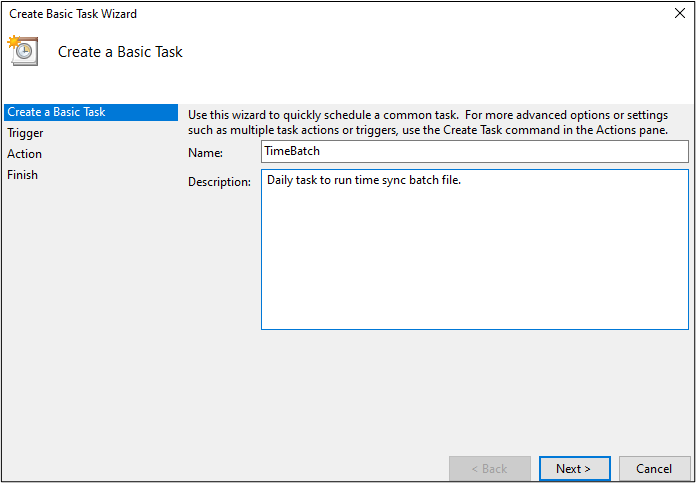
- Name your task and provide a description if desired and click Next.
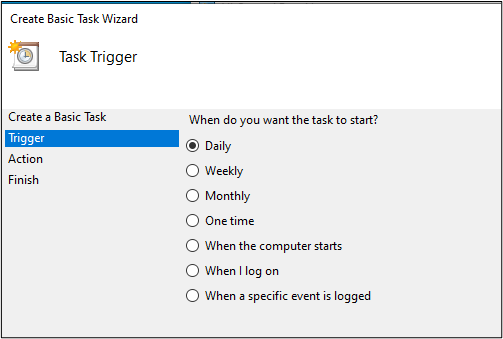
- Selected your desired trigger – in this example we choose “Daily”, then click next.
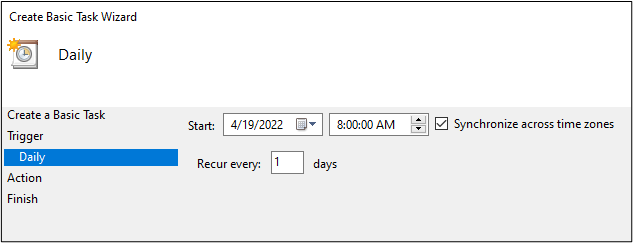
- Configure additional time details related to your chosen time trigger and click next.
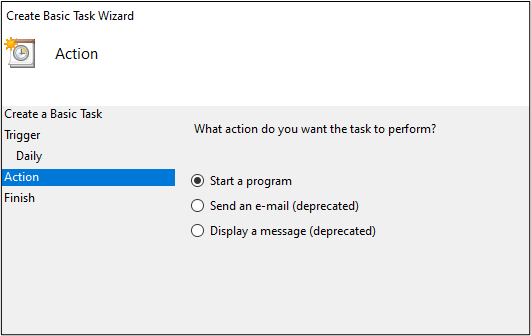
- Choose the “Start a program” option and click next.
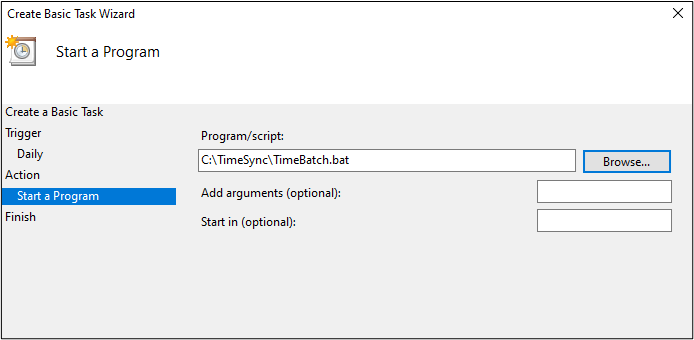
- Navigate to the batch file location using the “Browse” button, or manually enter the file path to the batch file. Click next once this is selected.
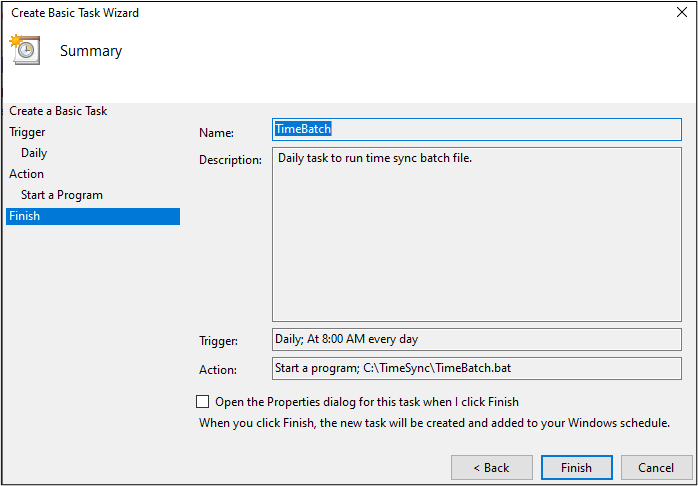
- Review the details of your task. You can also select the “Open the properties for this task when I click Finish” checkbox to apply even more detailed task properties (e.g. stopping the task if it runs for too long of a time frame, only run the task if the system is idle, etc.). Otherwise, click “Finish” to complete the setup.
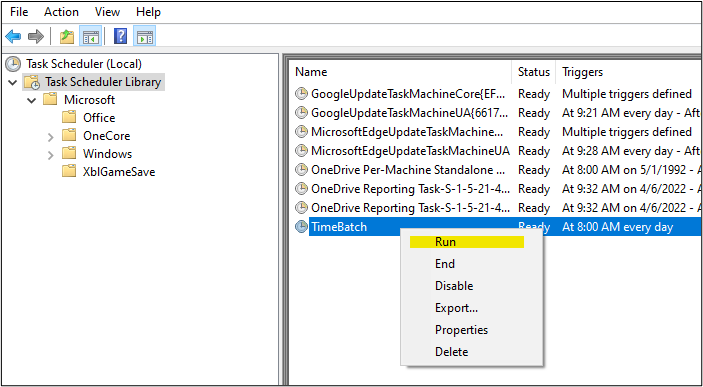
- If desired, when finished you may right-click on the scheduled task and select “Run” to implement the changes immediately.
All Industrial Software Solutions Tech Notes are provided "as is" without warranty of any kind.