

How to Create Tags Manually in AVEVA Historian
SUMMARY
This Tech Note details the procedure for manually creating tags within the AVEVA Historian 9.0 or later configuration environment.
APPLIES TO
- AVEVA Historian Server 9.0 and later
PROCUDURE
Section 1 – IDAS Configuration
1. First, open the Historian Server configuration in the System Management Console (SMC). Drill down into Configuration Editor > System Configuration > Data Acquisition > IDAS.
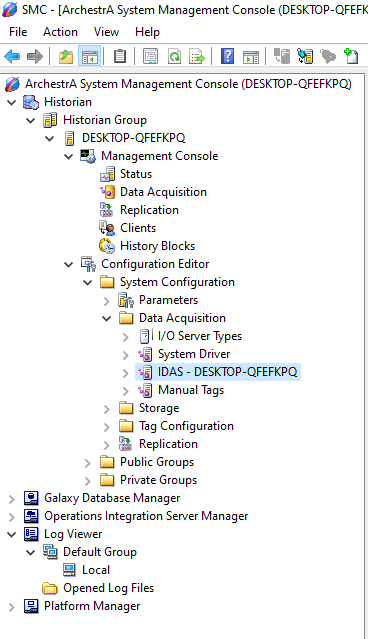
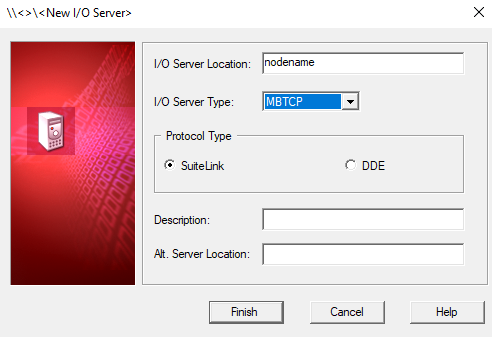
2. Next, right-click on IDAS and select New I/O Server
- Complete the I/O Server Location field with the node name that the I/O Server is located on.
- Choose the appropriate I/O Server type from the list.
- Choose the appropriate Protocol Type (DDE for non-AVEVA Servers).
- Enter a description (optional).
- If you have redundant I/O Servers, you can configure the Alt. Server Location field for automatic fail-over.
- Click on Finish.
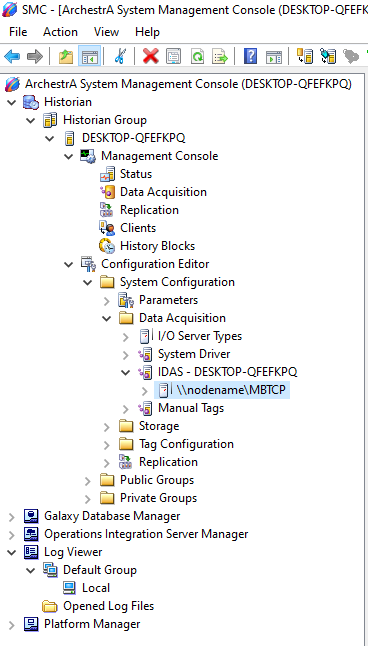
3. Next, drill down into the IDAS, and right-click on the newly created I/O Server in the hierarchy. Select New Topic
4. Now, enter the appropriate topic in the Topic Name field. No further changes to this dialog are necessary for standard configurations. Click on Finish.

5. Note that the topic is created under the I/O Server in the hierarchy.

Section 2 – Analog Tag Example
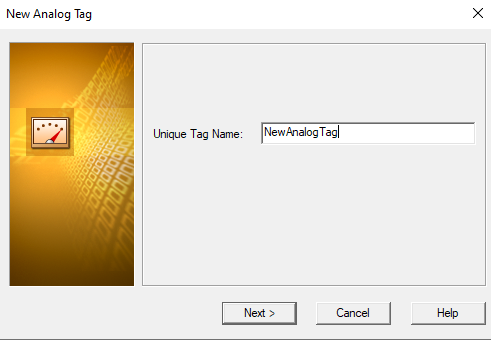
6. Now that we have an I/O Server and Topic configured we can create tags. The first example will be an analog tag. Right-click on the Topic in the hierarchy. Select “New Analog Tag” Enter the appropriate tagname and click on Next.
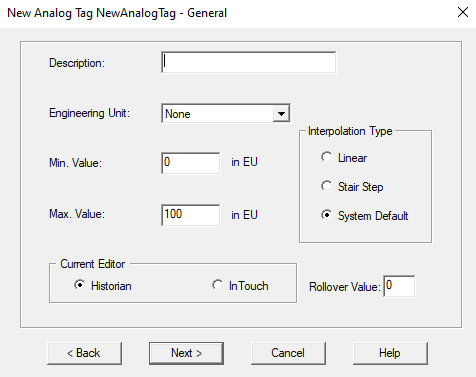
7. Next, enter information such as description, engineering units, min/max value, etc. Click on Next.
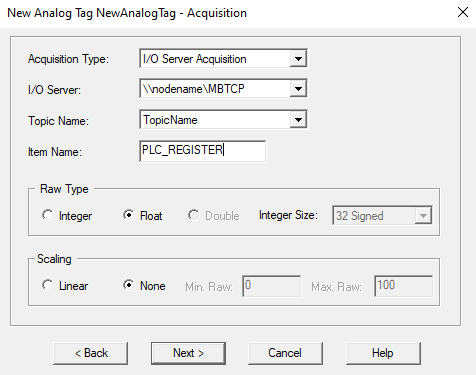
8. Next, enter the appropriate item name (generally a register in the PLC). Configure the Raw Type and Scaling if necessary. Click on Next.
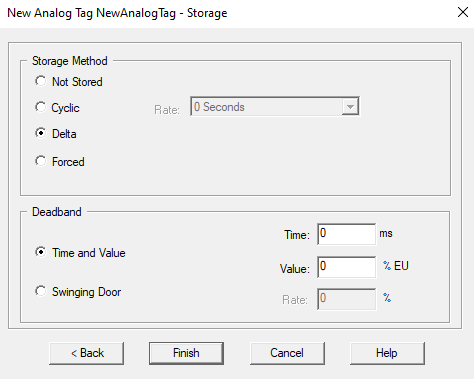
9. Now, configure the desired Storage Method and storage Deadband. Typically, we will leave the Active Image configuration default. Click on Finish.
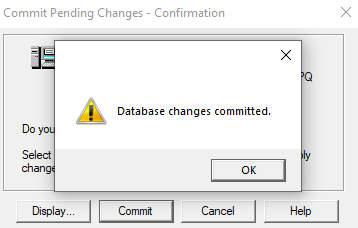
10. This tag should now be shown in the right-hand pane. The last step is to “Commit Pending Changes” which must be performed during most configuration changes on running InSQL servers. Right-click anywhere in the hierarchy in the left-hand pane, and select “Commit Pending Changes” Click on the Commit button.
Section 3 – Discrete Tag Example
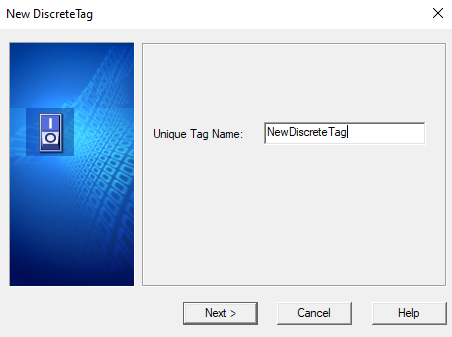
11. Right-click on the Topic level of the hierarchy. Select “New Discrete Tag” Enter the appropriate Tagname. Click on Next.
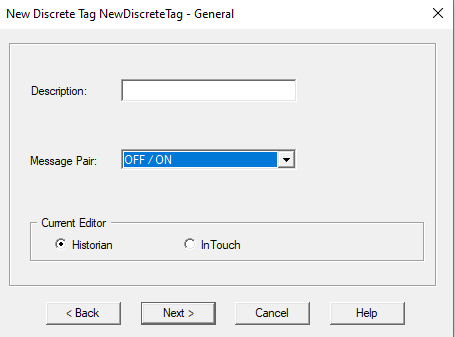
12. Next, enter a description (optional). Select the appropriate Message Pair. Click on Next.
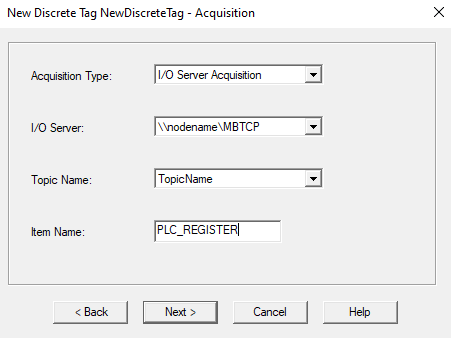
13. Now, enter the appropriate Item Name (once again, typically a PLC register). Click on Next.
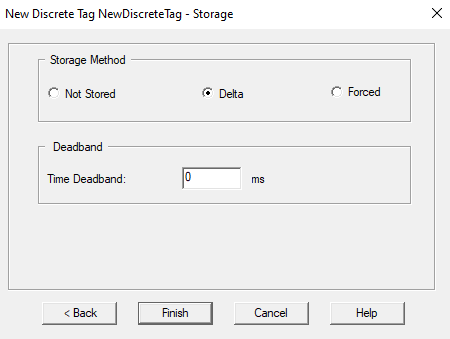
14. Next, configure the desired Storage Method (typically Delta for discrete tags). Configure the required Time Deadband. Active Image configuration will stay default. Click on Finish.
15. Don’t forget to commit those ‘pending changes’.
All Industrial Software Solutions Tech Notes are provided "as is" without warranty of any kind.