

How to secure Wonderware InTouch’s WindowViewer so only an Admin can close/minimize
SUMMARY
Sometimes it is necessary to secure AVEVA InTouch’s WindowViewer so it is not closed at an inopportune time. InTouch has the ability to be configured to prevent instances like these. Through WindowMaker, InTouch can be configured so only a user with the proper Access rights can shut down the WindowViewer and/or access WindowMaker.
APPLIES TO
- AVEVA InTouch (all versions)
PROCEDURE
For this example the Access right is set at >9000. While in Runtime, an operator with a proper access level can logon, and have a “Close” button appear for the purpose of shutting down WindowViewer. They can also have an “Enable” and “Disable” button to allow/disallow key stroke combinations (in this case the Ctrl – Alt – Delete combination).
Anyone without the proper Access rights will not see these buttons. This will prevent users from shutting down WindowViewer or switching to WindowMaker when it is not appropriate.
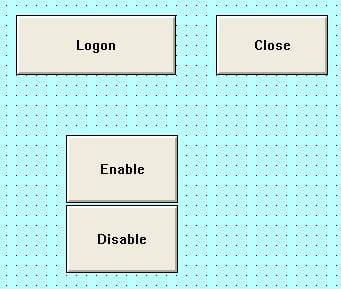
To do this you will need to add and configure the following buttons to your window:
- Logon Button
- Close Button
- Enable Button
- Disable Button
LOGON BUTTON
The Logon Button will allow users with proper Access rights to view the buttons that will allow them access to close WindowViewer and enable or disable keystrokes.
To create and configure a Logon Button
1. Place a button labeled “Login” in your window
2. Configure button scripts as follows:
a) Double click on the button to open the Object Type and Animation Selection Dialog Box

b) Under Touch Pushbutton –> Action, the script should be setup as in Figure 2
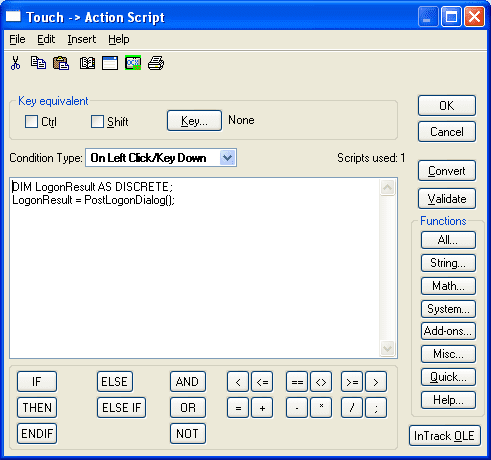
c) Click Validate, then OK. Choose OK in the Object Type to close
CLOSE BUTTON
The Close button is created so once a user with the proper Access rights logs on they have the ability to close WindowViewer with a click of the button.
To create and configure a Close Button
1. Place a button labeled “Close” in your window
2. Configure button scripts as follows:
a) Double click on the button to open the Object Type and Animation Selection Dialog Box

b) Under Touch Pushbutton –> Action, the script should be setup as in Figure 4
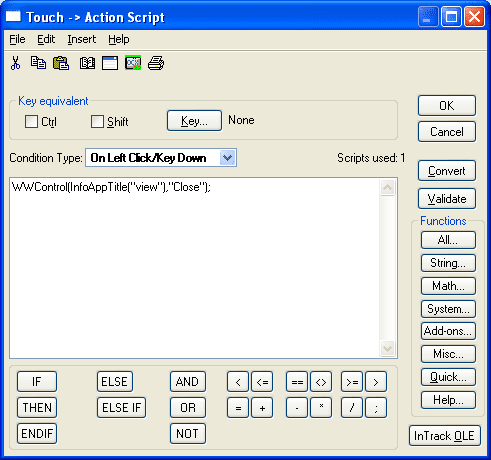
c) Click Validate, then OK.
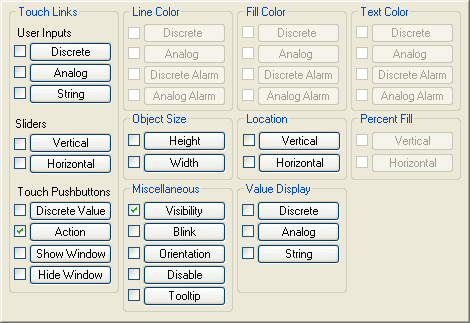
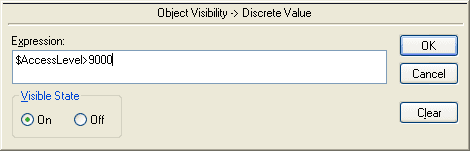
d) Under Miscellaneous –> Visibility the script should be setup as follows:

e) Click OK – then OK in the Object Type box to close.
ENABLE BUTTON
The Enable Button will allow the user to enable a set of keystrokes. For this example it is the Ctrl-Alt-Del keys.
To create and configure an Enable Button
1. Place a button labeled “Enable” in your window
2. Configure button scripts as follows:
a) Double click on the button to open the Object Type and Animation Selection Dialog Box
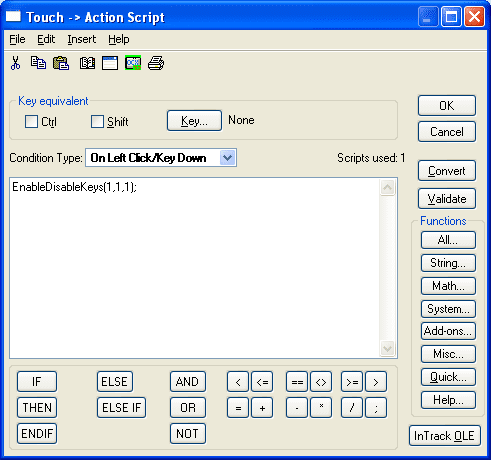
b) Under Touch Pushbutton –> Action, the script should be setup as in Figure 7

c) Click Validate, then OK
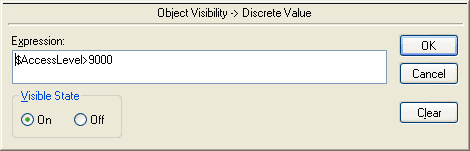
d) Under Miscellaneous –> Visibility the script should be setup as follows:
e) Click OK – then OK in the Object Type box to close.
DISABLE BUTTON
The Disable Button will allow the user to disable a set of keystrokes. For this example it is the Ctrl-Alt-Del keys.
To create and configure a Disable Button
1. Place a button labeled “Disable” in your window
2. Configure button scripts as follows:
a) Double click on the button to open the Object Type and Animation Selection Dialog Box
b) Under Touch Pushbutton –> Action, the script should be setup as in Figure 9
c) Click Validate, then OK
d) Under Miscellaneous –> Visibility the script should be setup as follows:
e) Click OK – then OK in the Object Type box to close.
ADDITIONAL CONFIGURATION CHANGES
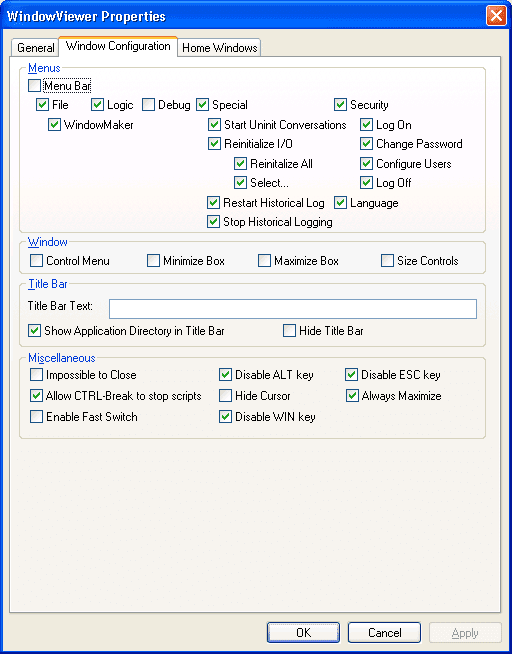
1. Make the following changes to the WindowViewer Properties:
Under Special -> Configure -> WindowViewer -> Windows Configuration tab:
2. Uncheck the Menu Bar option
3. Uncheck all four options under the Window section
4. Under Miscellaneous make sure to uncheck the following boxes:
Impossible to close
Enable Fast Switch
Hide Cursor
When you are finished your WindowViewer properties should look like figure 11 below
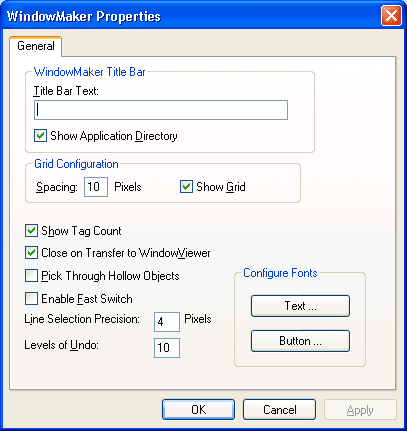
5. Make the following changes to the WindowMaker Properties:
Under Special -> Configure -> WindowMaker -> check the box “Close on transfer to WindowViewer”
When you are finished your WindowMaker properties should look like figure 12 below
6. Test in Runtime.
Click on Logon button and log on with an access level of >9000.
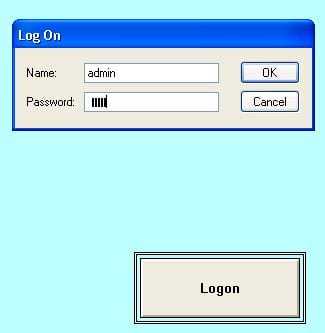
Click the Close button to close WindowViewer, Enable to enable the preset key strokes and the Disable button to disable the predefined keystrokes. For this example the keystrokes are Ctrl-Alt-Delete. You are now ready to use WindowViewer without the worry of it being closed without the proper rights.
All Industrial Software Solutions Tech Notes are provided "as is" without warranty of any kind.